Bulk Record Data Import
Overview
Import records into an existing collection using the Record Collections Viewer Bulk Record Data Import tool. Supported record formats include CSV and JSON JSON (JavaScript Object Notation) is an open standard file and data interchange format. Unqork uses JSON for submission (record) data..

Record Data is also known as Submission Data. You might see these terms used interchangeably across the Documentation Hub. Both Records and Submission data refer to module, workflow, and schema data stored in the database.
Use Bulk Record Data Import in the Record Collections Viewer to gain the following benefits:
-
Importing record data from systems outside of Unqork.
-
Import record data exported from other Unqork applications.
-
Move exported data to another Unqork environment level.
What You'll Learn
In this
Accessing the Record Collections Viewer Import Window
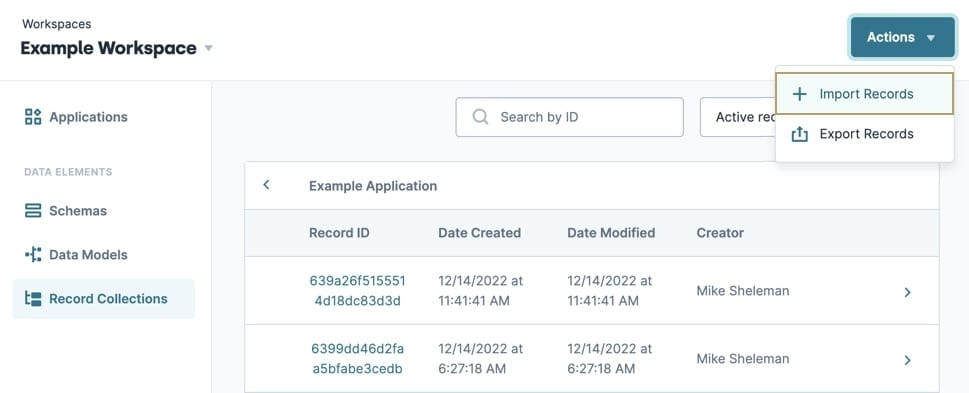
To access the Import window from the Workspaces view:
| 1. | In the Workspaces view, navigate to and select a Workspace. |
| 2. | Under Data Elements, click |
| 3. | Select a Collection Source. |
If a workspace doesn't have record data, then no collections display in the Records Collection list.
| 4. | Click Actions ▾. |
| 5. | Click |
About the Import Data Window
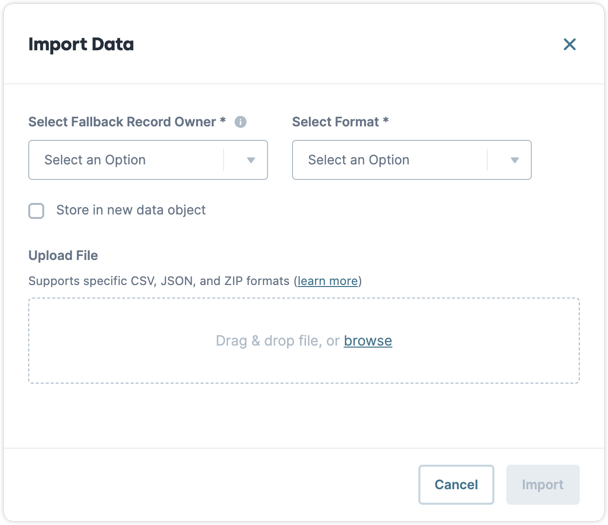
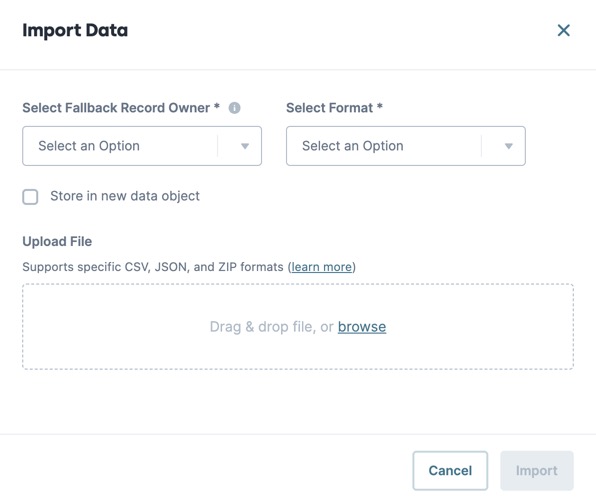
The Import Records window displays the following options:

|
Setting |
Description |
|---|---|
|
Select Submission Owner * |
Choose a Service User to own the files. Setup Service Users in Express User Administration. |
|
Select Format * |
Specify the file format of the incoming data. Formats include:
To learn more about JSONLine, visit
|
|
Store in New Data Object |
Incoming records with Unqork Metadata must check this setting. Setting this to Unqork Metadata includes:
To learn what Unqork metadata is included, view our Bulk Export article's metadata section. By default, this setting is ☐ (Unchecked). |
|
Upload Files |
Drag and drop, or browse for a supported file type. File types supported include JSON, CSV, and ZIP. When a file is selected, it displays below the Upload a File section. |
Importing a Record Collection
For this example, import a set of records belonging to your application. This example assumes you have an existing application with at least one collection of records to import.
To import a record collection from the Record Collections Viewer page:
| 1. | From the Record Collections list, select a Collection Source. |
| 2. | Click Actions ▾. |
| 3. | Click |
| 4. | From the Select Submission drop-down, select an available user. |
To learn how to set up Service Users, view our Express User Administration page.
| 5. | From the Select Format * drop-down, select the file type your records are stored in. |
| 6. | (Optional) If the records contain Unqork metadata, click the Store in New Data Object checkbox. |
| 7. | Drag and drop, or browse to and select the file containing the record data. |
| 8. | Click Import. The Job Tracker page displays the newest import at the top of the list. |
To learn more about the Job Tracker page, visit our Record Collections Viewer Job Tracker article.
| 9. | Wait until the status changes from In Progress to Completed, then click View Details. |
Importing a large set of records can greatly extend the processing time. Click the ![]() Refresh button to update the Job Tracker list.
Refresh button to update the Job Tracker list.
| 10. | Verify the values in the Processed column match. For example, if you import 20 records, the Process column should display 20 / 20. |
If you encounter an error or the import fails, view our Record Collections Viewer Job Tracker article for more assistance.
Best Practices
-
When creating a record collection, establish rules for including metadata. Mixing records containing metadata with records that don't have metadata might cause the import to fail.
-
For optimal import performance, each file should contain less than 20,000 records.
-
Complete imports in five minutes or less to prevent timeouts.
Resources


 (Checked) puts record data inside the