Bulk Record Data Export
Overview
Export a collection of records using the Record Collections Viewer Bulk Record Data Export action. Records data is exported in JSON JSON (JavaScript Object Notation) is an open standard file and data interchange format. Unqork uses JSON for submission (record) data. format and includes active, archived, or all records from a collection.
Record Data is also known as Submission Data. You might see these terms used interchangeably across the Documentation Hub. Both Records and Submission data refer to module, workflow, and schema data stored in the database.
Use Bulk Record Data Export in the Record Collections Viewer to gain the following benefits:
-
Extract record data from Unqork applications.
-
Analyze and manipulate Unqork Data using external tools.
-
Move data to another Unqork environment level.
What You'll Learn
After completing this article, you’ll know how to access the Bulk Export tool, how to use it, and understand the best practices.
Accessing the Record Collections Viewer Export Window
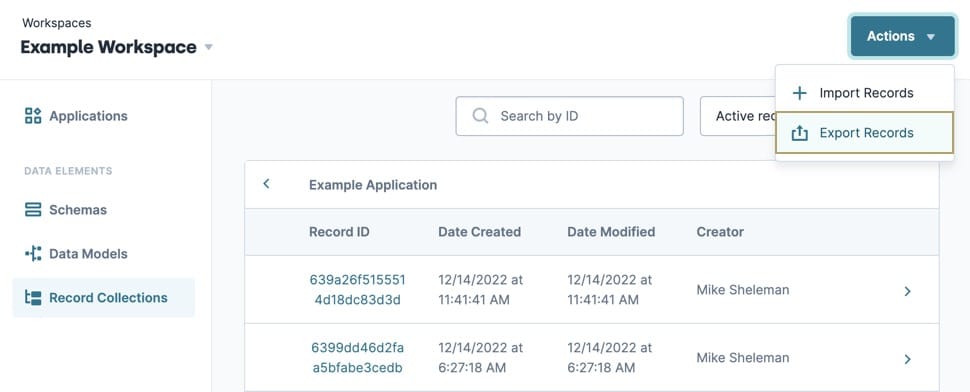
To access the Export window from the Workspaces view:
| 1. | In the Workspaces view, navigate to and select a Workspace. |
| 2. | Under Data Elements, click |
If a workspace does not have record data, no collection is available to display in the Records Collection list.
| 3. | From the Record Collections list, select a Collection Source. |
| 4. | Click Actions ▾. |
| 5. | Click |
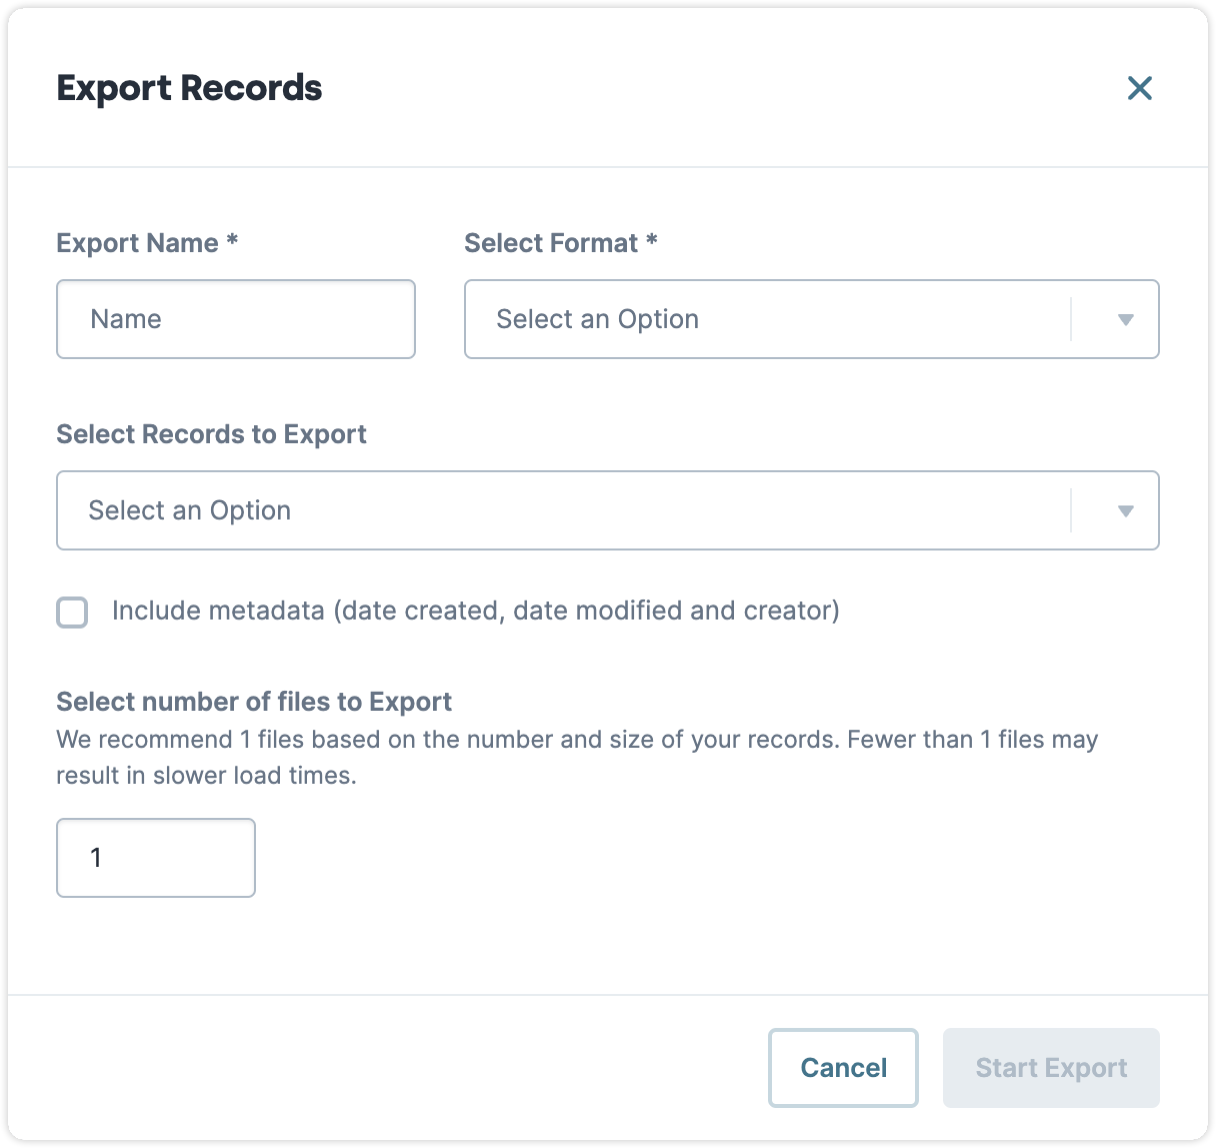
About the Export Records Window
The Export Records window displays the following options:
|
Setting |
Description |
|---|---|
|
Export Name * |
Enter a name for the export file. The file displays as {{filename}}.json after export. *This field is required. |
|
Select Format * |
Choose how the records are organized on export:
*This field is required. |
|
Select Number of Files to Export (All Records or Active Records) |
Split the export process into batches. The value in this field dictates how many files the record data is evenly split between. For example, if you have 20 records and Number of Files to Export is set to 2, the final export is split into two files containing 10 records each. Each file processes in its own batch. |
|
Select Records to Export |
Choose the type of records to export:
The Unqork API Delete Module Submission and Delete Workflow Submission endpoints mark records as archived. To permanently delete a record using the Unqork API, apply the destroy:true key value. |
|
Check this setting to append Unqork Metadata to each record. Setting this to Metadata includes:
By default, this setting is ☐ (Unchecked). |
 (Checked) puts record data inside the
Exporting a Record Collection
For this example, export a set of records belonging to your application. This example assumes you have an existing application with at least one collection of records available to download.
To export a record collection from the Record Collections Viewer page:
| 1. | Select a Collection Source. |
| 2. | Click Actions ▾. |
| 3. | Click |
| 4. | In the Export Name * field, enter a name for the export file. |
| 5. | From the Select Format * drop-down, select a file type. |
| 6. | From the Select Records to Export drop-down, select the type of record to include in the export. |
| 7. | Click Start Export. The Job Tracker page and Export Details panel displays. |
To learn more about the Job Tracker page, visit our Job Tracker article.
| 8. | Wait until the status changes from In Progress to Completed. The |
| 9. | Click |
Best Practices
-
Separate large record exports into smaller batches by increasing the Select Number of Files to Export value. If you intend to import these files at a later time, each file should contain less than 20,000 records.
Resources
