Step 11: Messaging Approved or Denied Travel Request Emails to Employees
Estimated Reading Time: 8 minutes
Introduction
In the previous use case, you created a Manager Review screen that allowed managers to review and evaluate submitted employee travel requests. In this article, you'll send employees an email with the approved or denied request status from the manager review. As you did in Step 7: Configuring Valid and Invalid Email Workflow Paths, you'll use an Exclusive Gateway node to divert your workflow path into two different processes. Using Signal nodes, you'll display different notifications to the employee based on whether the manager approves or denies their travel request submission.
You can preview an example of this completed use case step here: https://training.unqork.io/workflow/6477af11cc31bc9fd848489e.
Learning Objectives
In this use case article, you'll use your existing knowledge of Exclusive Gateway and Signal nodes to create two different message pathways for approved or denied travel request submissions.
What You Need
To complete this step of your application, you need
-
1 Exclusive Gateway node
-
2 Message nodes
-
1 End node
Open Your Workflow-Type Application
Start by opening the workflow-type application you previously created in the Workflow Builder.
| 1. | From the Workspaces page, locate your Workspace by selecting  (Search magnifying glass) and entering Creator Workshop Workspace [your name]. (Search magnifying glass) and entering Creator Workshop Workspace [your name]. |
| 2. | In your Workspace, select View App on your application tile. Your application title will be [initials] + “Creator Workshop App” + [date you created the application]. |
| 3. | From the menu to the left of the Application page, select  Workflows. Workflows. |
| 4. | Click on your Creator Workshop App workflow tile. |
Exclusive Gateway Node Configuration
To split your workflow path into two paths, use the Exclusive Gateway node.
| 1. | Open your Creator Workshop App workflow-type application. |
| 2. | Drag and drop an |
| 3. | Select the |
| 4. | Click  Edit to open the Edit Exclusive Gateway menu. Edit to open the Edit Exclusive Gateway menu. |
| 5. | In the Label field, enter Manager Review Gateway. |
| 6. | Disconnect the Manager Review  Delete. Delete. |
| 7. | Connect the output port (right) of the Manager Review |

| 8. | Save... your workflow. |
| 9. | In the Save to Version History window, select Save. |
Configure the Approved Travel Request Workflow Path
Approved Email Message Configuration
If the manager role approves the employee travel request, your application will divert them to a Message node that sends an email notifying employees that their travel request is approved.
| 1. | Open your Creator Workshop App workflow. |
| 2. | Drag and drop a |
| 3. | Click Edit to open the Edit Signal Event menu. |
| 4. | In the following fields, enter or select the following: |
|
Field |
Value |
|---|---|
|
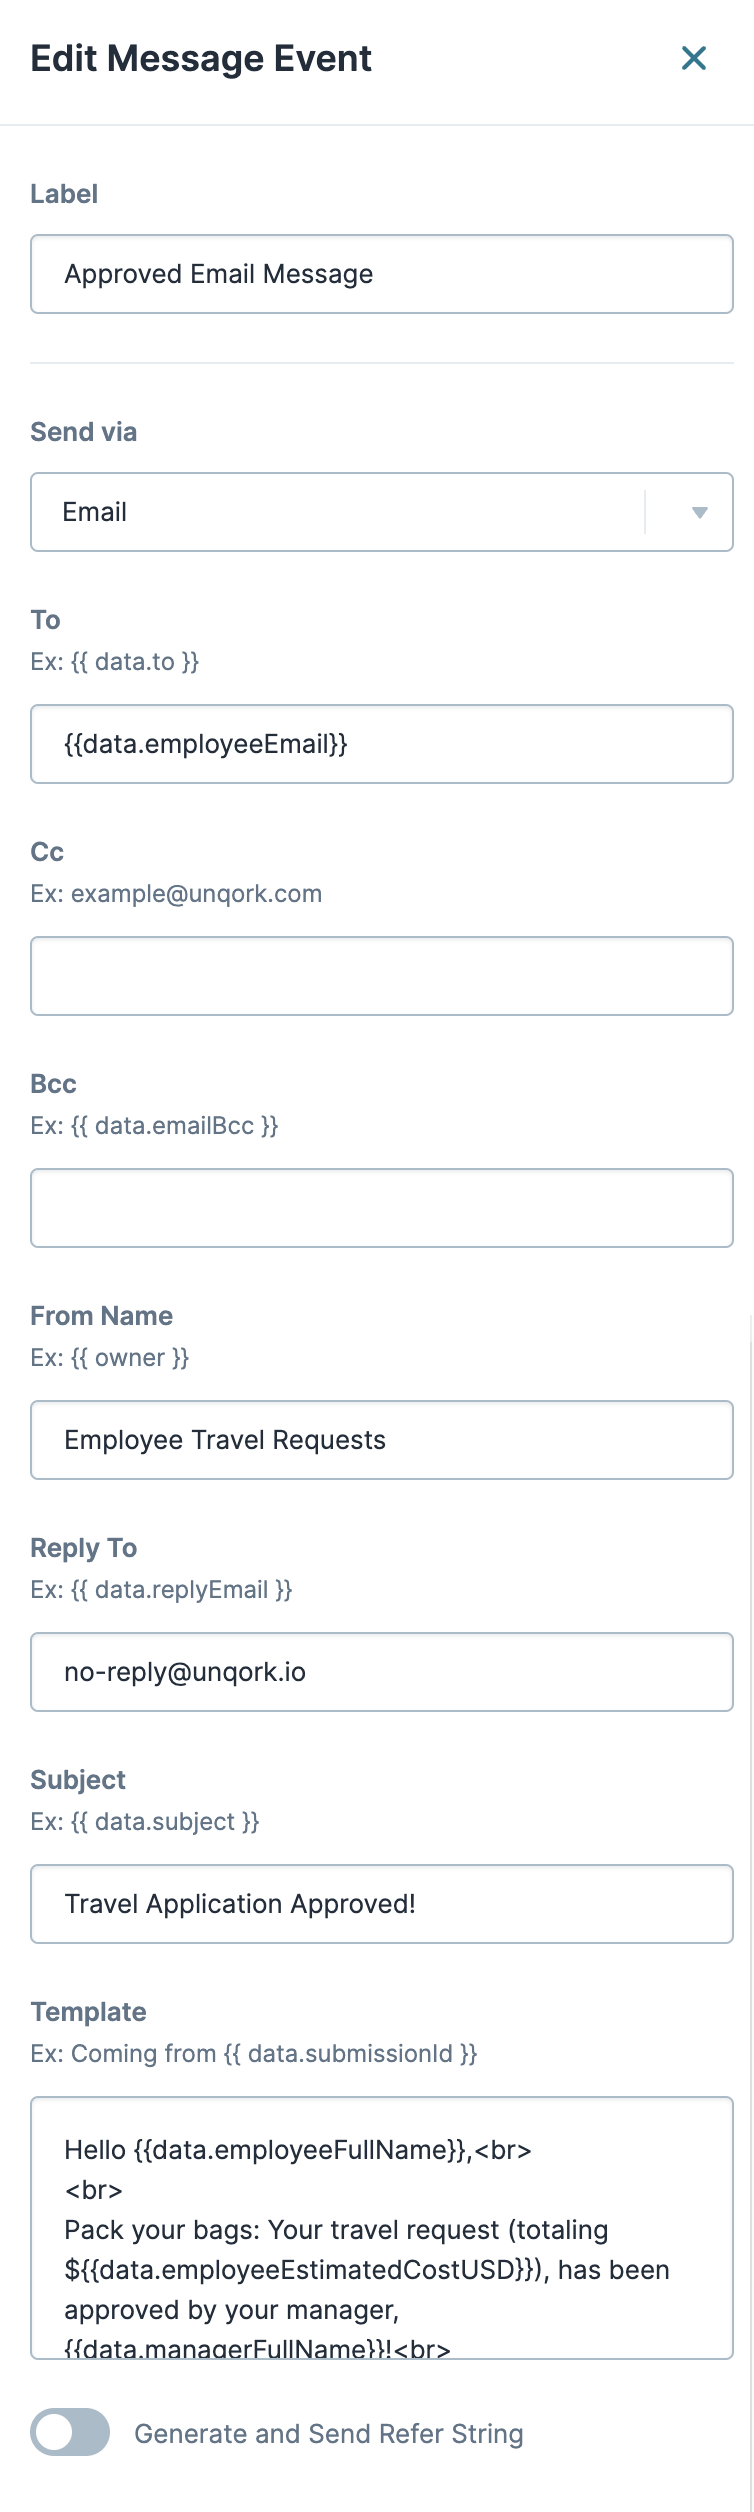
Label |
Approved Email Message |
|
Send via |
|
|
To |
{{data.employeeEmail}} |
|
From Name |
Employee Travel Requests |
|
Reply To |
no-reply@unqork.io |
|
Subject |
Travel Application Approved! |
|
Template |
Hello {{data.employeeFullName}},<br> <br> Pack your bags: Your travel request (totaling ${{data.employeeEstimatedCostUSD}}), has been approved by your manager, {{data.managerFullName}}!<br> <br> Signed,<br> <br> The Employee Travel Processing Team |
This tells the Message node to pull the end-user's End-users, also known as Express Users, are the individuals accessing an application through Express View. In most cases, end-users are the customers using the product. information from the Employee Travel Information module and populate the email correspondence.
Anything in the email template inside {{}} (double curly braces) is dynamically populated by the data the end-user End-users, also known as Express Users, are the individuals accessing an application through Express View. In most cases, end-users are the customers using the product. entered in a previous workflow screen. Enter data.propertyID in the {{}} to reference a specific component.
| 5. | Select the Employee Submitted |
| 6. | Click Edit to open the Edit End Event menu. |
| 7. | In the Label field, enter Approved Travel Request End. |
| 8. | Connect the output port (right) of the Manager Review Gateway |
| 9. | Connect the output port (right) of the Approved Email Message |

Approved Email Message Workflow Path Configuration
For the approved pathway to work, you must configure the Manager Review Gateway ![]() Exclusive Gateway node's path to the Approved Email Message
Exclusive Gateway node's path to the Approved Email Message ![]() Message node.
Message node.
To edit the path:
| 1. | Select the Manager Review Gateway |
| 2. | Select the |
| 3. | Click Edit to open the Edit Exclusive Gateway menu. |
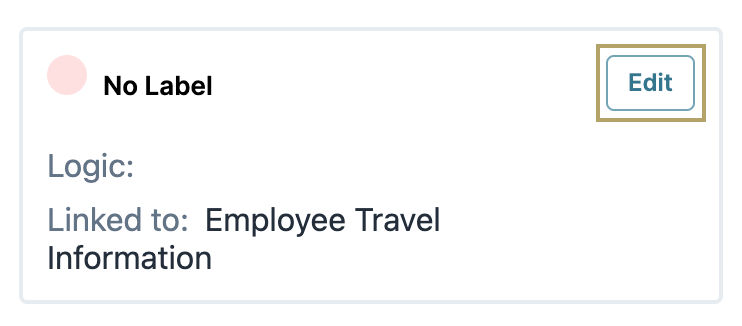
| 4. | In the Output Links section, you can see the No Label link between the Manager Review Gateway |
| 5. | In the No Label link, select Edit to open the Edit Exclusive Gateway Link menu. |
| 6. | In the Label field, enter Approved Request Path. |
| 7. | In the Logic field, enter requestStatus="Approved". This syntax tells the Email Validation Gateway |

| 8. | Save... your workflow. |
| 9. | In the Save to Version History window, select Save. |
Configure the Denied Travel Request Workflow Path
Denied Email Message Configuration
If the manager role denies the employee's travel request, your application diverts to a Message node that sends an email notifying employees that their travel request has been denied.
| 1. | Open your Creator Workshop App workflow. |
| 2. | Drag and drop a |
| 3. | Click Edit to open the Edit Signal Event menu. |
| 4. | In the following fields, enter or select the following: |
|
Field |
Value |
|---|---|
|
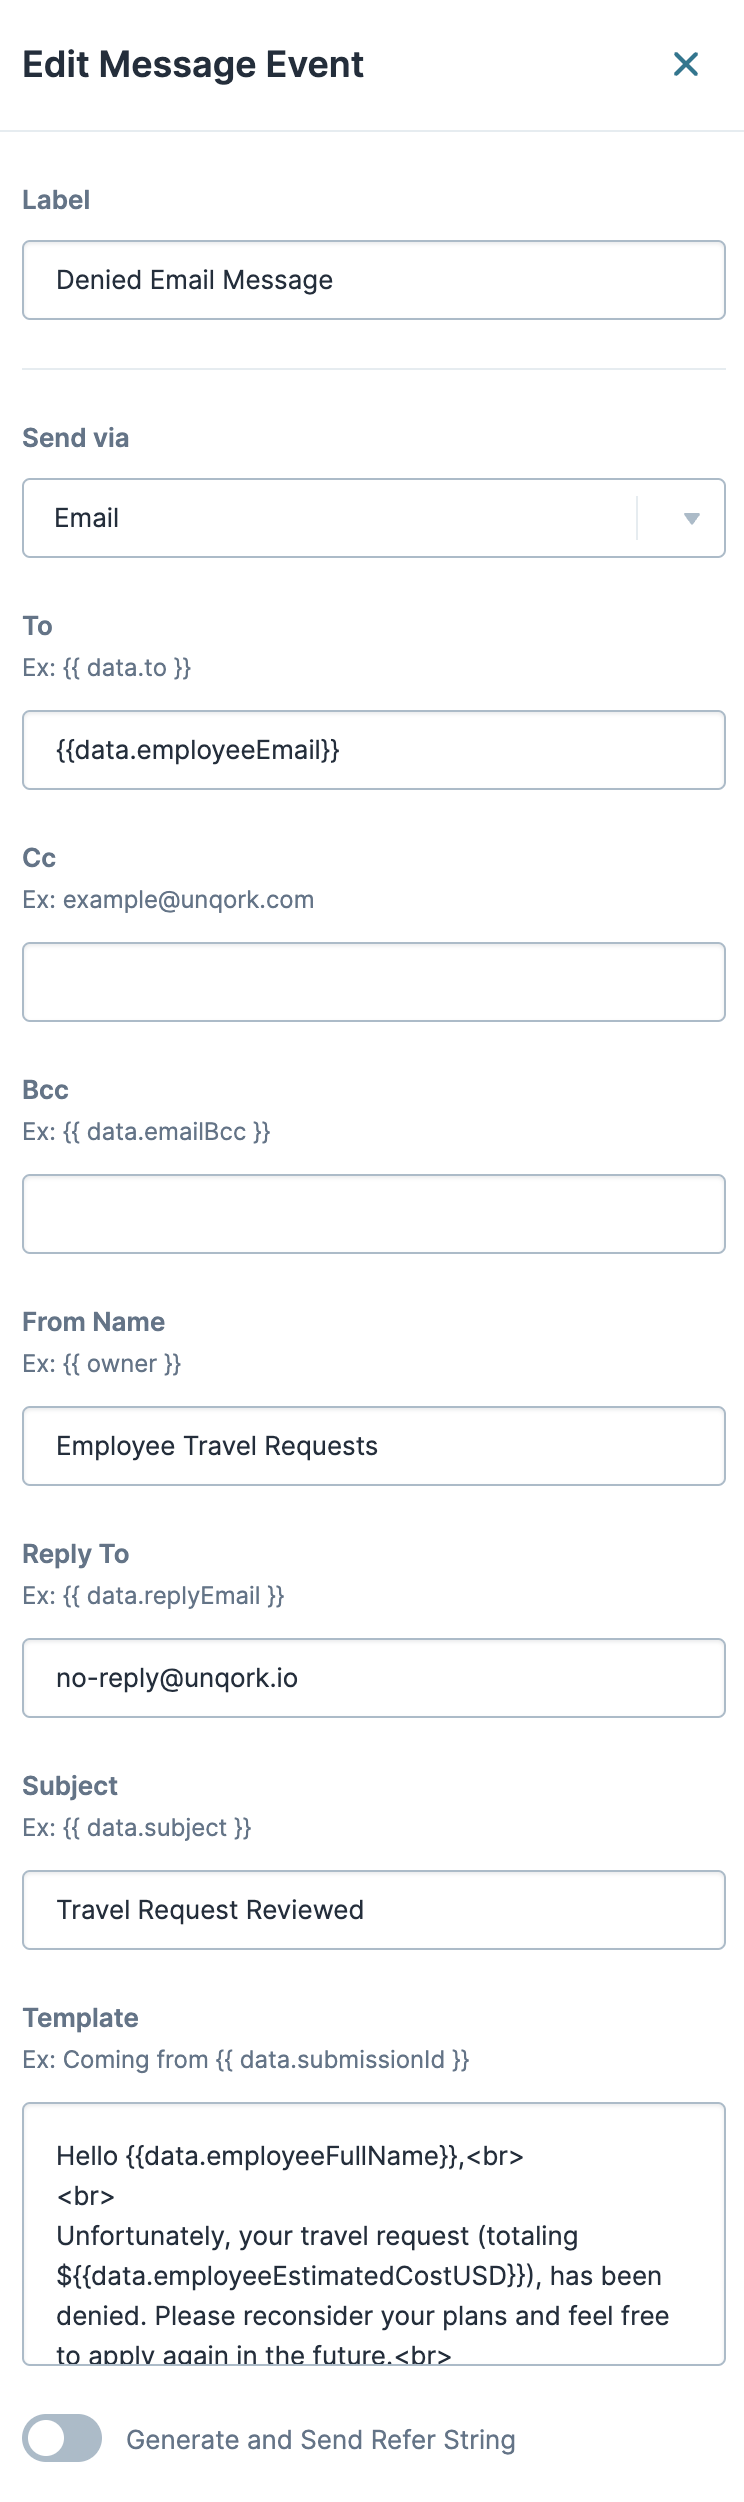
Label |
Denied Email Message |
|
Send via |
|
|
To |
{{data.employeeEmail}} |
|
From Name |
Employee Travel Requests |
|
Reply To |
no-reply@unqork.io |
|
Subject |
Travel Request Reviewed |
|
Template |
Hello {{data.employeeFullName}},<br> <br> Unfortunately, your travel request (totaling ${{data.employeeEstimatedCostUSD}}), has been denied. Please reconsider your plans and feel free to apply again in the future.<br> <br> Signed,<br> <br> The Employee Travel Processing Team |
This tells the Message node to pull the end-user's information from the Employee Travel Information module and populate the email correspondence.
| 5. | Drag and drop an |
| 6. | Select the |
| 7. | Click Edit to open the Edit End Event menu. |
| 8. | In the Label field, enter Denied Request End. |
| 9. | Connect the output port (right) of the Manager Review Gateway |
| 10. | Connect the output port (right) of the Denied Email Message |
Denied Email Message Workflow Path Configuration
As you did with the approved path, the denied path must also be configured to divert end-users End-users, also known as Express Users, are the individuals accessing an application through Express View. In most cases, end-users are the customers using the product. with denied travel requests to receive the Denied Email Message.
To edit the path:
| 1. | Select the Manager Review Gateway |
| 2. | Click Edit to open the Edit Exclusive Gateway menu. |
| 3. | In the Output Links section, you can see the No Label link between the Manager Review Gateway |
| 4. | In the No Label link, select Edit to open the Edit Exclusive Gateway Link menu. |
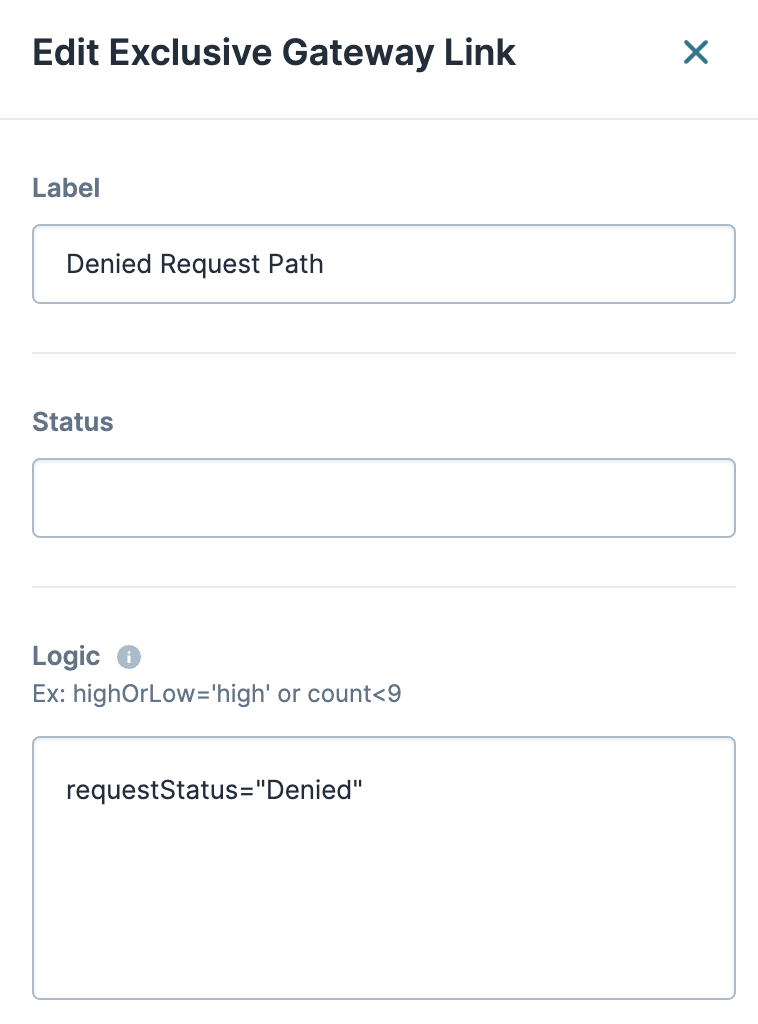
| 5. | In the Label field, enter Denied Request Path. |
| 6. | In the Logic field, enter requestStatus="Denied". |
| 7. | Save... your workflow. |
| 8. | In the Save to Version History window, select Save. |
Here's what your workflow looks like once complete:
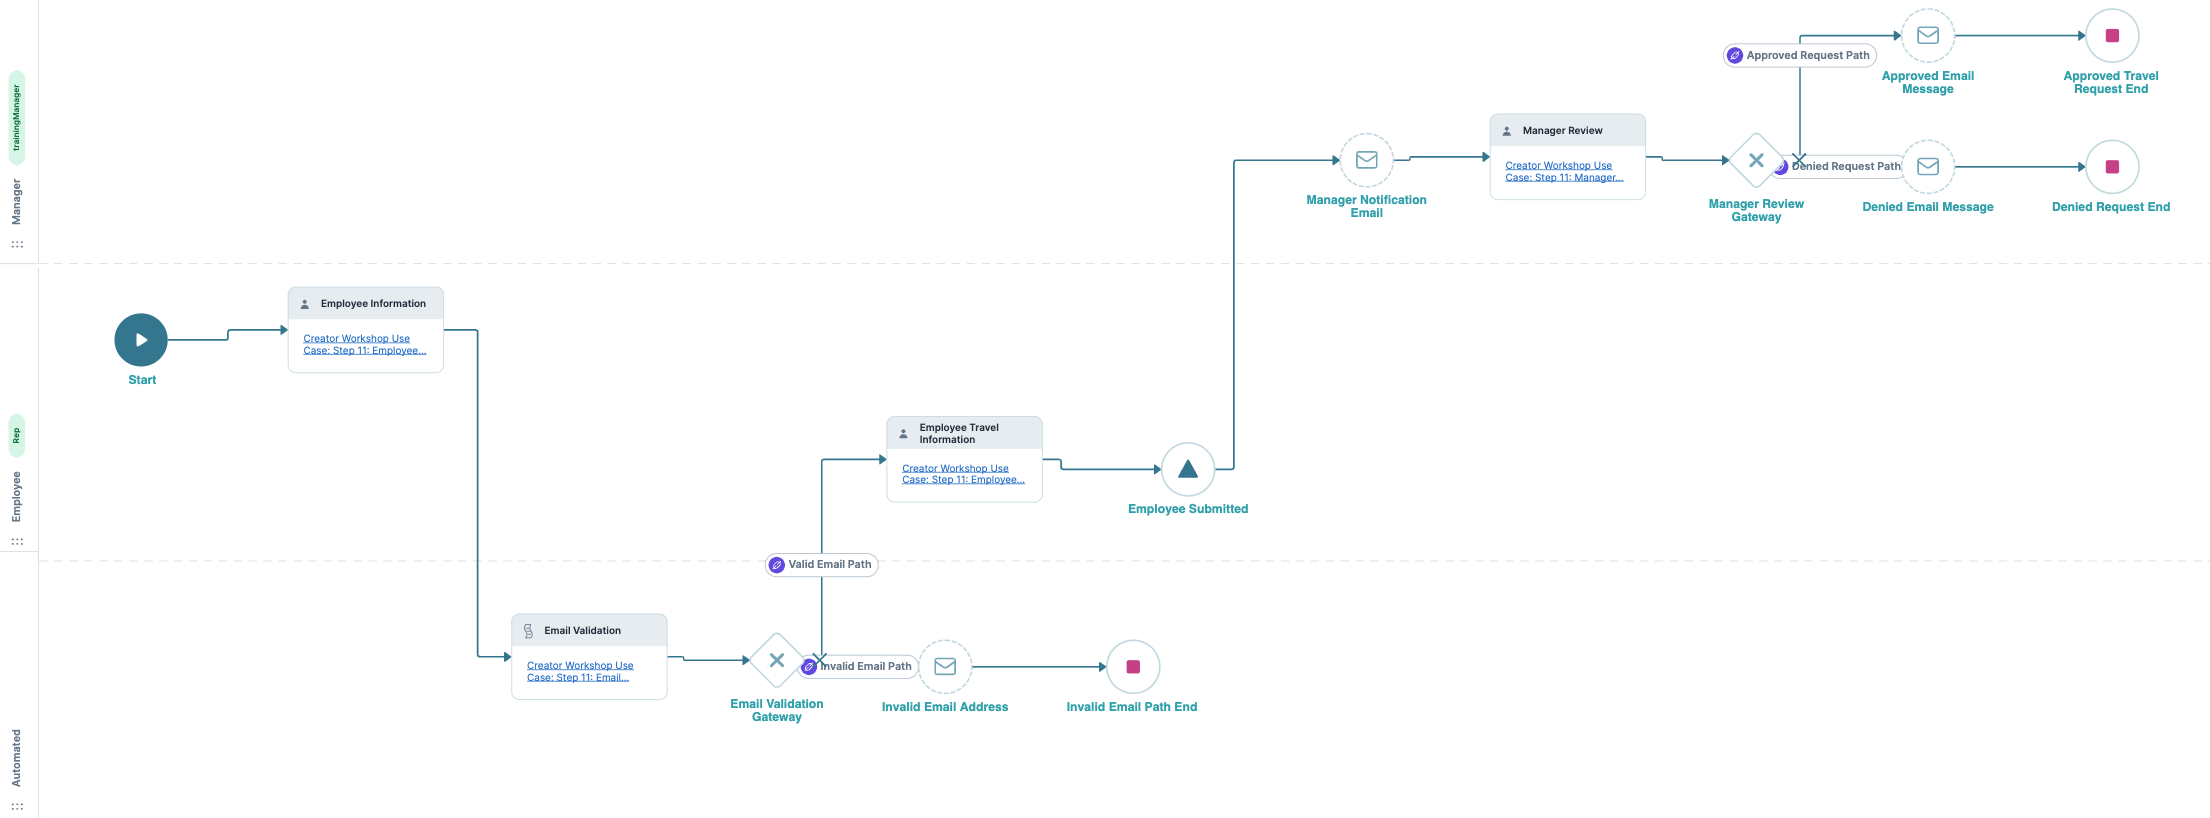
(click image to expand)
View and Test the Workflow-Type Application in Express View
Before moving on to the last use case step, ensure your application runs as expected. Preview your workflow-type application in Express View Express View is how your end-user views you application. Express View also lets you preview your applications to test your configuration and view the styling. This is also the view your end-users will see when interacting with your application. After configuring a module, click Preview in the Module Builder to interact with the module in Express View. and fill in the necessary information to complete each workflow screen. For the manager's email address, use an email address you can access to test the Message node and the Manager Review screen.
When testing role-specific screens on your Express View preview, use the Role-Based Access Control (RBAC RBAC (Role-Based Access Control) is a method to control system access for authorized users. The role in RBAC refers to the levels of access employees have to a network.) settings to view your application as your end-user End-users, also known as Express Users, are the individuals accessing an application through Express View. In most cases, end-users are the customers using the product. would. At the top of your Express View preview, select Show to open the Express RBAC Control. In the Preview as: field, switch between the Administrator, trainingApplicant, and trainingManager roles to view and test each part of your application.

Having trouble with your configuration? Visit our Troubleshooting the Creator Workshop Configuration article to help identify and resolve any errors on your application.
Recap
In this use case step, you added an Exclusive Gateway node after your Manager Review screen to divert your workflow into two different paths. Based on the manager's review status, you used Message nodes to send employees an approved or denied travel request email. In the next use case step, you'll complete your configuration by creating a Manager Dashboard module. This module will allow manager roles to view all approved and denied employee travel requests.
Continue Your Learning
In the next article, you'll begin Step 12 of the Beyond Basics learning module. In the first article of Step 12, you'll learn about Charts & Graphs components.
