Use Case: Triggering Initializers with Buttons
Introduction
In our Data and Events Processing course, you learned how versatile an Initializer is. Maybe you're using an Initializer to auto-answer a set of questions. Or, your Initializer might connect to a Plug-In that controls an application programming interface (API) call. Whatever function your Initializer serves, you have a couple of options on how you can trigger it. If you want to trigger your Initializer manually, you'll use a Button component. Let's take a look.
What You'll Learn
In this article, you'll learn how to trigger an Initializer with a Button component.
Triggering an Initializer with a Button
Using a Button component to trigger an Initializer is pretty simple. First you'll configure your Initializer as normal. Then, you'll set your Initializer's Trigger Type to Manual. Finally, you'll reference the Initializer's Property ID when configuring your Button component. You'll set the Button Action Type to Event. Then, you'll enter the Initializer's Property ID in the Button's Trigger on Click field.
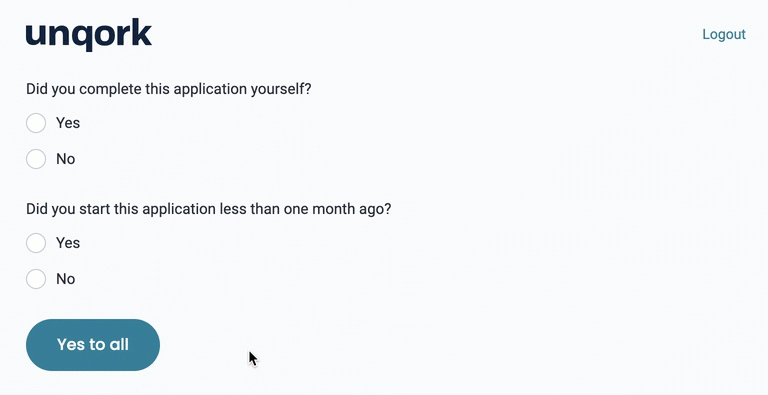
To better show you how this works, let's look at an example. You'll create a quick application with 2 Yes or No questions. Then, you'll add an Initializer to select Yes for both questions. You won't set the Initializer to do this automatically, though. Instead, you'll add a Button component to serve as the trigger. When your end-user clicks the button, both answers will show as Yes.
What You'll Need
To set up this use case, you’ll need:
-
2 Radio Buttons components
-
1 Initializer component
-
1 Button component
Pre-Configuration
Configure the Radio Buttons Components
First, let's create your questions. You'll use 2 Radio Buttons components to do that. For this example, you'll use 2 sample questions. These samples might appear at the end of a questionnaire or application.
| 1. | Drag and drop 2 Radio Buttons components onto your canvas. Place your Radio Buttons one below the other. |
| 2. | Enter the following Property IDs and Label Text: |
| Property ID | Label Text |
|---|---|
|
completeApplication |
Did you complete this application yourself? |
|
applicationStarted |
Did you start this application less than one month ago? |
| 3. | Set your Option Label and Value to Store in Submission Data as shown below: |
|
Option Label |
Value to Store in Submission Data |
|---|---|
|
Yes |
yes |
|
No |
no |

| 4. | Save each component as you add it. |
Configuration
Configure the Initializer Component
Next, let's set up your Initializer. You'll configure your Outputs table to send yes values to both of your questions. Note that you'll set the Trigger Type to Manual here. That Manual trigger will be the Button component you'll add in the next step.
| 1. | Drag and drop an Initializer component onto your canvas. Place your Initializer component below your Radio Buttons. |
| 2. | Enter initRadioButtons in the Property ID and Label Text. |
| 3. | Select Manual from the Trigger Type. |
| 4. | In the Outputs table, enter the following: |
|
Property ID |
Type |
Value |
|---|---|---|
|
applicationStarted |
value |
yes |
|
completeApplication |
value |
yes |
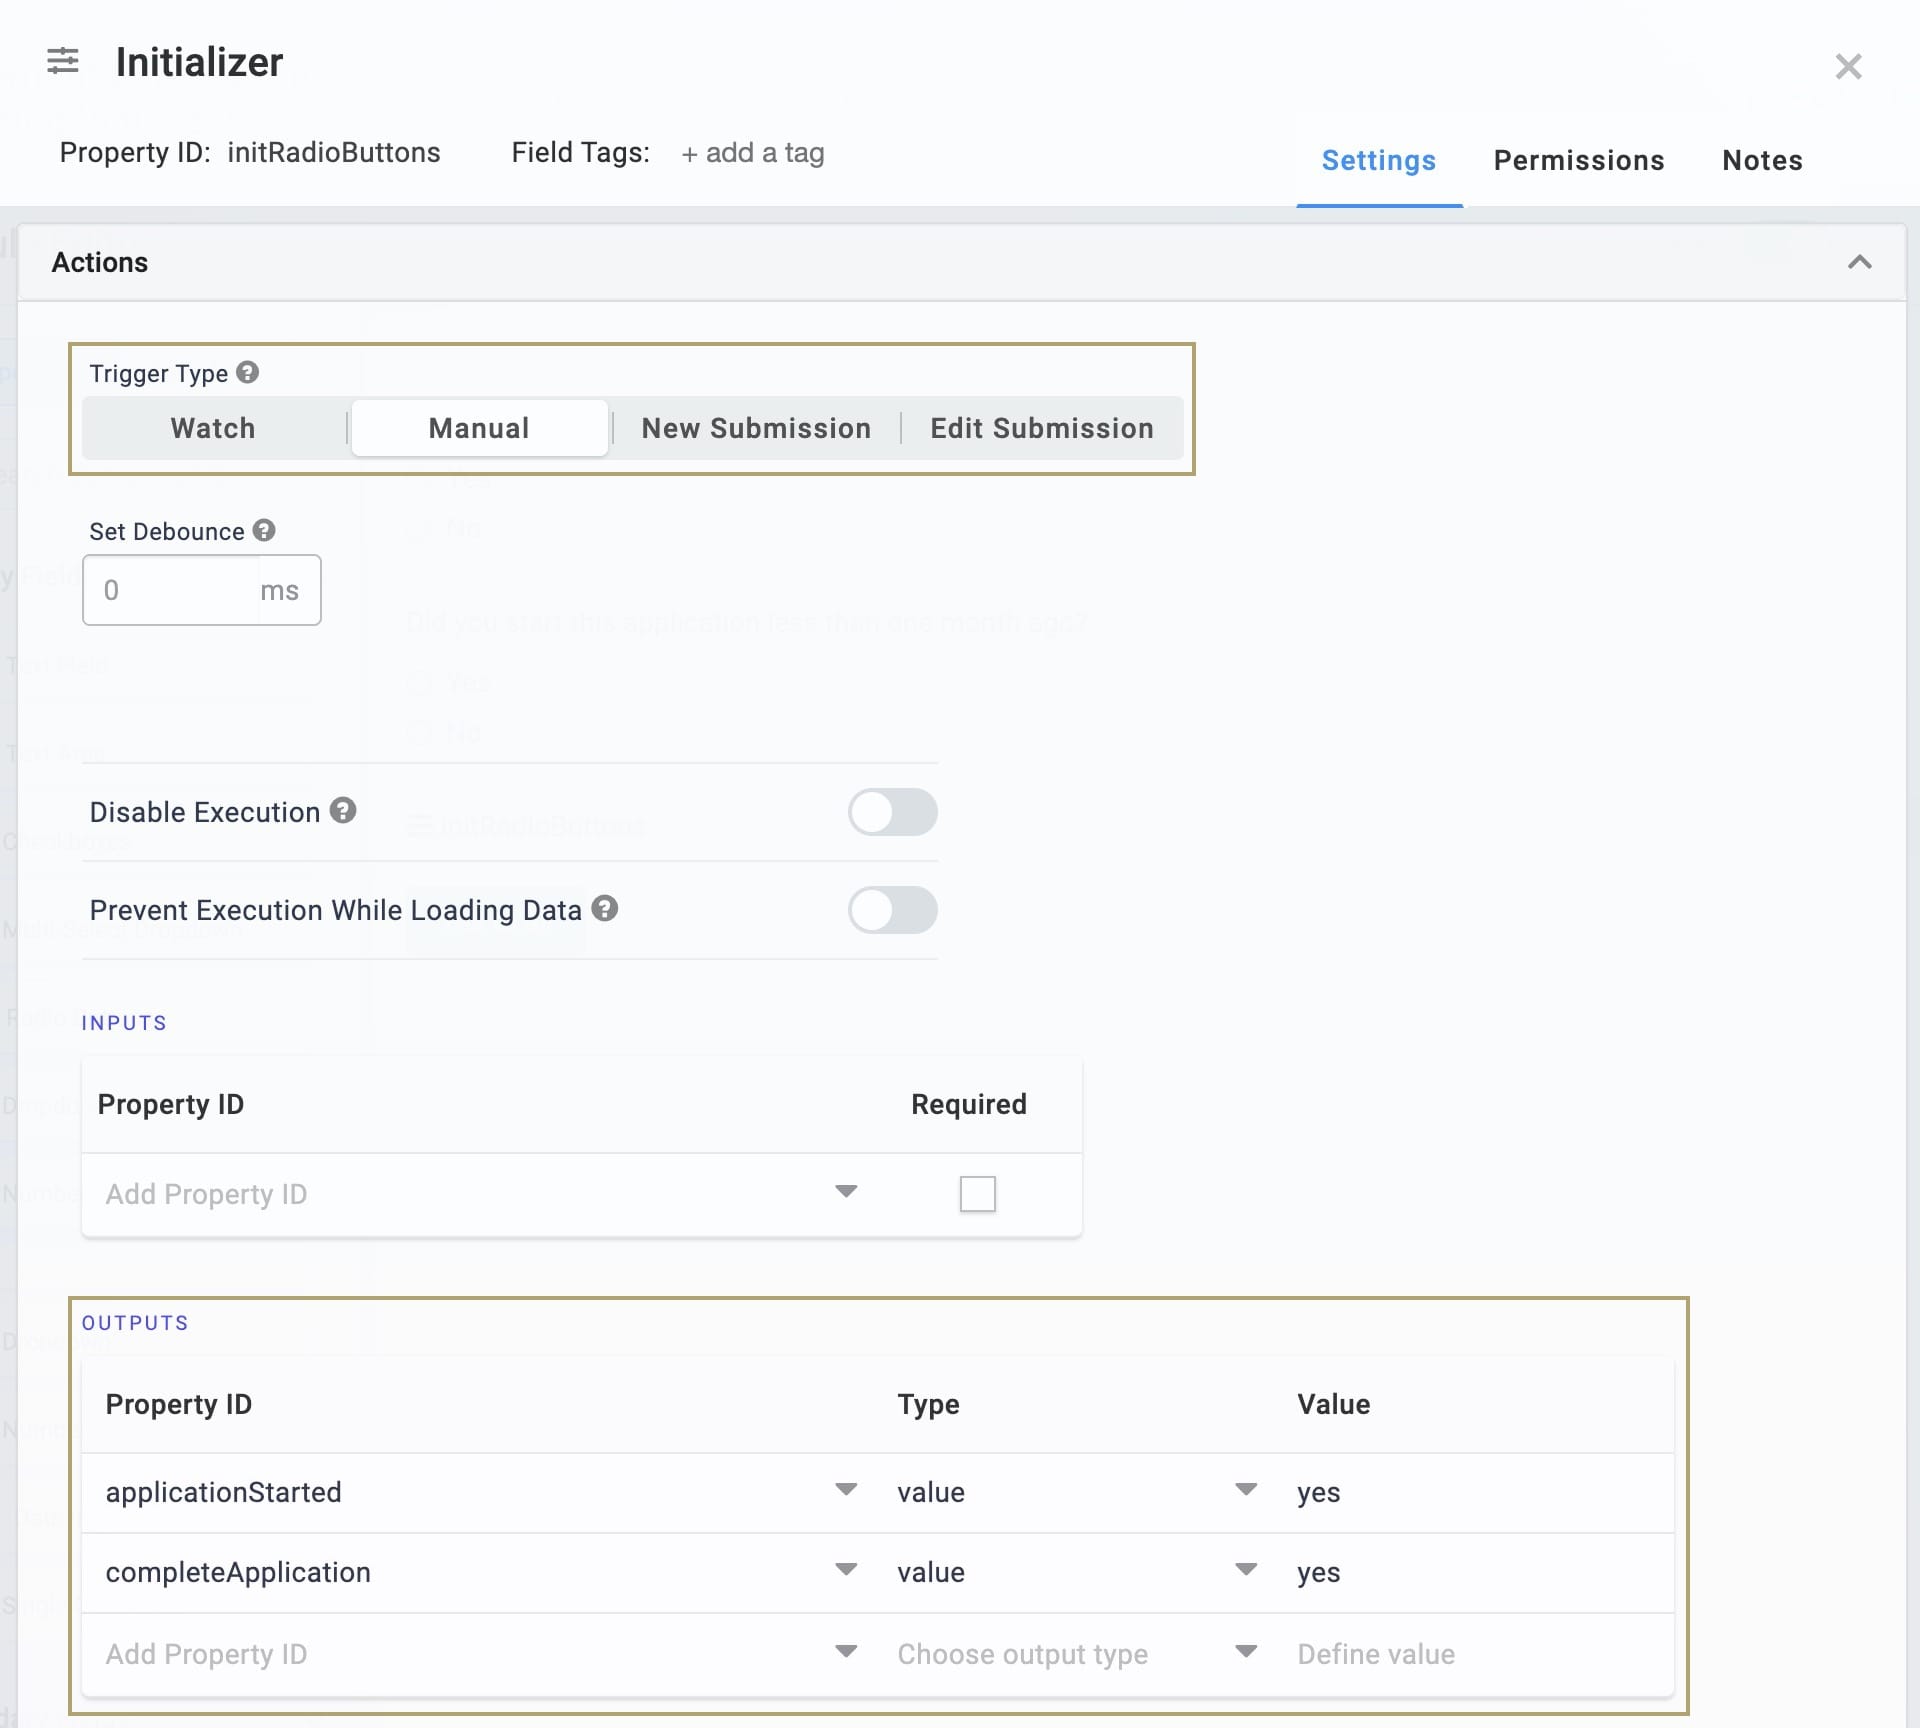
| 5. | Click Save. |
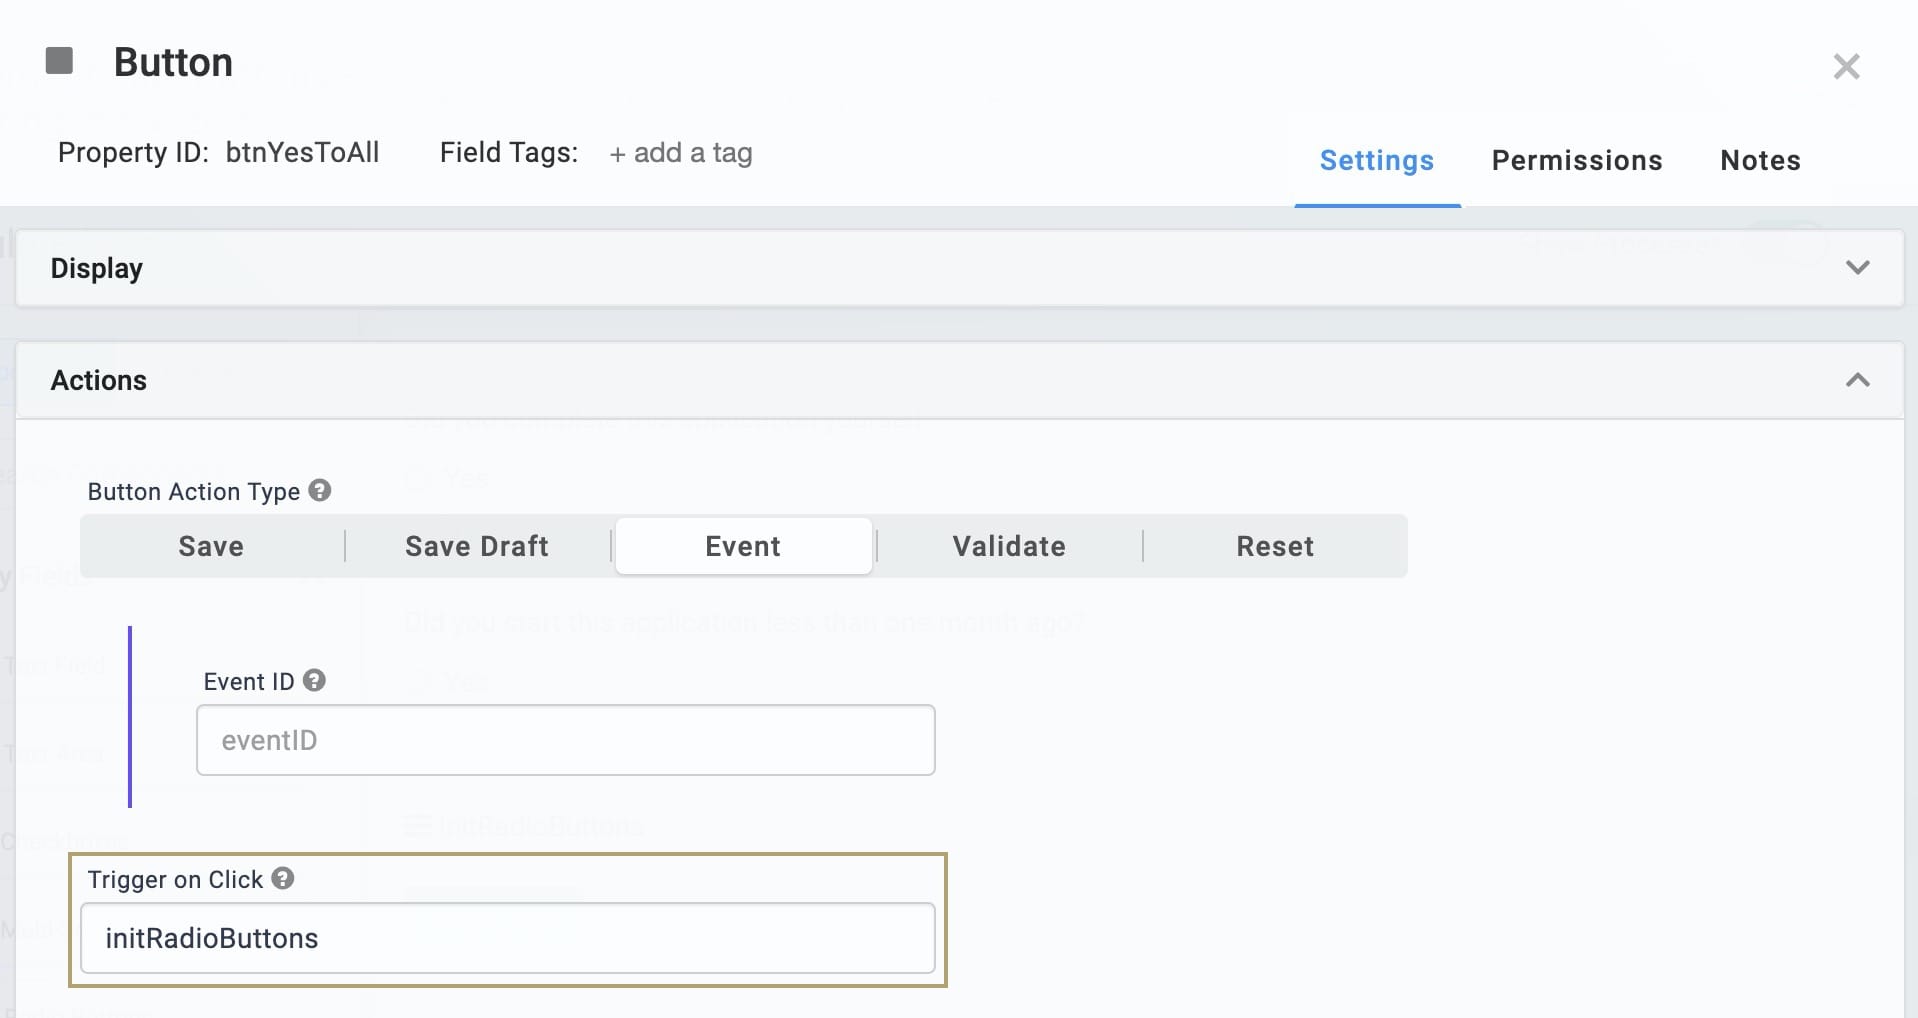
Configure the Button Component
Finally, you'll add a Button component to trigger your Initializer. To tie this to your Initializer, you'll set the Button Action Type to Event. Then, you'll enter the Property ID for your Initializer in the Trigger on Click field.
| 1. | Drag and drop a Button component onto your canvas. Place your Button component below your Initializer. |
| 2. | Enter btnYesToAll in the Property ID. |
| 3. | Enter Yes To All in the Label Text. |
| 4. | Select Event from the Button Action Type. |
| 5. | Enter initRadioButtons in the Trigger on Click. |
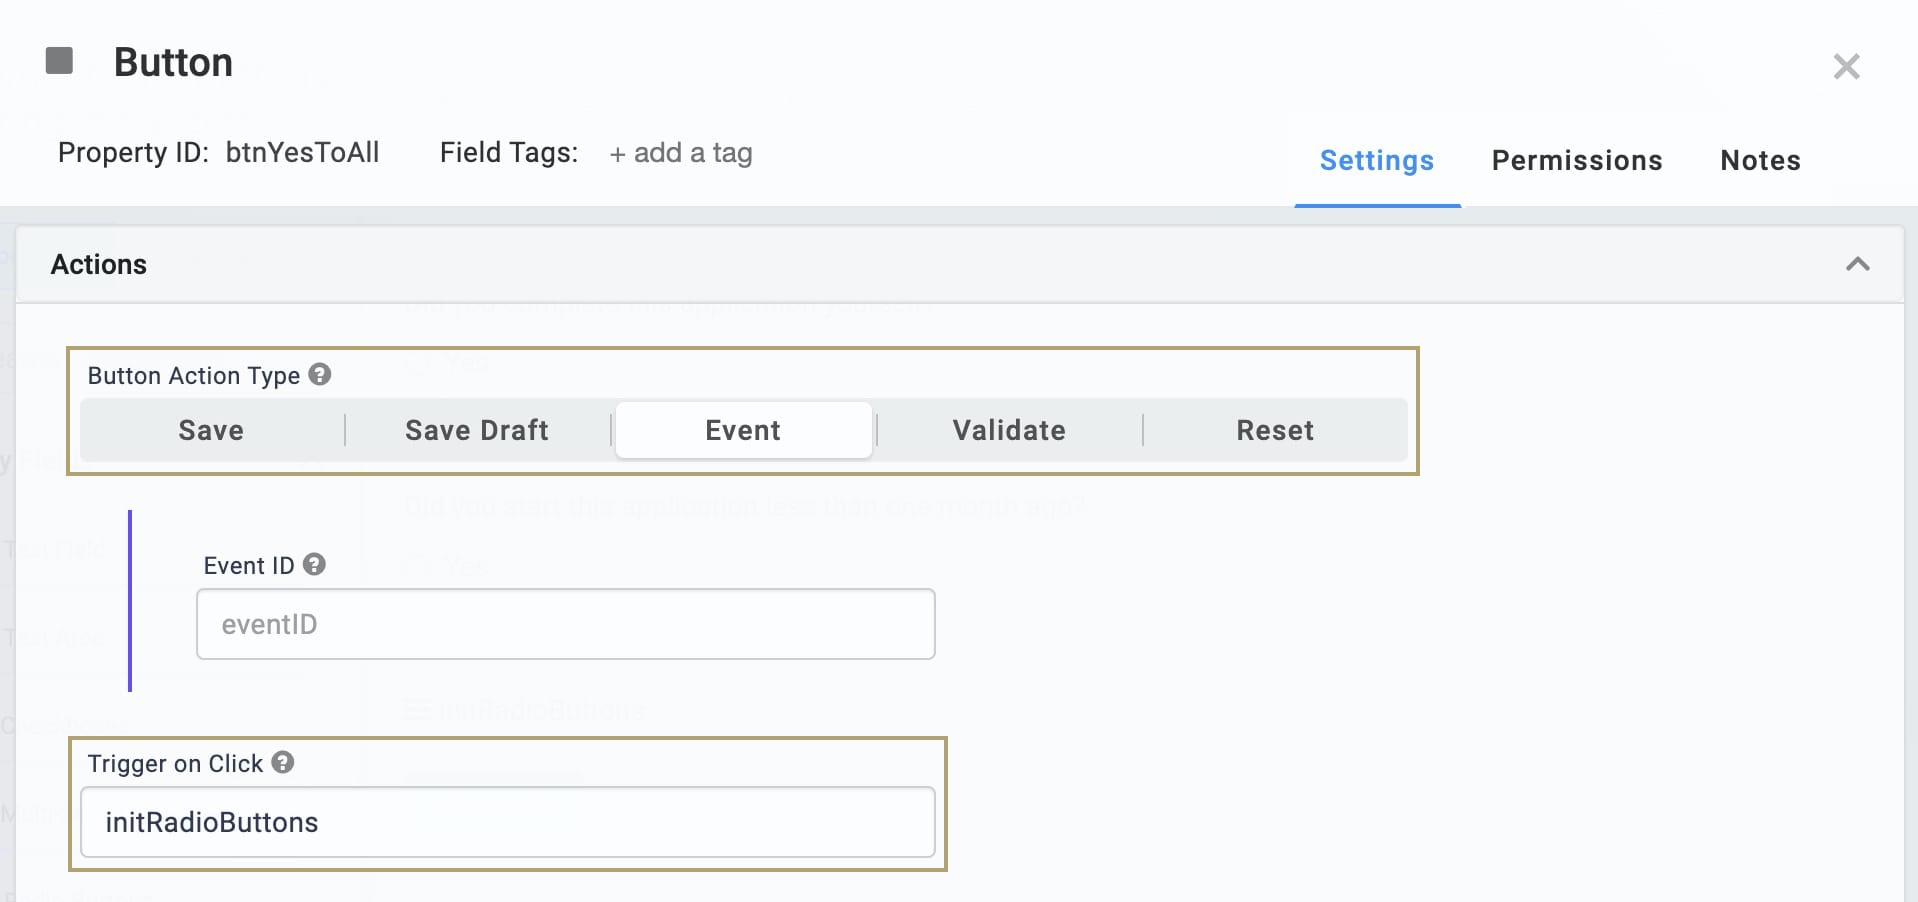
| 6. | Click Save. |
| 7. | Save your module. |
With these steps complete, you can test out your handiwork! Preview your module in Express View. Then, click the Yes to All button. You'll see the answers to your questions automatically show as Yes.
Lab
You can view the completed lab for this Initializer/Button use case here: https://training.unqork.io/#/form/5f637cccabf886024d45ab47/edit.
