Introduction to Unqork Applications
Overview
Like traditional web applications, Unqork applications are also web-based, and can perform the same tasks and processes. Unqork applications can be module-type or workflow-type applications. Module-type applications let you take advantage of Unqork's Module Builder and its various components to build applications. Workflow-type applications are typically process-specific, letting you create applications that an end-user End-users, also known as Express Users, are the individuals accessing an application through Express View. In most cases, end-users are the customers using the product. can navigate. The versatility of Unqork applications lets you combine modules with workflows to perform any task you require.
Working With Multiple Applications
While we’ve defined the two types of applications in Unqork, many times "application" is an umbrella term to describe an application that consists of multiple applications. Let’s say you're creating a meal-delivery application where customers submit a meal order. Then, a driver picks up the meal from a hub and delivers it to the customer. This application might consist of multiple applications designed to execute the following functions:
| 1. | Customers use one application to create the order and submit it to the hub. |
| 2. | Drivers use another application to create a profile and select a delivery shift. |
| 3. | Another application assigns routes to drivers based on their availability. |
Each application in this example might also have their own respective schemas (orders, drivers, shifts, and routes) defined by a data model. This data model's overall goal is to deliver meals to customers. So, each application contributes to your overall meal-delivery application.
Creating an Application
To create an Unqork application, you must have a workspace to store it. Once you have a workspace, you can create one or more module-type or workflow-type applications inside it.
To learn more about creating workspaces, view our Introduction to Workspaces article.
At the top right of your opened workspace, click + Create App. A modal A modal is a window that appears on top of the content you are currently viewing. displays with three tabs that let you customize your application. For example, you can customize its styling and performance. The following sections define all the options you'll see in these tabs. After completing the configuration of your application, click Create.
App Info Tab
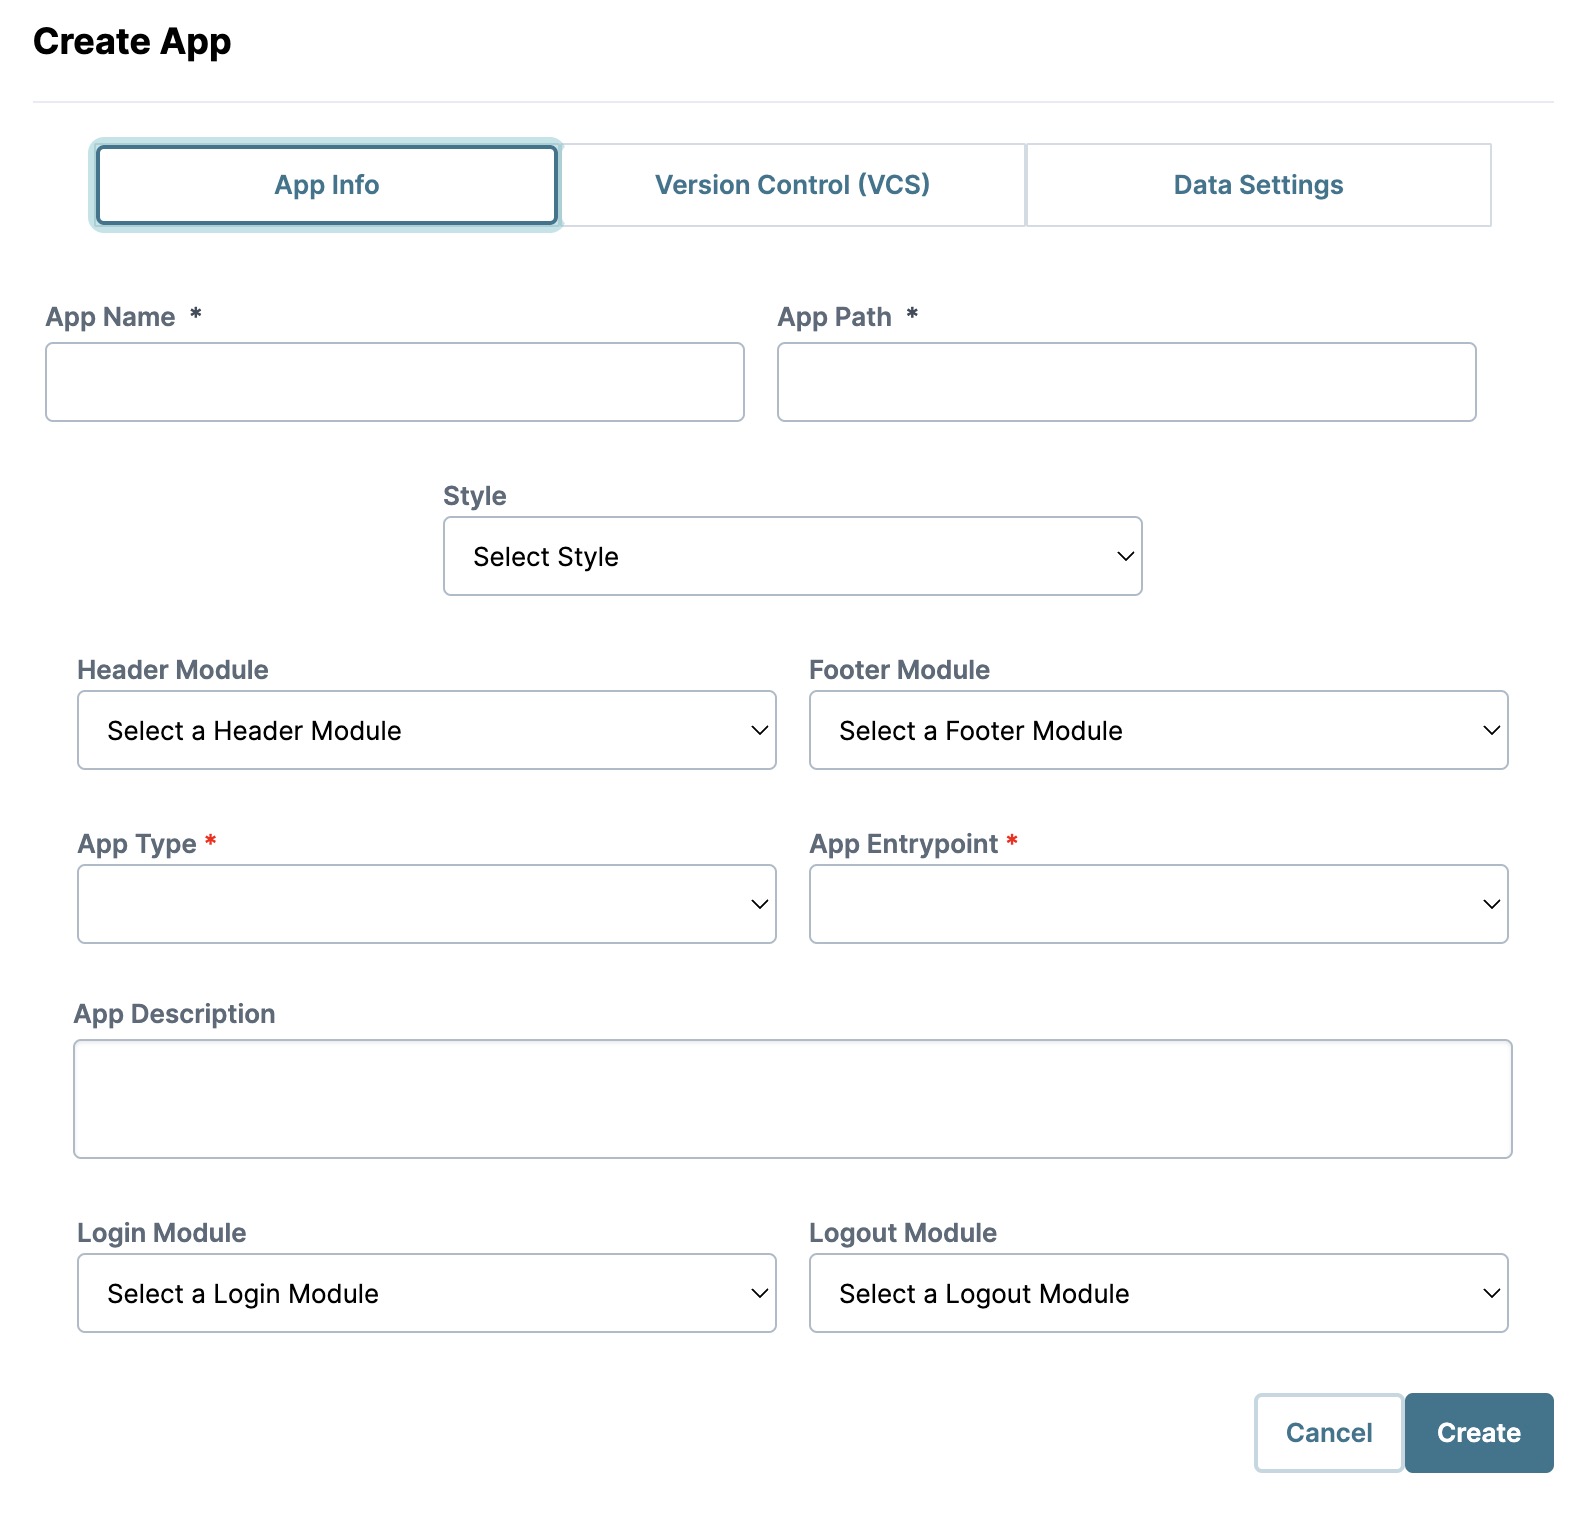
The App Info tab is where you'll set up the basic application configuration. This tab lets you assign an application name, select an application type, define the application's entry point, and so on.
|
Setting |
Description |
|---|---|
|
App Name* |
Enter a unique application name. It's best practice to choose a name that helps you and your team identify the function of the application. Entering a name for your application populates the App Path field in a concise URL format. |
|
App Path* |
The URL-friendly format of your application's name. This field can be modified or left with the default path. |
|
Style |
Use this drop-down to select a style that end-users End-users, also known as Express Users, are the individuals accessing an application through Express View. In most cases, end-users are the customers using the product. see in Express View. No selection defaults to the default style specified in Style Administration. |
|
Header Module |
Use this drop-down to select a custom header module to display in Express View. |
|
Footer Module |
Use this drop-down to select a custom footer module to display in Express View. |
|
App Type* |
Use this drop-down to set this application as a module-type or workflow-type application. Depending on your selection, a module or workflow is automatically created in the application. |
|
App Entrypoint* |
Use this drop-down to specify the module end-users are directed to when they access the application. Or, select New Entrypoint to set the module or workflow as the starting point. Once selected, you must define the entrypoint's module type. |
|
App Description |
Use this field to add a description of this application. |
|
Login Module |
Use this drop-down to select a custom login module to display in Express View. |
|
Logout Module |
Use this drop-down to select a custom logout module to display in Express View. |
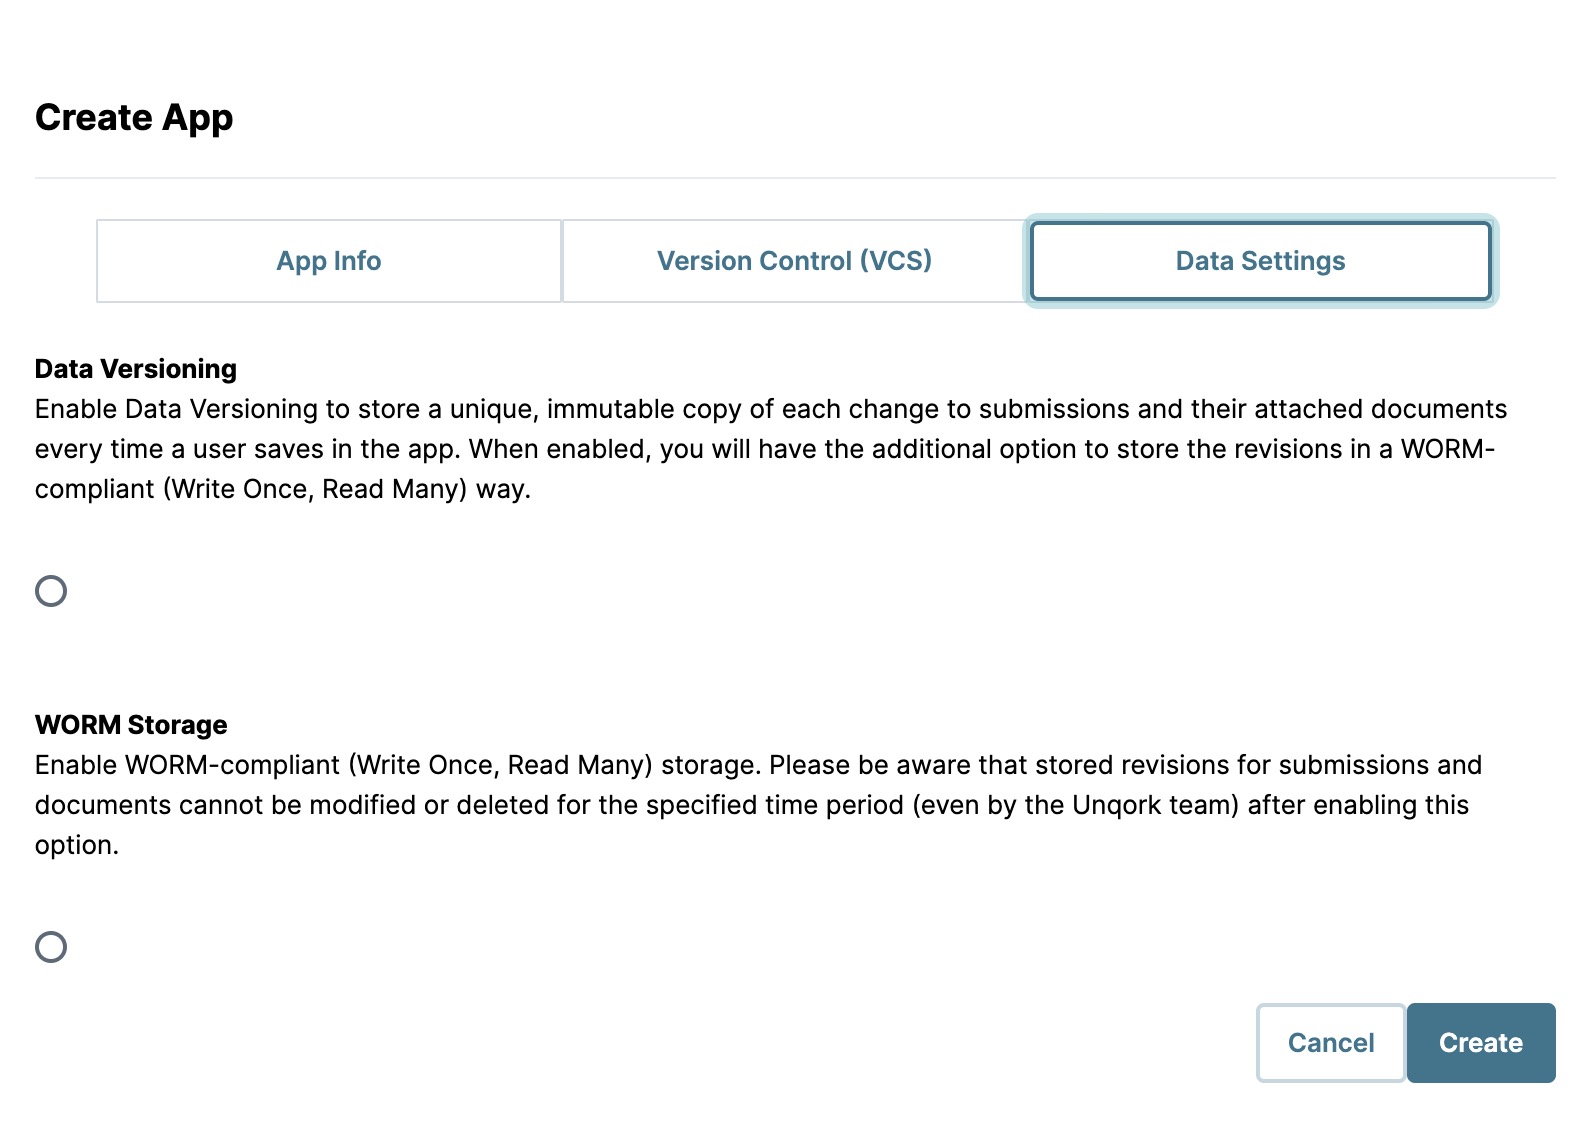
Data Settings Tab
The Data Settings tab lets you control your application data by enabling data versioning and WORM (Write Once, Read Many) storage.
|
Option |
Description |
|---|---|
|
Data Versioning |
Determines how long data persists in modules. When enabled, Unqork stores all submission revisions belonging to the application. Disabling this setting hides the WORM Storage setting. By default, this setting is disabled. |
|
WORM Storage |
WORM data storage prevents the overwriting or deletion of records. Enabling this setting sends data revisions to a WORM-compliant storage. A slider prompts you to set the number of days data should persist in storage. Enabling WORM Storage removes previous submissions and attachments. By default, this setting is disabled. |
Viewing an Application
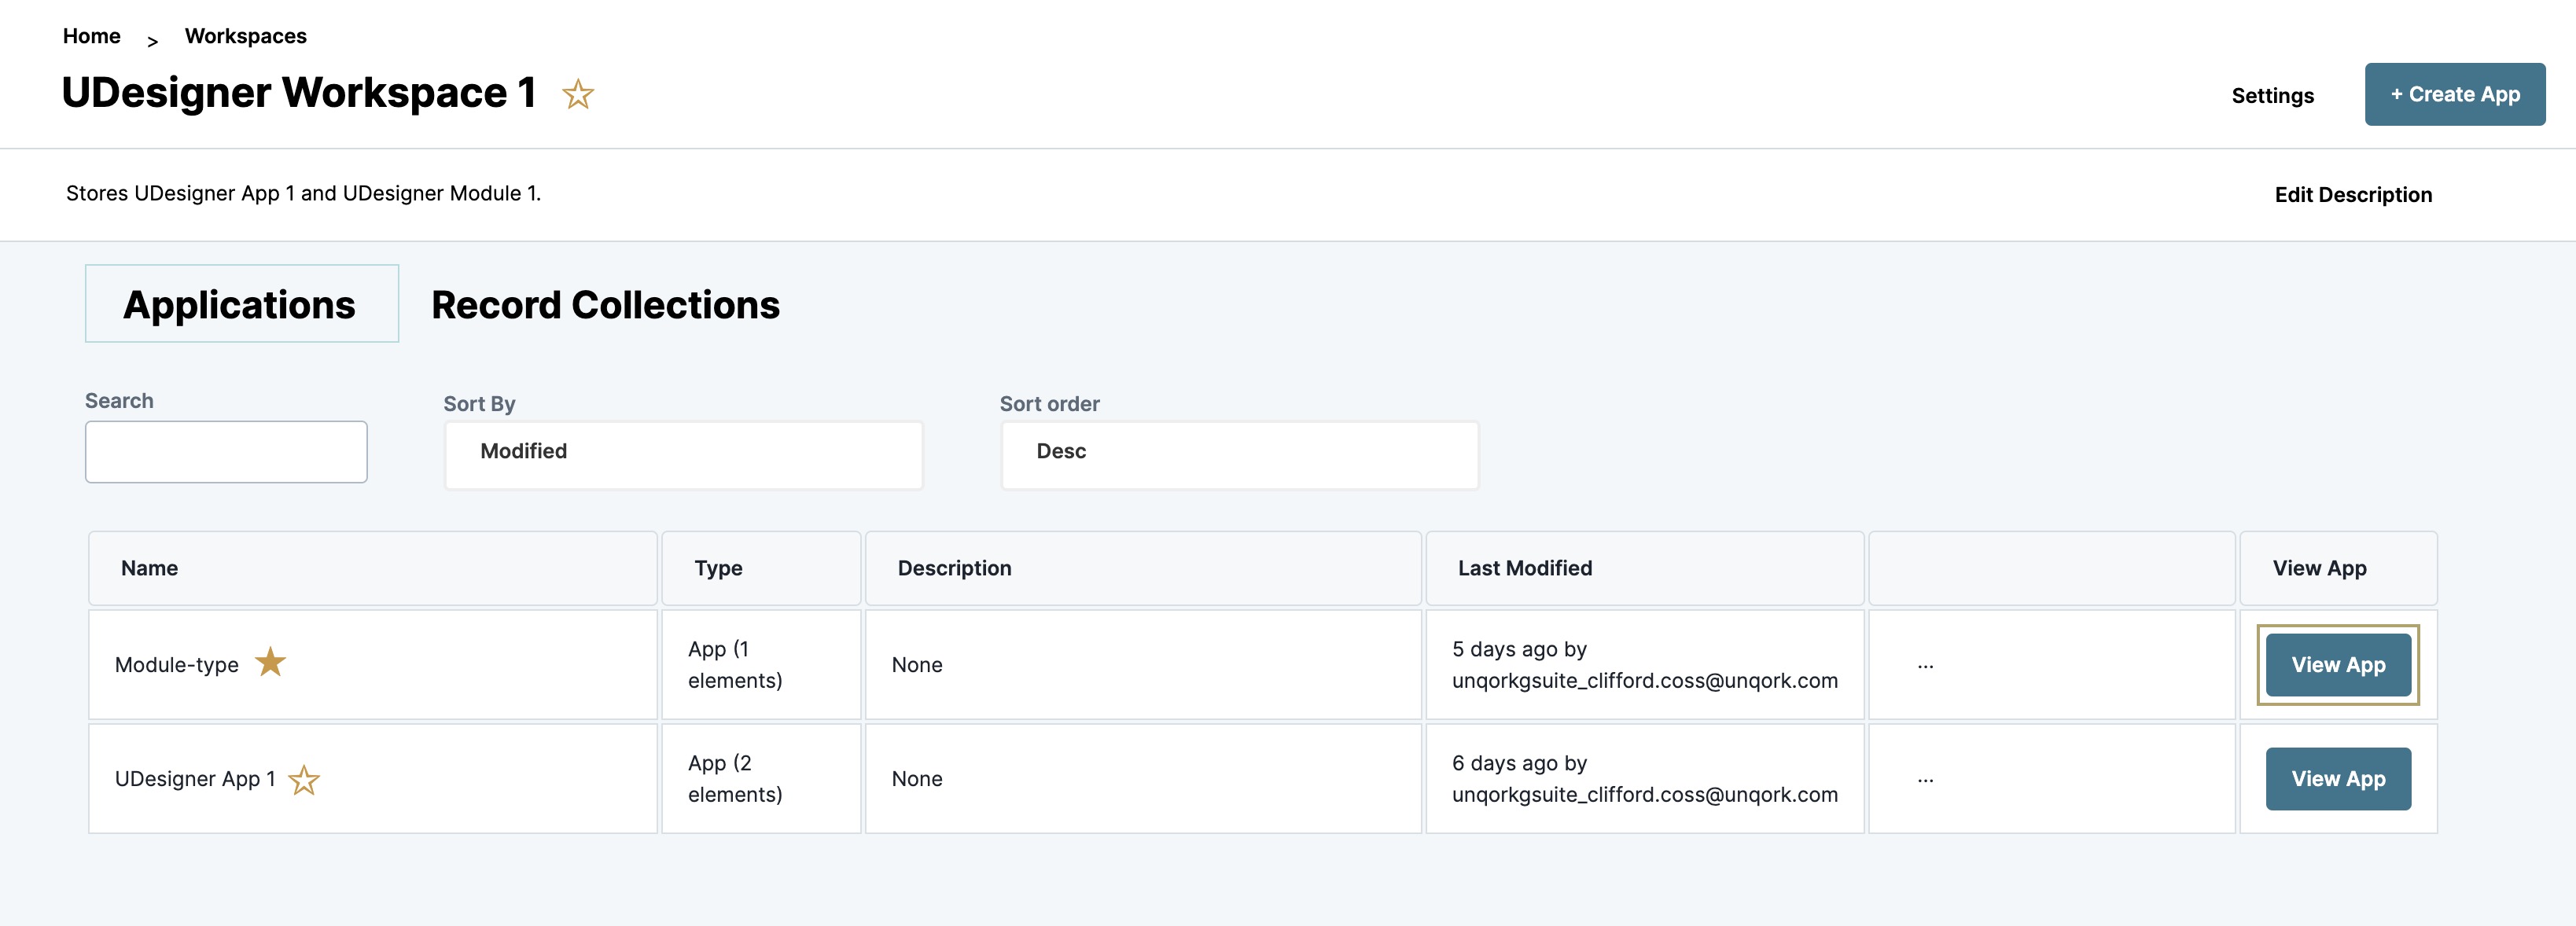
After creating your application, open it to begin building. Inside each application, you'll see a grid of all modules and workflows created. After opening an application, you can search for or filter by a module or workflow, sort the grid, and view any of the modules and workflows stored in the application.
To view an application in a workspace:
| 1. | Inside your workspace, locate the application you want to view. |
| 2. | From the View App column, select View App. Your application opens in a new tab. |
Navigating an Application
When you open any application, you'll see a grid displaying all modules and workflows in that application. Below is a list of all available actions you can perform on those modules and workflows.
![]()
| Setting | Description | |
|---|---|---|
|
1 |
Breadcrumbs |
Use the breadcrumbs at the top left of the page to navigate back to the environment Workspaces page or your UDesigner homepage. |
|
2 |
Application Name |
The name of the application you are viewing. Click the |
|
3 |
... (Ellipsis) |
Use the ... drop-down to perform the following actions in your application:
|
|
4 |
+ Create New |
Click this button to create a module in this application. To learn more about creating modules, view our Introduction to the Module Builder article. |
|
5 |
Edit Description |
Clicking this button opens a modal A modal is a window that appears on top of the content you are currently viewing. to modify the application description. |
|
6 |
Search |
Use this field to search for modules or workflows in your application. |
|
7 |
Sort By |
Lets you sort modules and workflows by the following:
|
|
8 |
Sort Order |
Lets you sort modules and workflows in ascending (Asc) or descending (Desc) order. |
|
9 |
Filter By |
Lets you filter the grid by element type. You can filter by the following:
|
|
9 |
Name |
The name of the module or workflow in the application. |
|
10 |
Type |
The element type. Available types include:
|
|
11 |
Description |
The description of the module or workflow. |
|
12 |
Last Modified |
The last time the module or workflow was modified, and the user who made the change. |
|
13 |
Actions |
The unique actions you can take on your modules and workflows. The next section explores these actions based on the element type. |
|
14 |
View |
Click the View button in this column to view a module or workflow in this application. |
Actions
The following are the available actions you can take on modules and workflows:
| Action | Description |
|---|---|
|
Settings |
Lets you update the various settings for your module or workflow. |
|
Preview |
Lets you preview your module or workflow in Express View. |
|
Duplicate |
Duplicates a module or workflow in this application. |
|
Move |
Moves your module or workflow to another workspace and application. |
|
Delete |
Deletes the module or workflow. |
Resources
