Set Operator: Creating Rows in a Table
Overview
In this
Here's how the completed use case looks in the Module Builder:

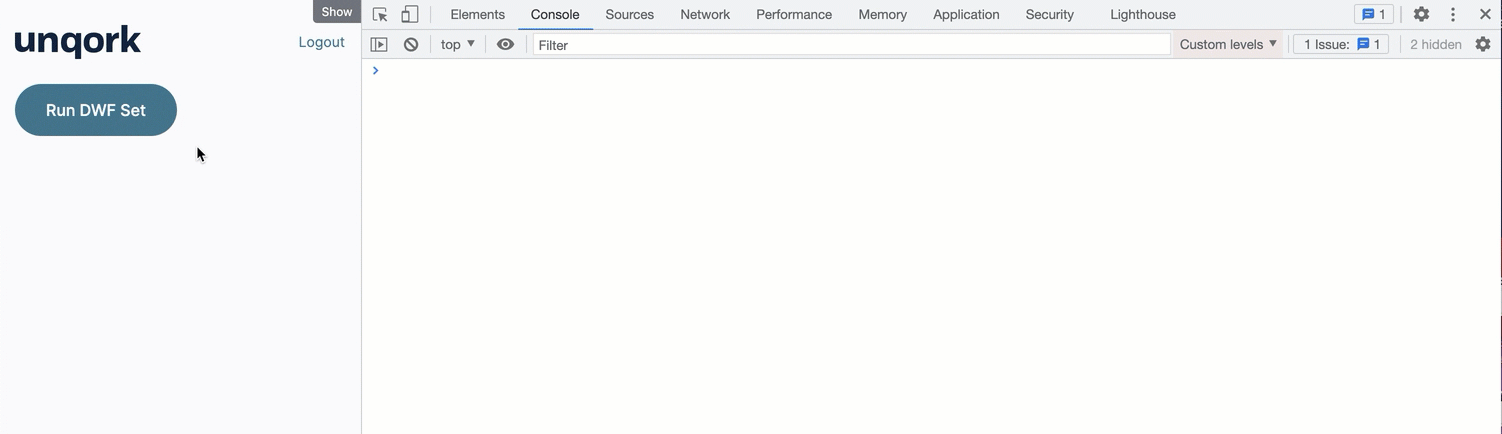
Here's how the completed use case looks in Express View, including how your DevTools Console displays:
What You'll Learn
In this
What You'll Need
For this use case, you'll need:
-
1 Button component
-
1 Data Workflow component
For your Data Workflow, you'll need:
-
1 Create Table operator
-
3 Set operators
-
3 Console operators
Configure the Data Workflow Component
First, create the table in a Data Workflow. This table is a three-row table. Or, in actuality, a three-object array.
| 1. | Drag and drop a Data Workflow component onto your canvas. |
| 2. | Enter dwfSet in the Label and Property Name fields. |

Configure the Create Table Operator
Create an empty table (array), so you can add rows with the Set operators. Defining the Number of Rows as 3 gives you an array with three empty objects. This is how it looks: [{ }, { }, { }].
Next, it's important you set the Create Index setting to No. If left enabled, the Create Index setting creates key/value pairs of "index":0, "index":1, and so on, in each row.
| 1. | Drag and drop a Create Table operator onto your Data Workflow canvas. |
| 2. | Configure the operator's Info window as follows: |
|
Setting |
Value |
|---|---|
|
Category |
Create Table |
|
Label |
Empty Table |
|
Create Index |
No |
|
Number of Rows |
3 |
Configure the Set Operators
These three Set operators populate the empty rows (objects) in the table (array) you created. The Path setting lets you specify which row of the table to add a value and its key. For example, [0].name adds a "name" key in the [0] index position. You define what value to add in the Value field of the Setting column.
| 1. | Drag and drop 3 Set operators onto your Data Workflow canvas. |
| 2. | Configure the first Set operator's Info window as follows: |
|
Setting |
Value |
|---|---|
|
Category |
Set |
|
Label |
Set Index 0 |
|
Path |
[0].name |
|
Value |
Minna |
| 3. | Configure the second Set operator's Info window as follows: |
|
Setting |
Value |
|---|---|
|
Category |
Set |
|
Label |
Set Index 1 |
|
Path |
[1].age |
|
Value |
27 |
| 4. | Configure the third Set operator's Info window as follows: |
|
Setting |
Value |
|---|---|
|
Category |
Set |
|
Label |
Set Index 2 |
|
Path |
[2].occupation |
|
Value |
lawyer |
| 5. | Connect the output port (right) of the Create Table operator to the input port (left) of the Set Index 0 Set operator. |
| 6. | Connect the output port (right) of the Set Index 0 Set operator to the input port (left) of the Set Index 1 Set operator. |
| 7. | Connect the output port (right) of the Set Index 1 Set operator to the input port (left) of the Set Index 2 Set operator. |
Configure the Console Operators
Next, add three Console operators to watch the process. Connect a Console operator to each of the Set operator's output ports. That way, you can see how each Set operator works.
Notice that the third Set operator only outputs to a Console operator. When creating applications, you might want to use a dedicated Output operator. Then, that Output operator can connect to a Hidden component. This lets you store the final table and reference it elsewhere in your application.
| 1. | Drag and drop three Console operators onto your Data Workflow canvas. |
| 2. | Configure the first Console operator's Info window as follows: |
|
Setting |
Value |
|---|---|
|
Category |
Console |
|
Label |
Index 0 |
| 3. | Configure the second Console operator's Info window as follows: |
|
Setting |
Value |
|---|---|
|
Category |
Console |
|
Label |
Index 1 |
| 4. | Configure the third Console operator's Info window as follows: |
|
Setting |
Value |
|---|---|
|
Category |
Console |
|
Label |
Index 2 / Final Table |
| 5. | Connect the output port (right) of the Set Index 0 Set operator to the input port (left) of the Index 0 Console operator. |
| 6. | Connect the output port (right) of the Set Index 1 Set operator to the input port (left) of the Index 1 Console operator. |
| 7. | Connect the output port (right) of the Set Index 2 Set operator to the input port (left) of the Index 2 / Final Table Console operator. |
| 8. | Click Save. |
Configure the Button Component
Finally, create a button to click in Express View that triggers your Data Workflow.
| 1. | Drag and drop a Button component onto your canvas, placing it below the Data Workflow. |
| 2. | Enter btnRunDWF in the Property ID field. |
| 3. | Enter Run DWF Set in the Label Text field. |
| 4. | Select Event as the Action Type. |
| 5. | Enter dwfSet in the Trigger on Click field. |
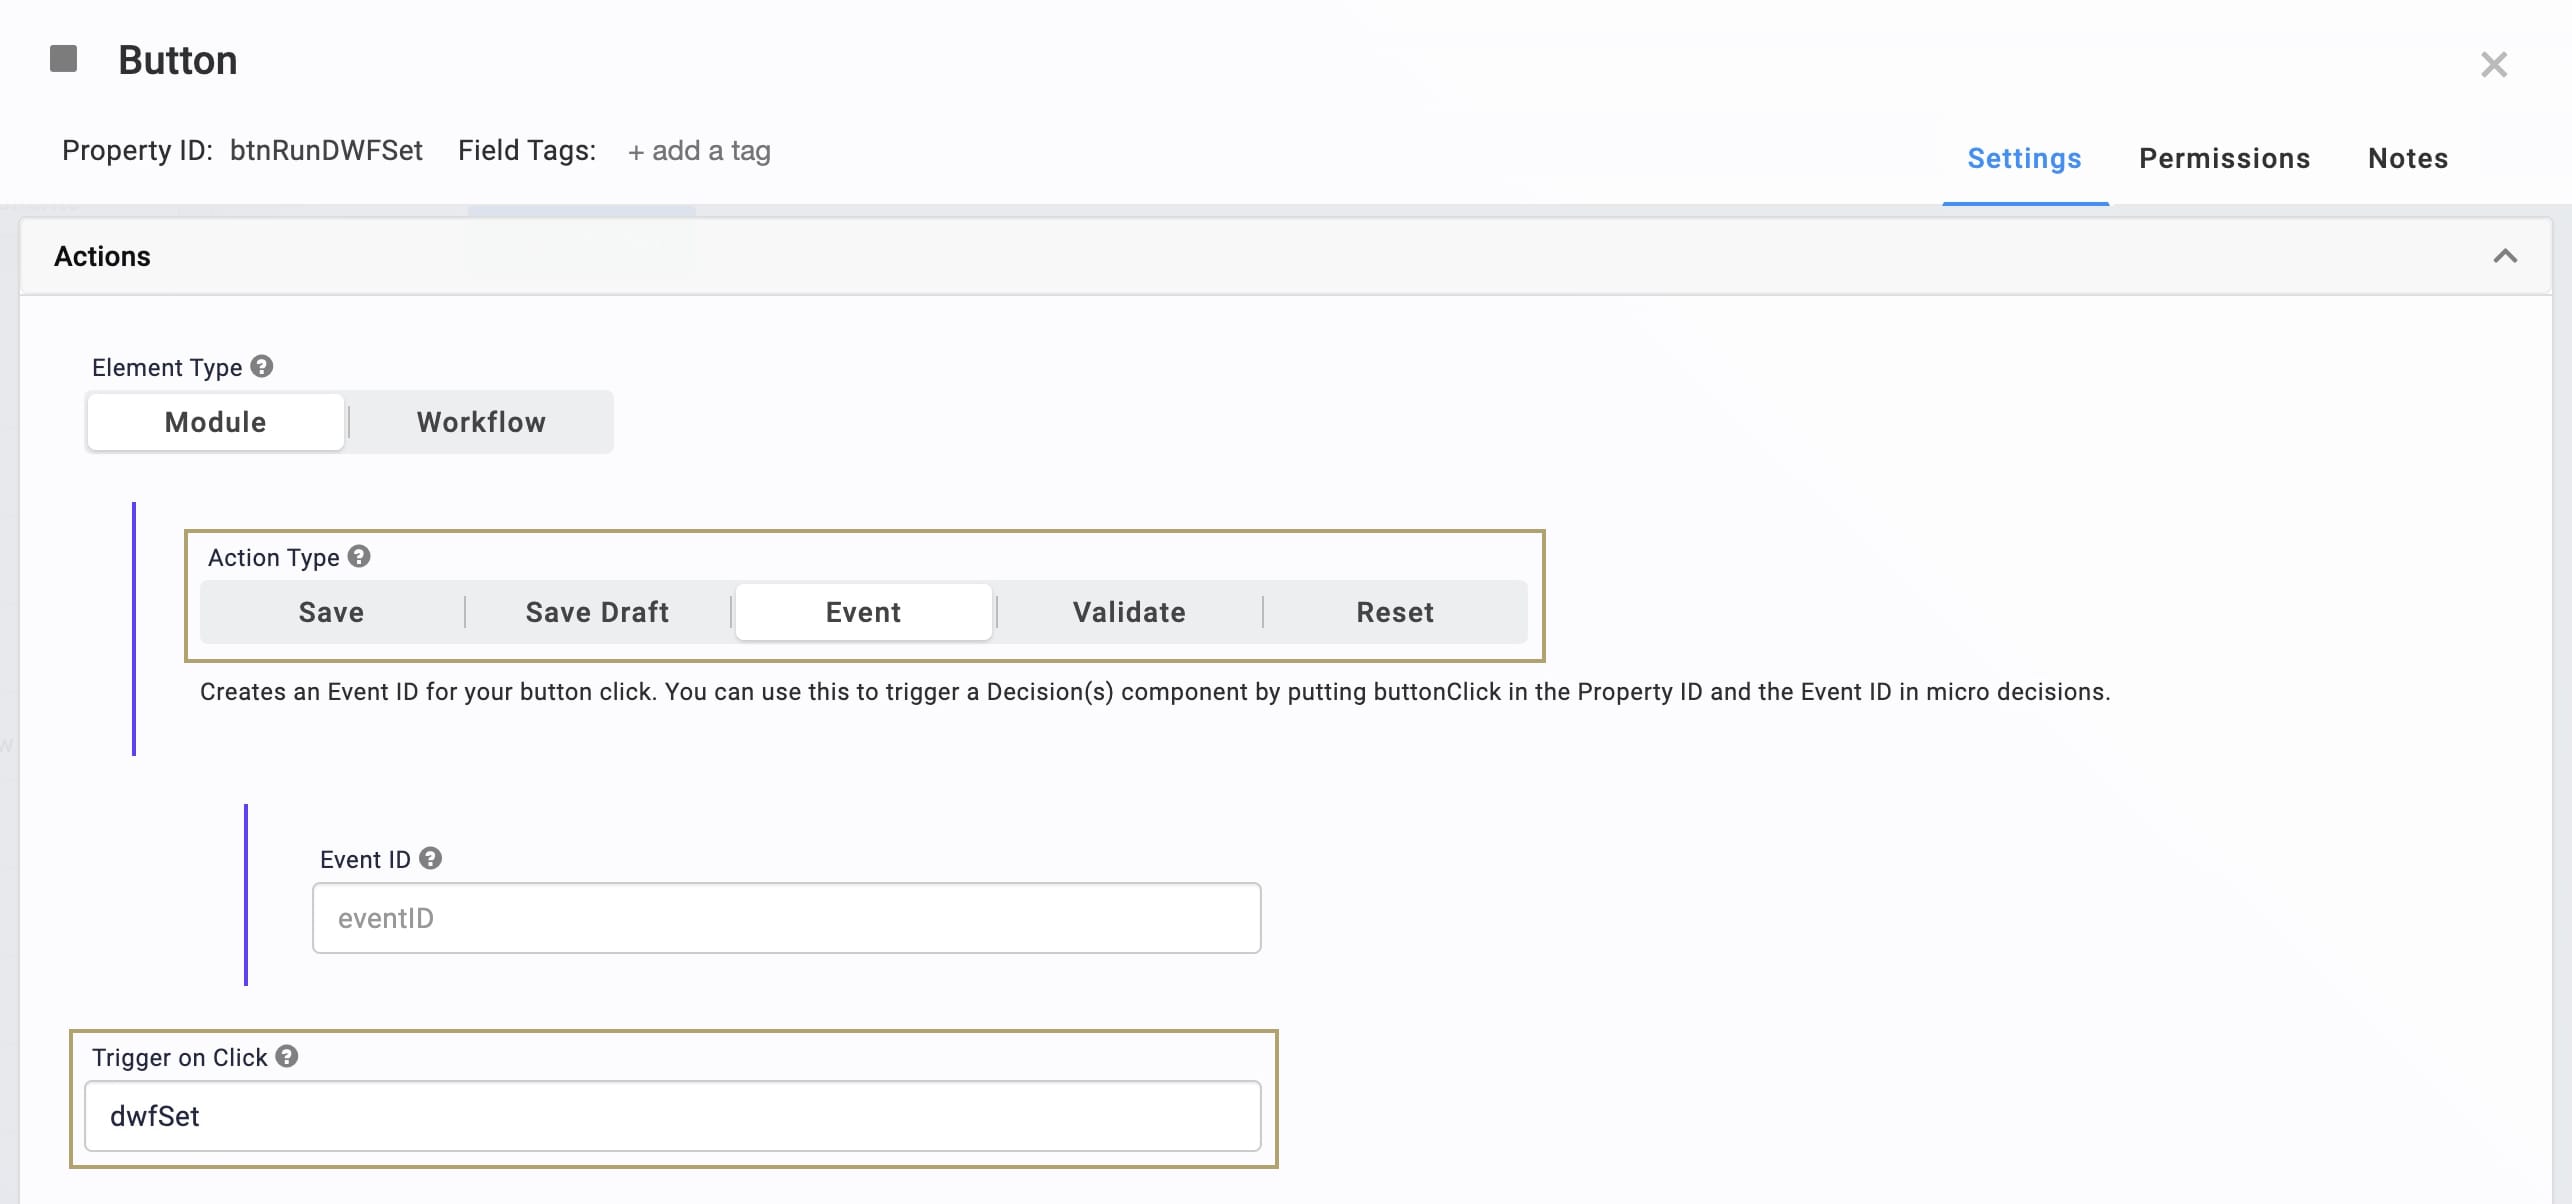
| 6. | Click Save. |
| 7. | Save your module. |
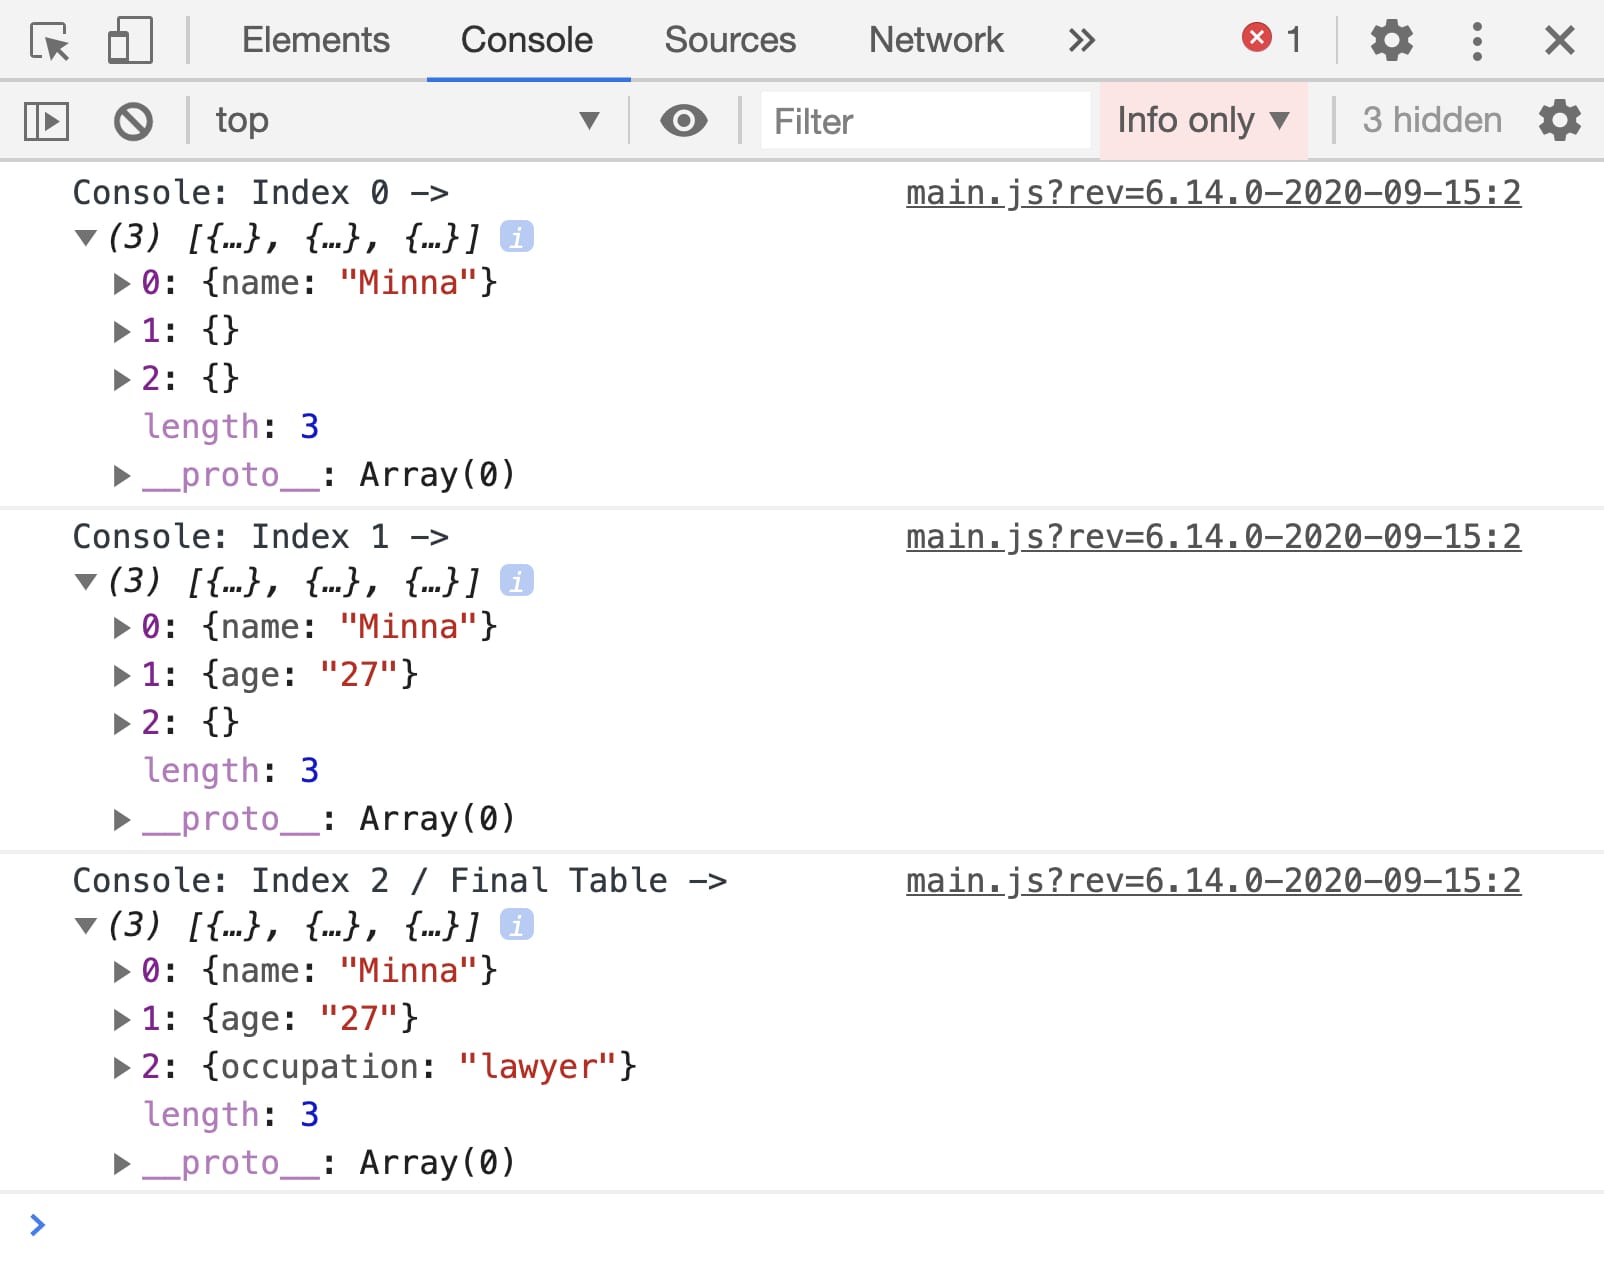
Now, test your Data Workflow. Preview your module in Express View and open the DevTools Console. Click the Run DWF Set button and see what happens. The DevTools Console looks likes this:
Lab
You can find the completed Creating Rows in a Table lab here: https://training.unqork.io/#/form/5f6b9da519c4e6024ed21758/edit.
