Excel to JSON Operator: Uploading a Multi-Tab Excel Sheet
Overview
Sometimes you'll want to upload an Excel file that has multiple tabs to your application. Say you collected data outside of your application and now want to process it using a Data Workflow. To do that, you'd use an Excel to JSON operator. Processing multi-tab files gives you a slightly different output than processing single-tab files. You'll get a separate array for each tab in your Excel file.
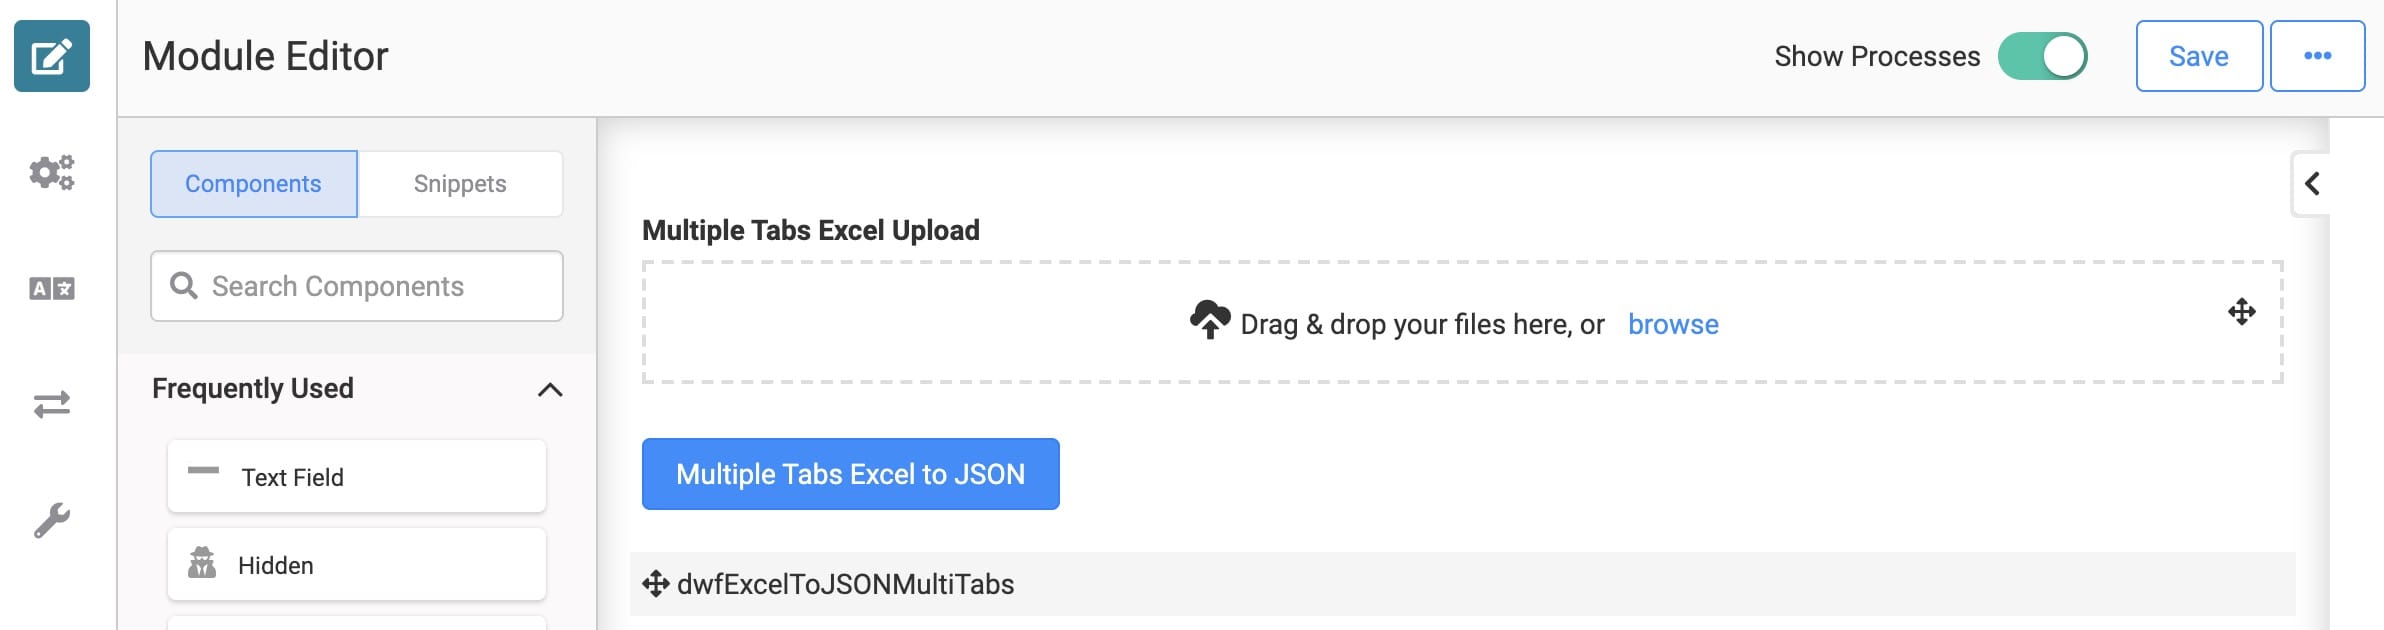
Here's how your module will look in the Module Builder:
This use case works behind the scenes, so you won't see anything in Express View outside of the DevTools Console. So, here's a sneak peek at that:

To complete this use case, you'll need a sample Excel file to upload. This configuration can accept any multi-tab Excel file you have on hand. The end result you see in the DevTools Console may vary depending on the data you upload.
What You'll Learn
In this article, you'll learn how to use the Excel to JSON operator with a multi-tab Excel file.
What You'll Need
To set up this use case, you’ll need:
-
1 File component
-
1 Button component
-
1 Data Workflow component
To set up your Data Workflow, you'll need:
-
1 Input operator
-
1 Get operator
-
1 Excel to JSON operator
-
1 Console operator
These instructions assume you have a new module open, saved with a title.
Configuration
Configure the File Component
First, let's add a File component to handle the file upload.
| 1. | Drag and drop a File component onto your canvas. |
| 2. | Enter fileUploadTabs in the Property ID field. |
| 3. | Enter Multiple Tabs Excel Upload in the Label Text field. |
| 4. | Click Save. |
Configure the Data Workflow Component
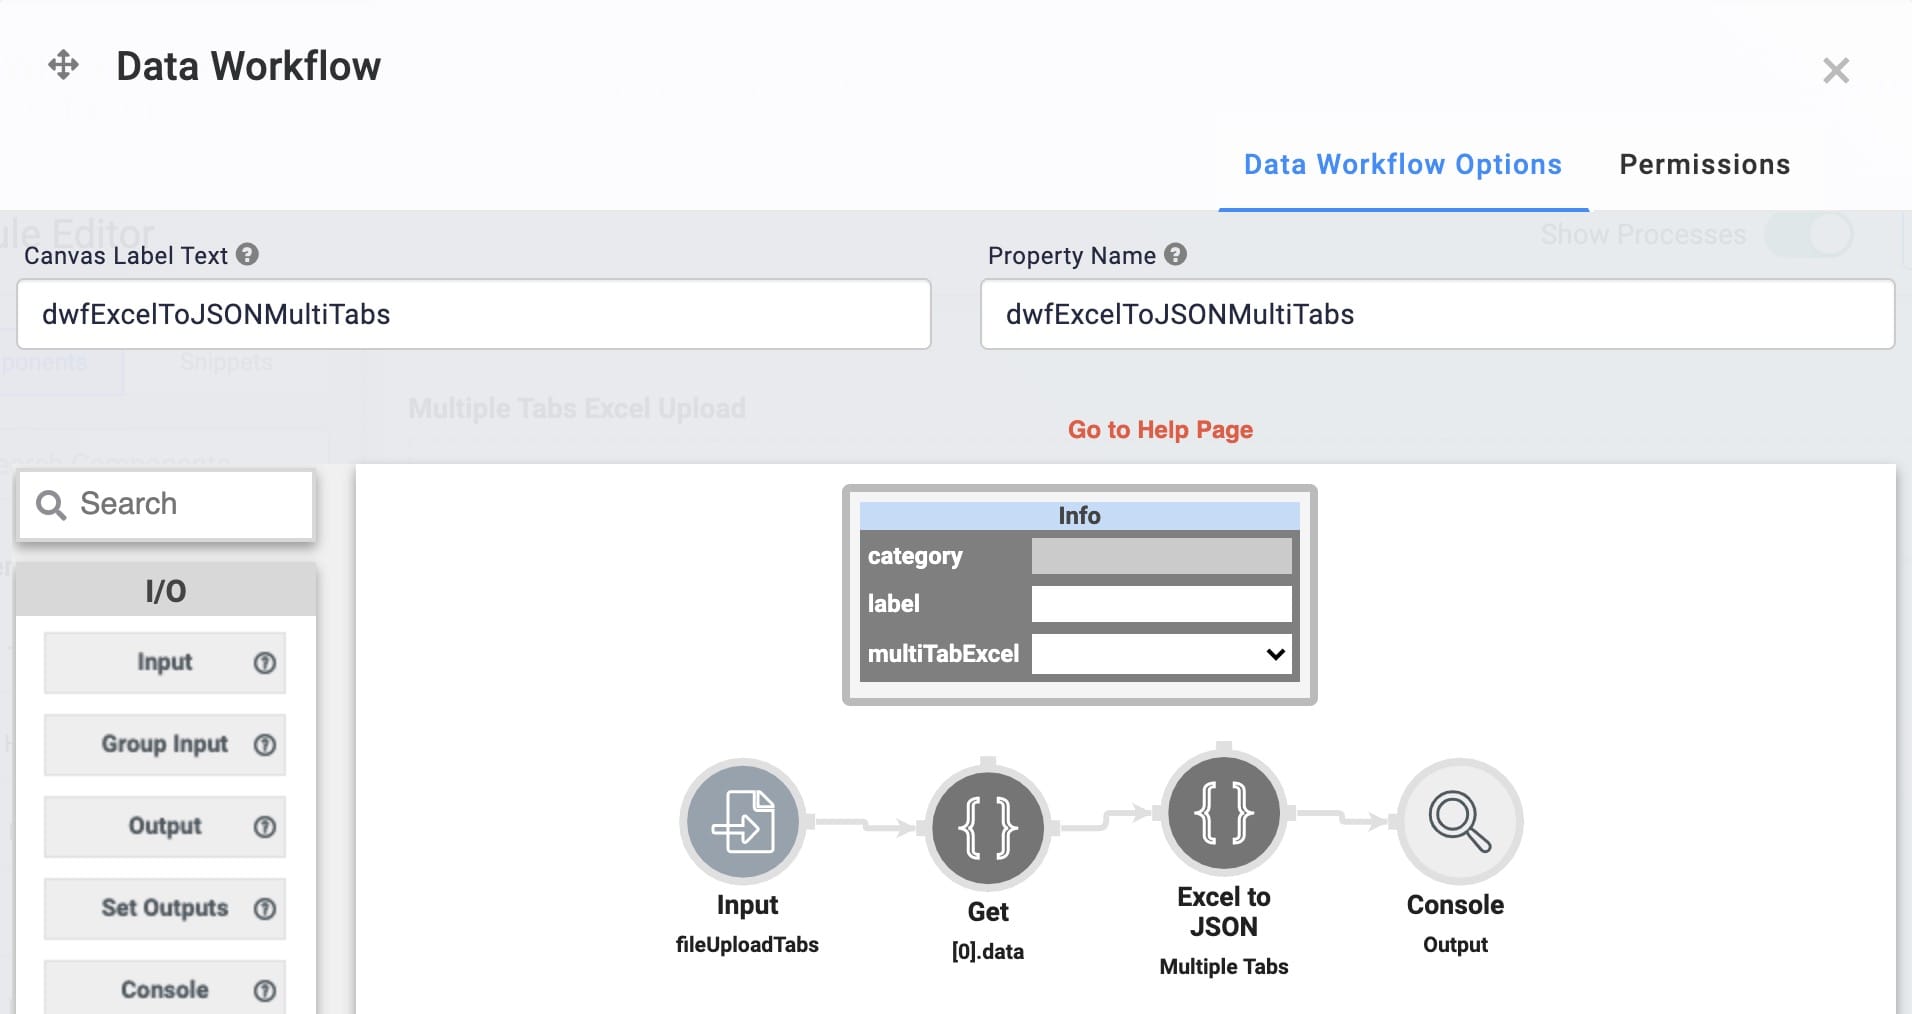
Next, let's add the Data Workflow. You'll include an Input operator to grab the data from your File component. But you'll also use a Get operator to retrieve the base64 of your Excel file. Remember, the Excel to JSON operator can only accept the base64, not the entire Excel file. From there, you'll pass that data to the Excel to JSON operator. Here, you'll set the multiTabExcel setting to Yes. Finally, you'll add a Console operator. This lets you see the output in the DevTools Console.
| 1. | Drag and drop a Data Workflow component onto your canvas. Place your Data Workflow below your File component. |
| 2. | Enter dwfExcelToJSONMultiTabs in the Canvas Label Text and Property Name fields. |
Configure the Input Operator
| 1. | Drag and drop an Input operator onto your Data Workflow canvas. |
| 2. | Configure the Input operator's Info window as follows: |
|
Setting |
Value |
|---|---|
|
Category |
Input |
|
Component |
fileUploadTabs |
|
Required |
Yes |
|
Source |
Default |
Configure the Get Operator
| 1. | Drag and drop a Get operator onto your Data Workflow canvas. |
| 2. | Configure the Get operator's Info window as follows: |
|
Setting |
Value |
|---|---|
|
Category |
Get |
|
Label |
[0].data |
|
Path |
[0].data |
| 3. | Connect the output port (right) of the Input operator to the input port (left) of the Get operator. |
Configure the Excel to JSON Operator
| 1. | Drag and drop an Excel to JSON operator onto your Data Workflow canvas. |
| 2. | Configure the Excel to JSON operator's Info window as follows: |
|
Setting |
Value |
|---|---|
|
Category |
Excel to JSON |
|
Label |
Multiple Tabs |
|
mutliTabExcel |
Yes |
| 3. | Connect the output port (right) of the Get operator to the input port (left) of the Excel to JSON operator. |
Configure the Console Operator
| 1. | Drag and drop a Console operator onto your Data Workflow canvas. |
| 2. | Configure the Console operator's Info window as follows: |
|
Setting |
Value |
|---|---|
|
Category |
Console |
|
Label |
Output |
| 3. | Connect the output port (right) of the Excel to JSON operator to the input port (left) of the Console operator. |
| 4. | Click Save. |
Configure the Button Component
Finally, let's add a button to trigger the whole operation.
| 1. | Drag and drop a Button component onto your canvas. Place your Button between your File component and your Data Workflow. |
| 2. | Enter btnExcelTabsToJSON in the Property ID field. |
| 3. | Enter Multiple Tabs Excel to JSON in the Label Text field. |
| 4. | Select Event as the Action Type. |
| 5. | Enter dwfExcelToJSON in the Trigger on Click field. |
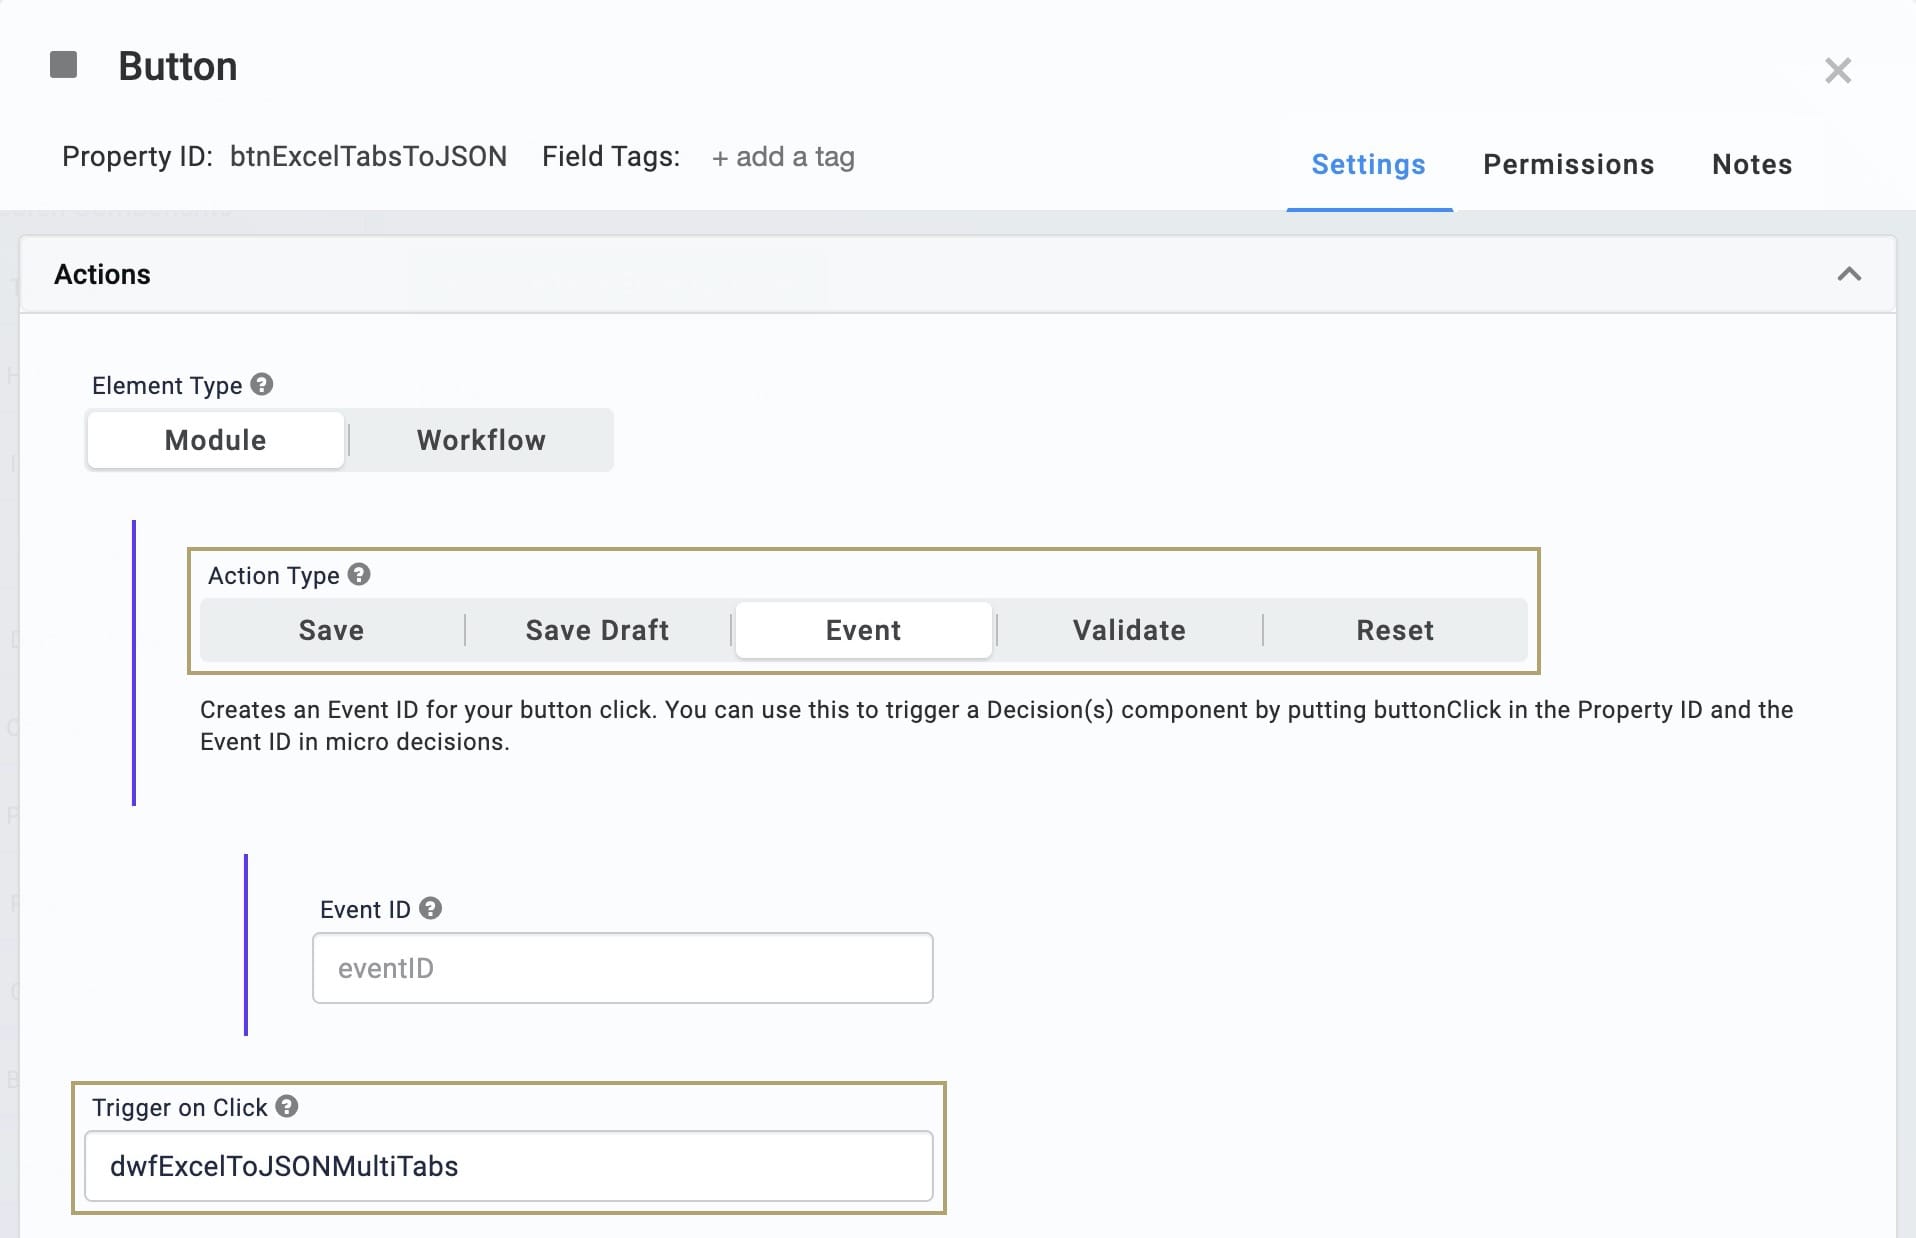
| 6. | Click Save. |
| 7. | Save your module. |
Now it's time to test your work. Open your module in Express View and upload a multi-tab Excel file. Then, with the DevTools Console open, click your Multiple Tabs Excel to JSON button. You'll see a new JSON object populate with the data from your Excel file. There, you'll see arrays for each tab in your Excel file. In the below example, you'll see data pulled from an Excel file with 3 tabs: applicationIds, clientInfo, and organizations.
You'll get a different result depending on what data is in your Excel file. Try uploading different sorts of Excel data to see what your output looks like. From there, you can change settings in your Data Workflow to get the output you want. Once you have the JSON data you need, you can pass it on to another process.
Lab
You can view this complete use case here: https://training.unqork.io/#/form/60c8dad07ca65402e67a95a4/edit.
