Overview
When configuring a Decision component, you'll set a condition for your data to meet. If your data meets that condition, the operator marks the data as True. If your data doesn't meet that condition, the operator marks the data as False. Quite often, you can construct your condition using one of the following symbols: <, >, =, >=, or <=. But sometimes, you might want to accept a few variations at once. Maybe you want to accept 2 specific values instead of anything greater than one value. For that, you can use an OR condition.
For example, let's say you want to let students check if a grade qualifies for graduation. Grades A, B, and C all qualify for graduation while grades D and F don't. It's difficult to represent this with a greater-than/less-than expression. So, instead, you'll use an OR statement in your Decision operator.
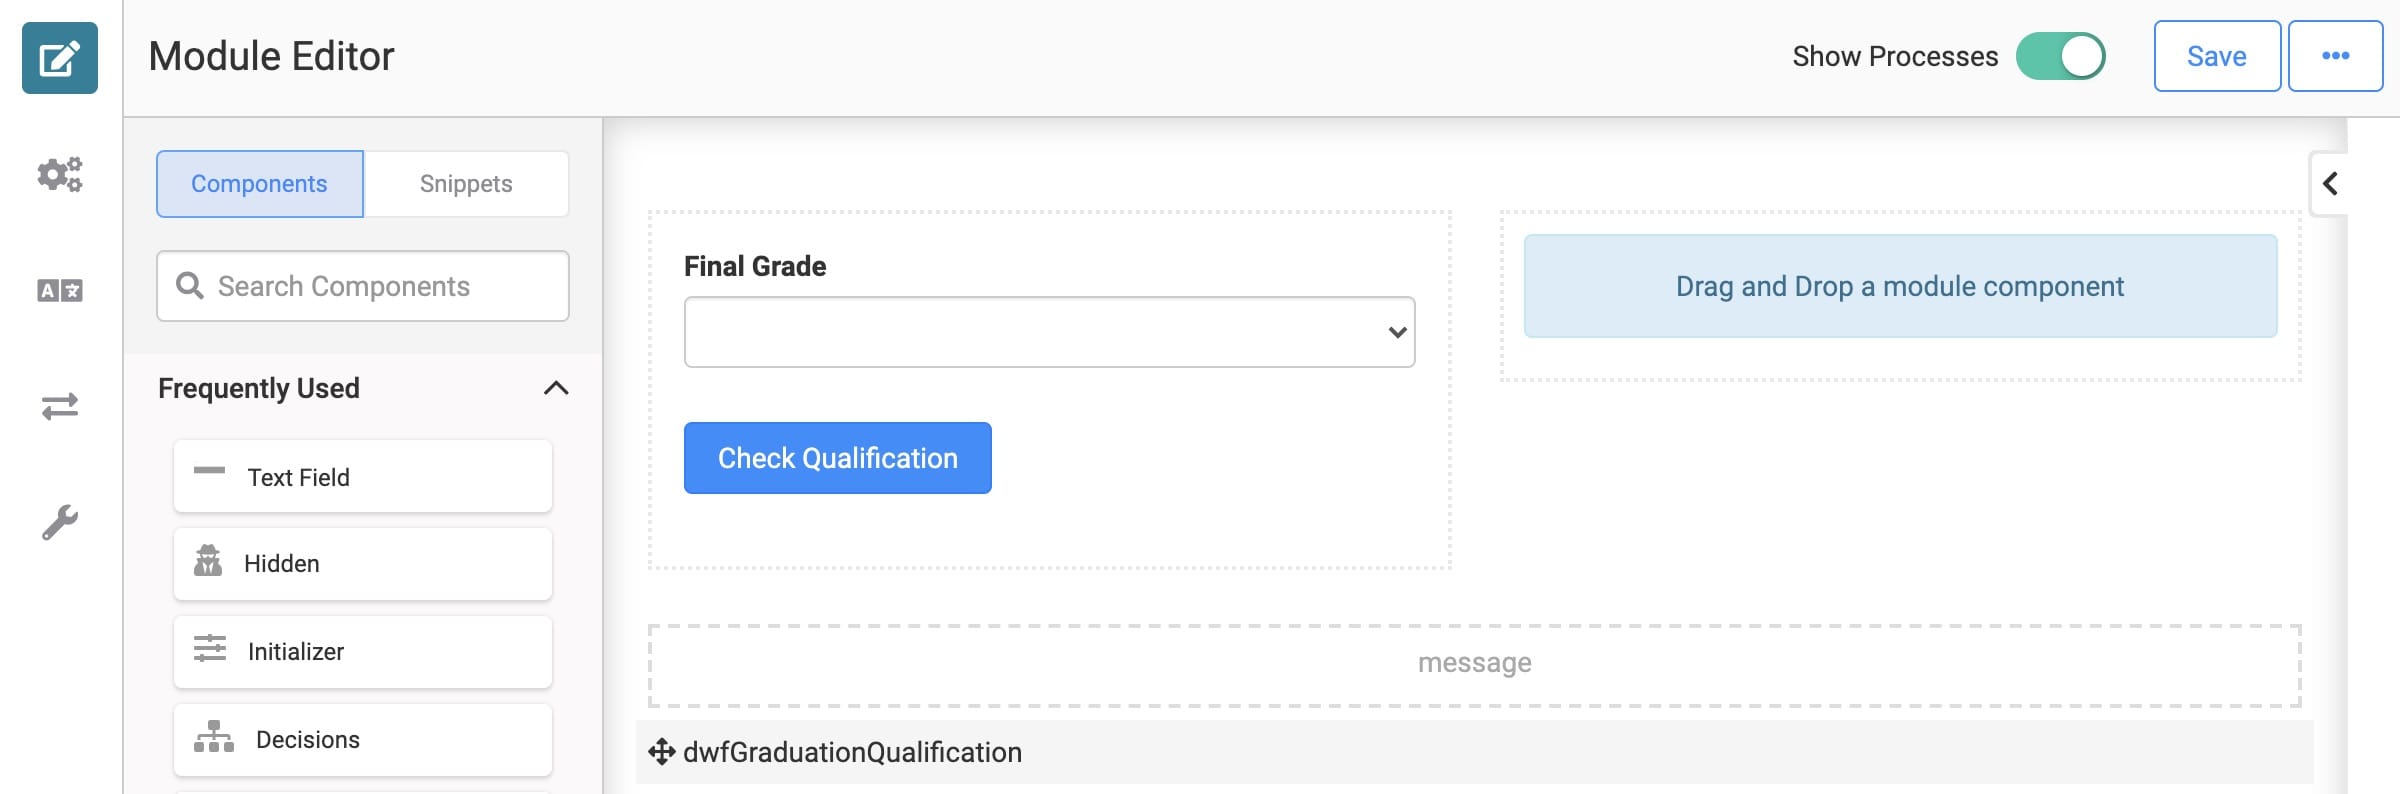
Here's how your module will look in the Module Builder:
Here's how the completed use case will look in Express View:
What You'll Learn
In this article, you'll learn how to use a Decision operator with an OR condition.
What You'll Need
To set up this use case, you’ll need:
1 Columns component
1 Dropdown component
1 Hidden component
1 Button component
1 Data Workflow component
To set up your Data Workflow, you'll need:
1 Input operator
1 Decision operator
2 Create Value operators
2 Output operators
These instructions assume you have a new module open, saved, and with a title.
Configuration
Configure the Columns Component
Your columns act as containers for the components that follow.
Drag and drop a Columns component onto your canvas.
Enter colGrades in the Property ID field.
Select the Column Layout showing 2 evenly spaced columns.
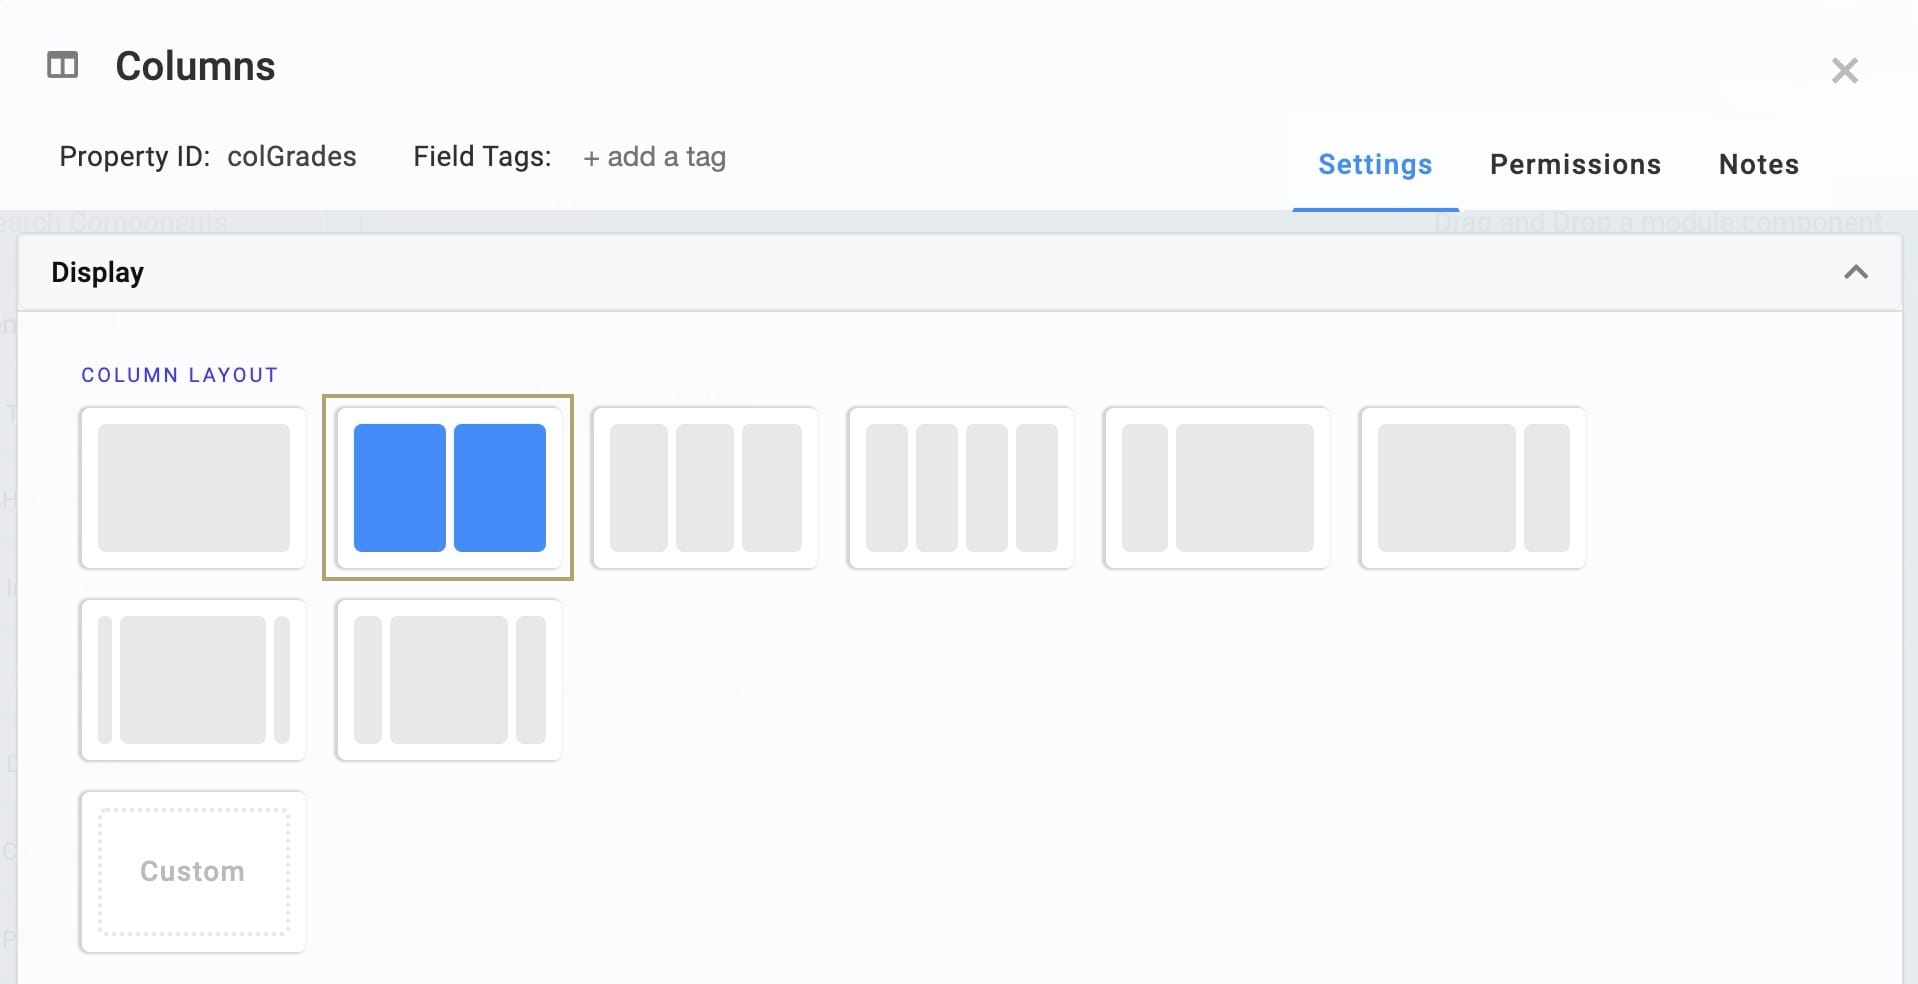
Click Save.
Configure the Dropdown Component
Next, let's give your end-users a way to select their grade. You'll use a Dropdown component for that.
Drag and drop a Dropdown component onto your canvas. Place your Dropdown in your left-hand column.
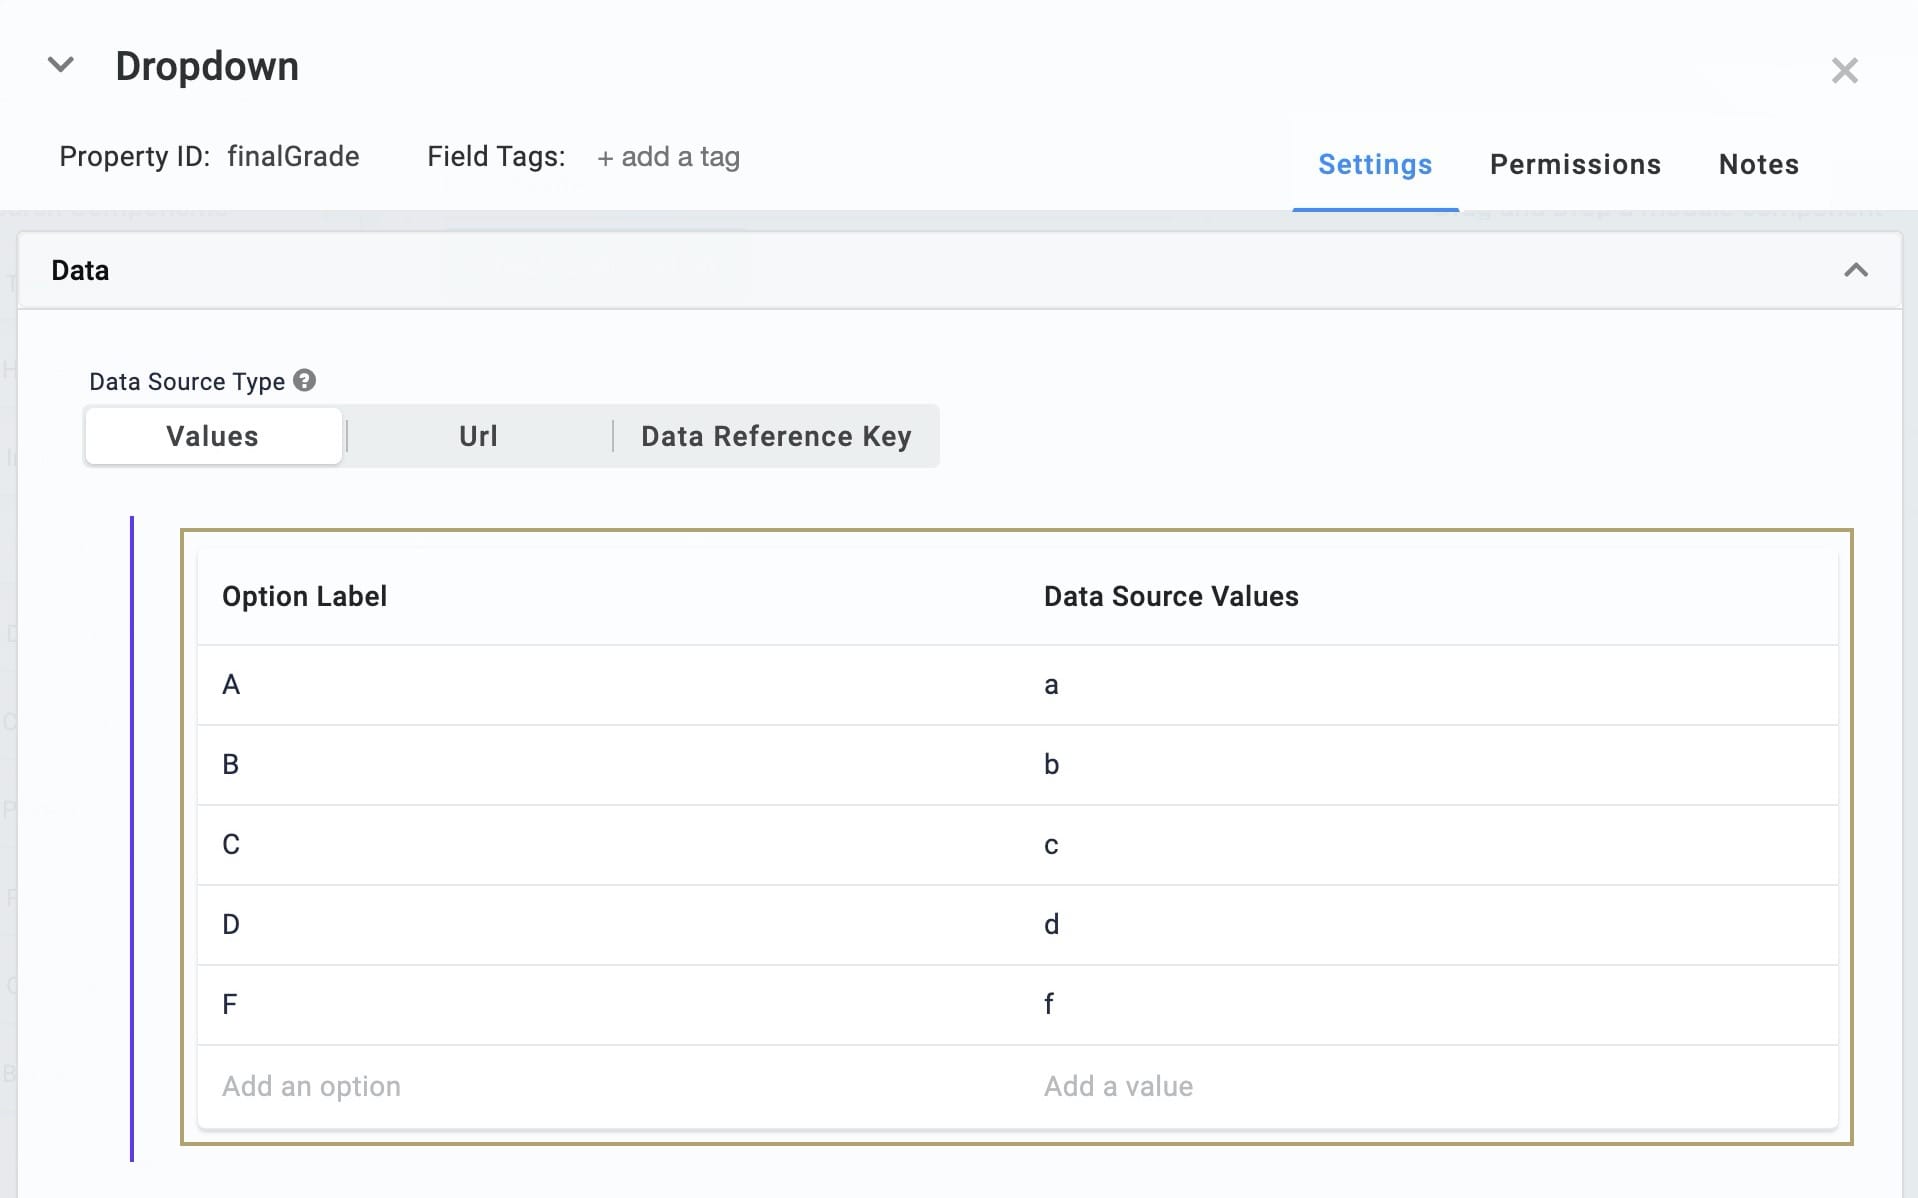
Enter finalGrade in the Property ID field.
Enter Final Grade in the Label Text field.
Set your Option Label and Data Source Values as shown below:
Option Label
Data Source Values
A
a
B
b
C
c
D
d
E
e
F
f
Click Save.
Configure the Hidden Component
Before you can configure your Data Workflow, you'll need a place to store its output. For that, you'll use a Hidden component. This shows as a pop-up message once your Data Workflow has run.
Drag and drop a Hidden component onto your canvas. Place your Hidden component beneath your columns.
Enter message in the Property ID and Canvas Label Text fields.
Click Save.
Configure the Data Workflow Component
Now let's add your Data Workflow component.
Drag and drop a Data Workflow onto your canvas. Place your Data Workflow below your columns.
Enter dwfGraduationQualification in the Canvas Label Text and Property Name fields.
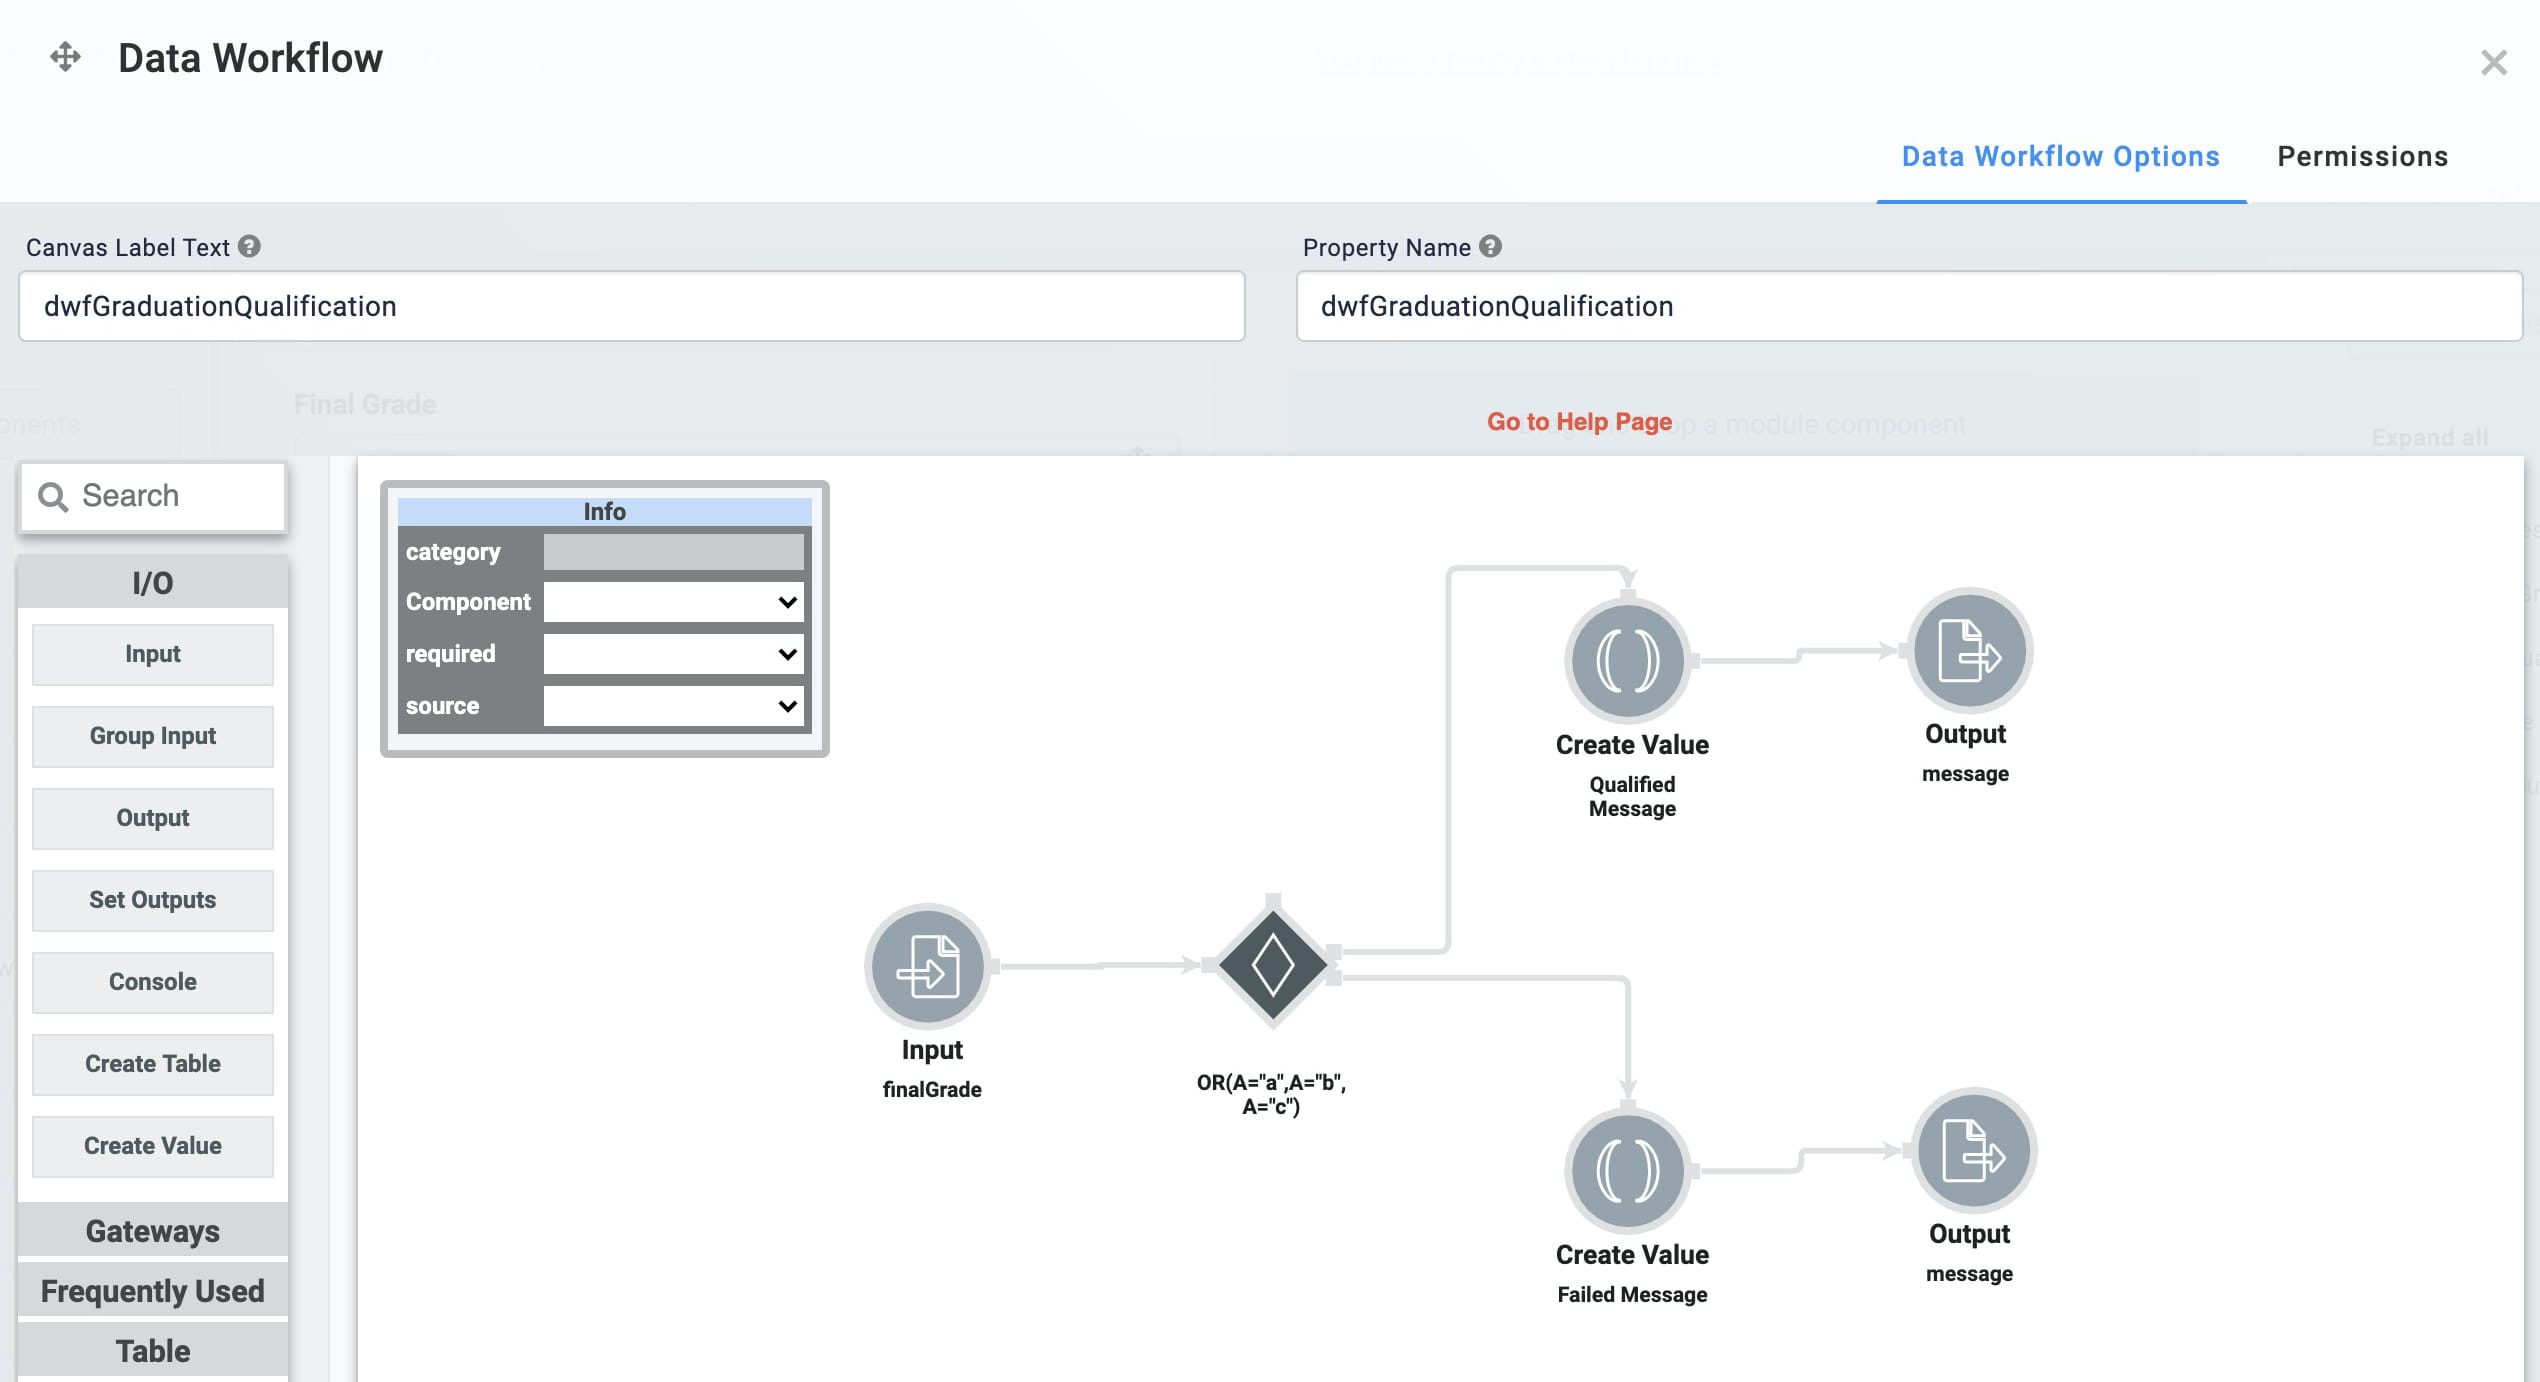
Configure the Input Operator
Drag and drop an Input operator onto your Data Workflow canvas.
Configure the Input operator's Info window as follows:
Setting
Value
Category
Input
Component
finalGrade
Required
Yes
Source
Default
Configure the Decision Operator
Drag and drop a Decision operator onto your Data Workflow canvas.
Configure the Decision operator's Info window as follows:
Setting
Value
Category
Decision
Input List
finalGrade
Condition
OR(A="a",A="b",A="c")
Connect the output port (right) of the Input operator to the input port (left) of the Decision operator.
Configure the First Create Value Operator
Drag and drop a Create Value operator onto your Data Workflow canvas.
Configure the Create Value operator's Info window as follows:
Setting
Value
Category
Create Value
Label
Qualified Message
Expression/Value
"Qualified for Graduation!"
Connect the upper output port (right) of the Decision operator to the top port of the Qualified Message Create Value operator.
Configure the First Output Operator
Drag and drop an Output operator onto your Data Workflow canvas.
Configure the Output operator's Info window as follows:
Setting
Value
Category
Output
Component
message
Action
popMessage
Connect the output port (right) of the Qualified Message Create Value operator to the input port (left) of the message Output operator.
Configure the Second Create Value Operator
Drag and drop a second Create Value operator onto your Data Workflow canvas.
Configure the Create Value operator's Info window as follows:
Setting
Value
Category
Create Value
Label
Failed Message
Expression/Value
"Does not qualify for Graduation."
Connect the lower output port (right) of the Decision operator to the top port of the Failed Message Create Value operator.
Configure the Second Output Operator
Drag and drop a second Output operator onto your Data Workflow canvas.
Configure the Output operator's Info window as follows:
Setting
Value
Category
Output
Component
message
Action
popMessage
Connect the output port (right) of the Failed Message Create Value operator to the input port (left) of the second message Output operator.
Click Save.
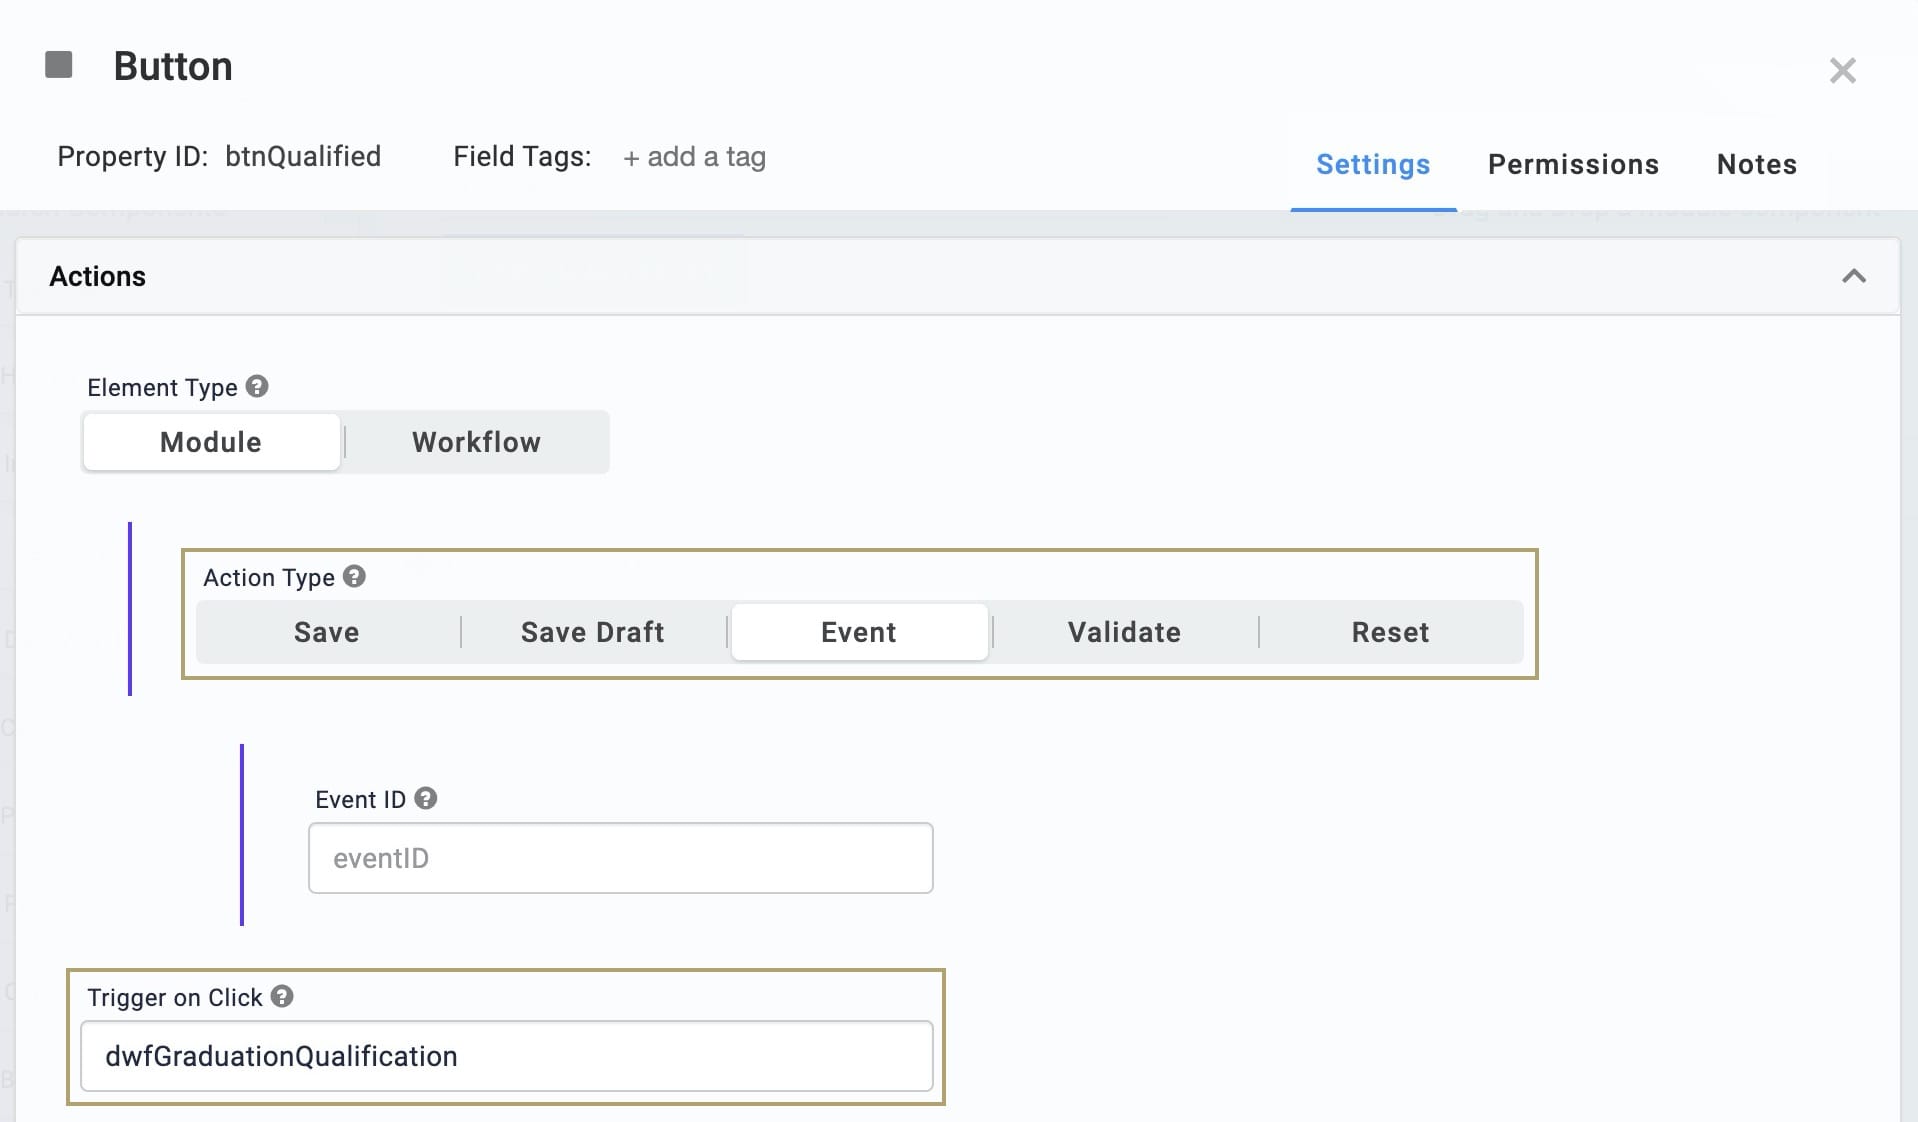
Configure the Button Component
Finally, let's add a way for your end-users to trigger the operator. You'll use a Button component for that.
Drag and drop a Button component onto your canvas. Place your button below your Dropdown component.
Enter btnQualified in the Property ID field.
Enter Check Qualification in the Label Text field.
Select Event as the Action Type.
Enter dwfGraduationQualification in the Trigger on Click field.
Click Save.
Save your module.
Now you can test your data workflow. Preview your module in Express View and select a grade. When you click your Check Qualification button, you'll see if the selected grade qualifies for graduation.
.gif)
Lab
You can view this complete use case here: https://training.unqork.io/#/form/601996c42b56d8025c33caa9/edit.