Modularizing applications increases system reliability and scalability while reducing complexity. To modularize your applications, separate them into small, reusable modules by patterns in your configuration. Designing these modules to function independently lets you import them into other modules to execute specific application functionality. For example, you might have a search bar that displays on multiple pages of your application. Instead of implementing multiple search bar modules, a single, reusable search bar module is built instead.
Identifying Configuration Patterns
Modularizing an application requires identifying repeating patterns and shared functionalities. For example, a single drop-down component or a search field might be required across multiple modules. Identifying these similarities lets you build efficient, scalable applications.
When evaluating your configuration for modularity, consider the following:
Does the same header exist throughout the application?
Is the footer identical across all modules?
Is the same navigation required in different locations?
If a functionality repeats, build it into a function-specific module.
Modularization Example
Building the following application without modularity requires three dashboards and 18 individual modules. By identifying overlapping functions, you can consolidate these elements into reusable components.
Dashboard Requirements
Dashboard 1: Header, side navigation, search, filtering, inbox dashboard (grid and content), and footer.
Dashboard 2: Header, side navigation, search, inbox dashboard (grid and KPIs), and footer.
Dashboard 3: Header, side navigation, progress bar, search, filtering, inbox dashboard (grid and KPIs), and footer.
Shared Functionality
The similarities between these dashboards allow for the creation of eight function-specific modules:
Header
Footer
Navigation
Search
Filter
Progress bar
Inbox dashboard
KPI dashboard
Creating Reusable Modules
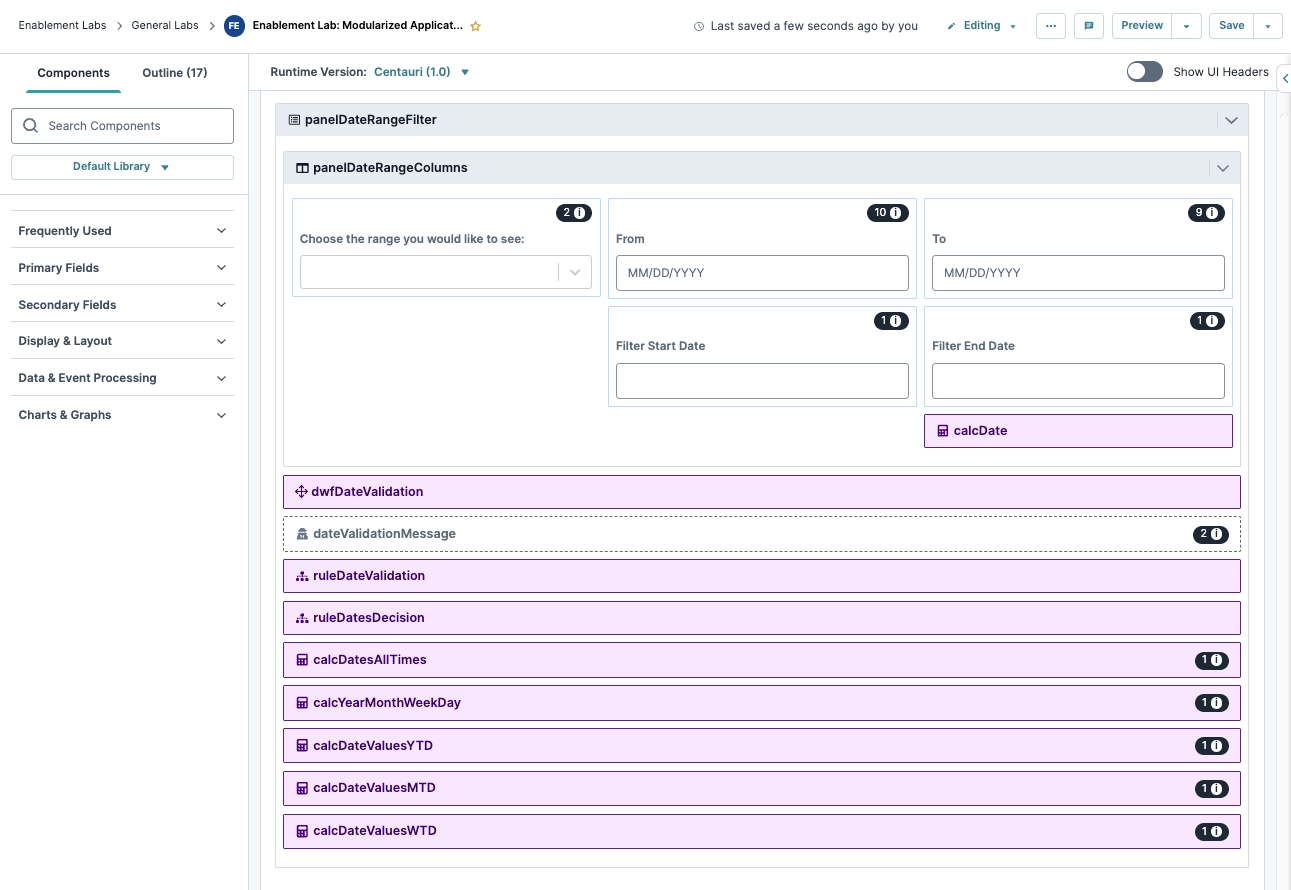
Using the filter function example, consider modules designed to filter information by date. To ensure reusability, this module must function independently of other modules. After configuration, Creators can import the date filter module into another module.
Naming Conventions and Property IDs
Maintain strict naming conventions for all modules and components. Names must be clear and specific to their functionality to avoid configuration conflicts.
Duplicate component names or Property IDs prevent successful module imports. For example, if two modules contain a Plug-In component with the Property ID of
pluginGetSubmissions, the platform returns a duplicate component name error during the import process. Ensure every component in your reusable modules has a unique Property ID.
Conceptual Module
The following images illustrate a completed function-specific module. This example is conceptual and intended to demonstrate the structure of a modularized application.
Module Builder View: This view displays the logic and components of the standalone filter module.
Express View: Express View displays the module as it appears to an end-user.

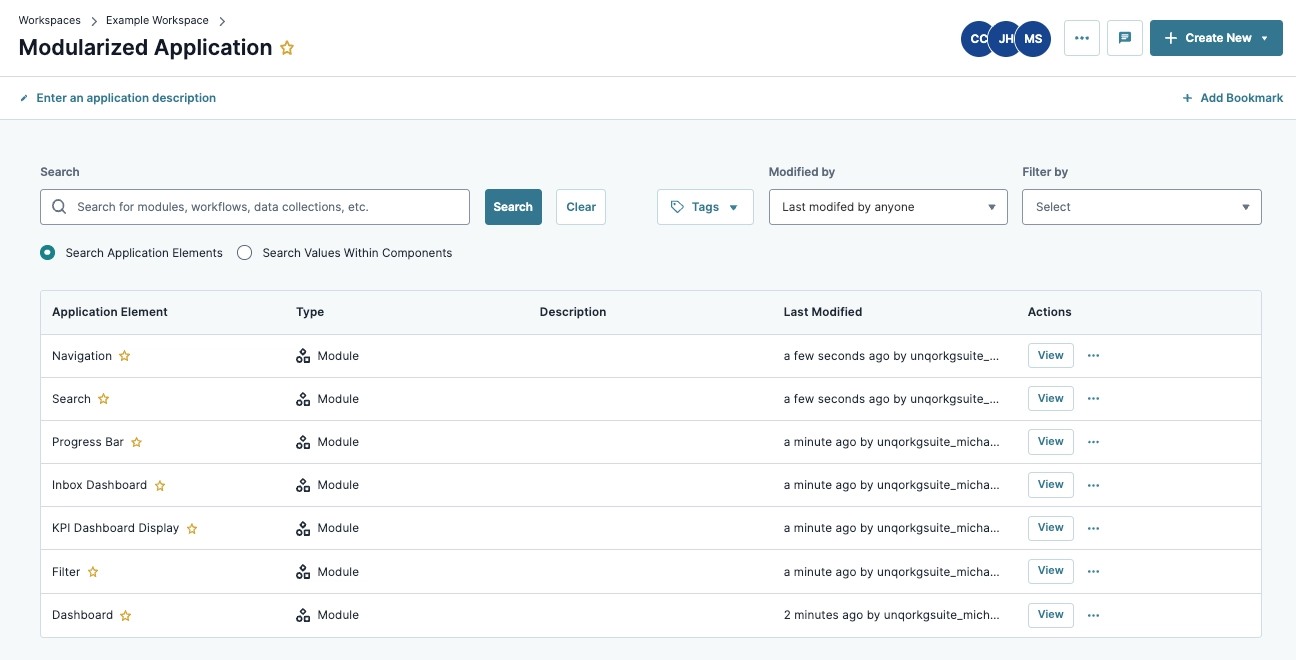
Module List View: This list view displays all function-specific modules required for the application. Each module and its internal components use unique naming conventions to support seamless integration.
Building an Application Using Modularity
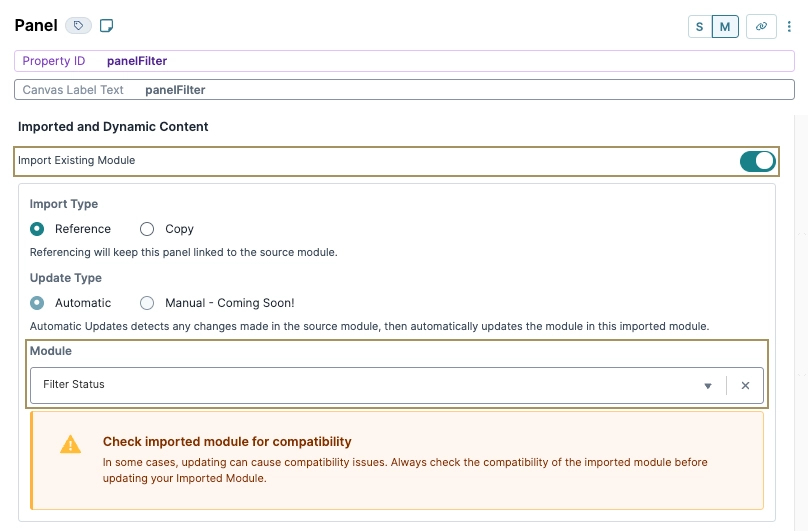
To import a module into another module, use the Panel component to reference another module by its name. For example, you can import a module named Filter Status into Dashboard 1.
These instructions assume you have a module open, saved, and with a title.
To import modules with content that must be refreshed, view our Dynamic Refresh article.
Importing a Module Using a Panel Component
Configure a Panel component to reference an external module. By default, the Panel component's Update Type is set to Automatic, ensuring any changes made to the source module automatically reflect in the host module.
To set up the Panel component:
In the Module Builder, drag and drop a Panel component onto your canvas.
In the Property ID and Canvas Label Text fields, enter a unique and descriptive ID. For example,
panelFilter.Set Import Module to
 (ON).
(ON).From the Module drop-down, select the module you'd like to import. For this example, select Filter Status.
Click Save Component.
Save your module.
After saving, the imported module’s module ID displays below the component's Property ID. Select the Preview Module link to open the imported module in a new tab for editing.
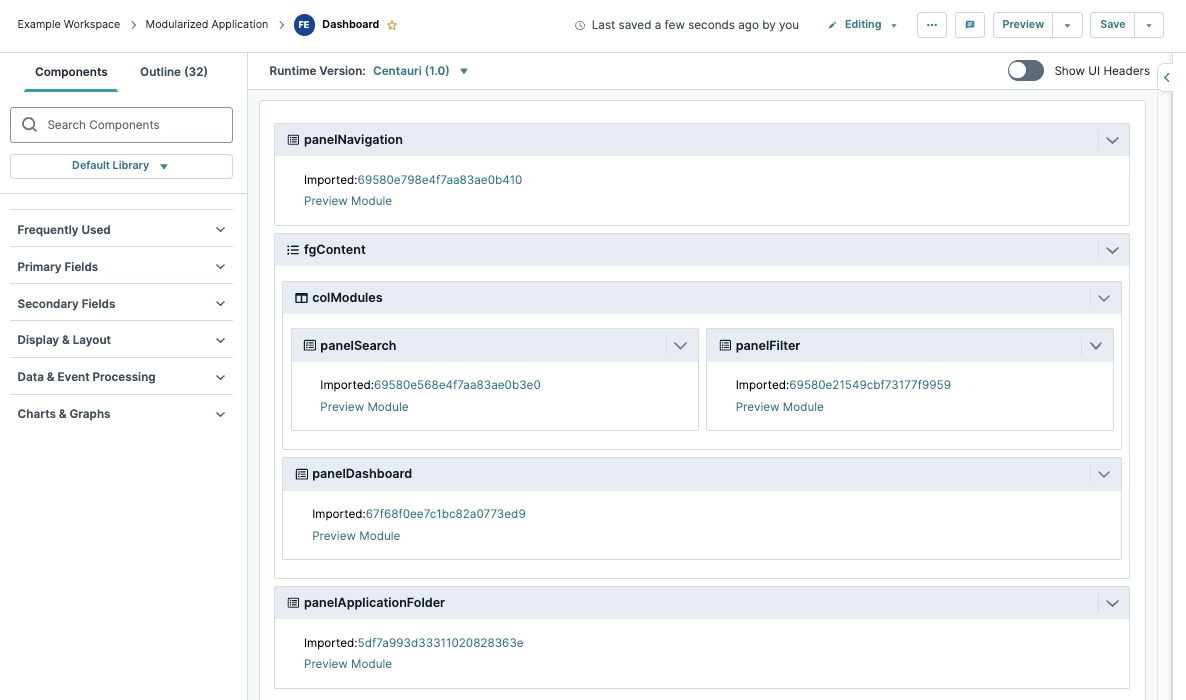
Modularized Dashboard
When all reusable modules are imported into Panel components, the host dashboard contains minimal unique configuration. Most of the dashboard's functionality is derived from function-specific modules:
Modularization eliminates redundant configurations and improves application maintainability by centralizing core logic in dedicated modules.