How to: Reference Field Tags in Decisions
Overview
Every Unqork component has a Field Tags setting. Field Tags are useful not only to organize and group components, but also as a way to target grouped fields using logic components. Imagine you want to conditionally show or hide several components in your module based on a given input. One option is to list each component's Property ID as an output in a Decisions component, then set your show/hide criteria on a component-by-component basis. Another option is to apply the same Field Tag to all the fields you want to show or hide together. Then, set the Field Tag as the output in your Decisions component. With this approach, you can apply your show/hide criteria to every component grouped under the Field Tag, instead of listing the components individually. In this article, you'll see how to configure a Decisions component to show or hide fields by Field Tag.
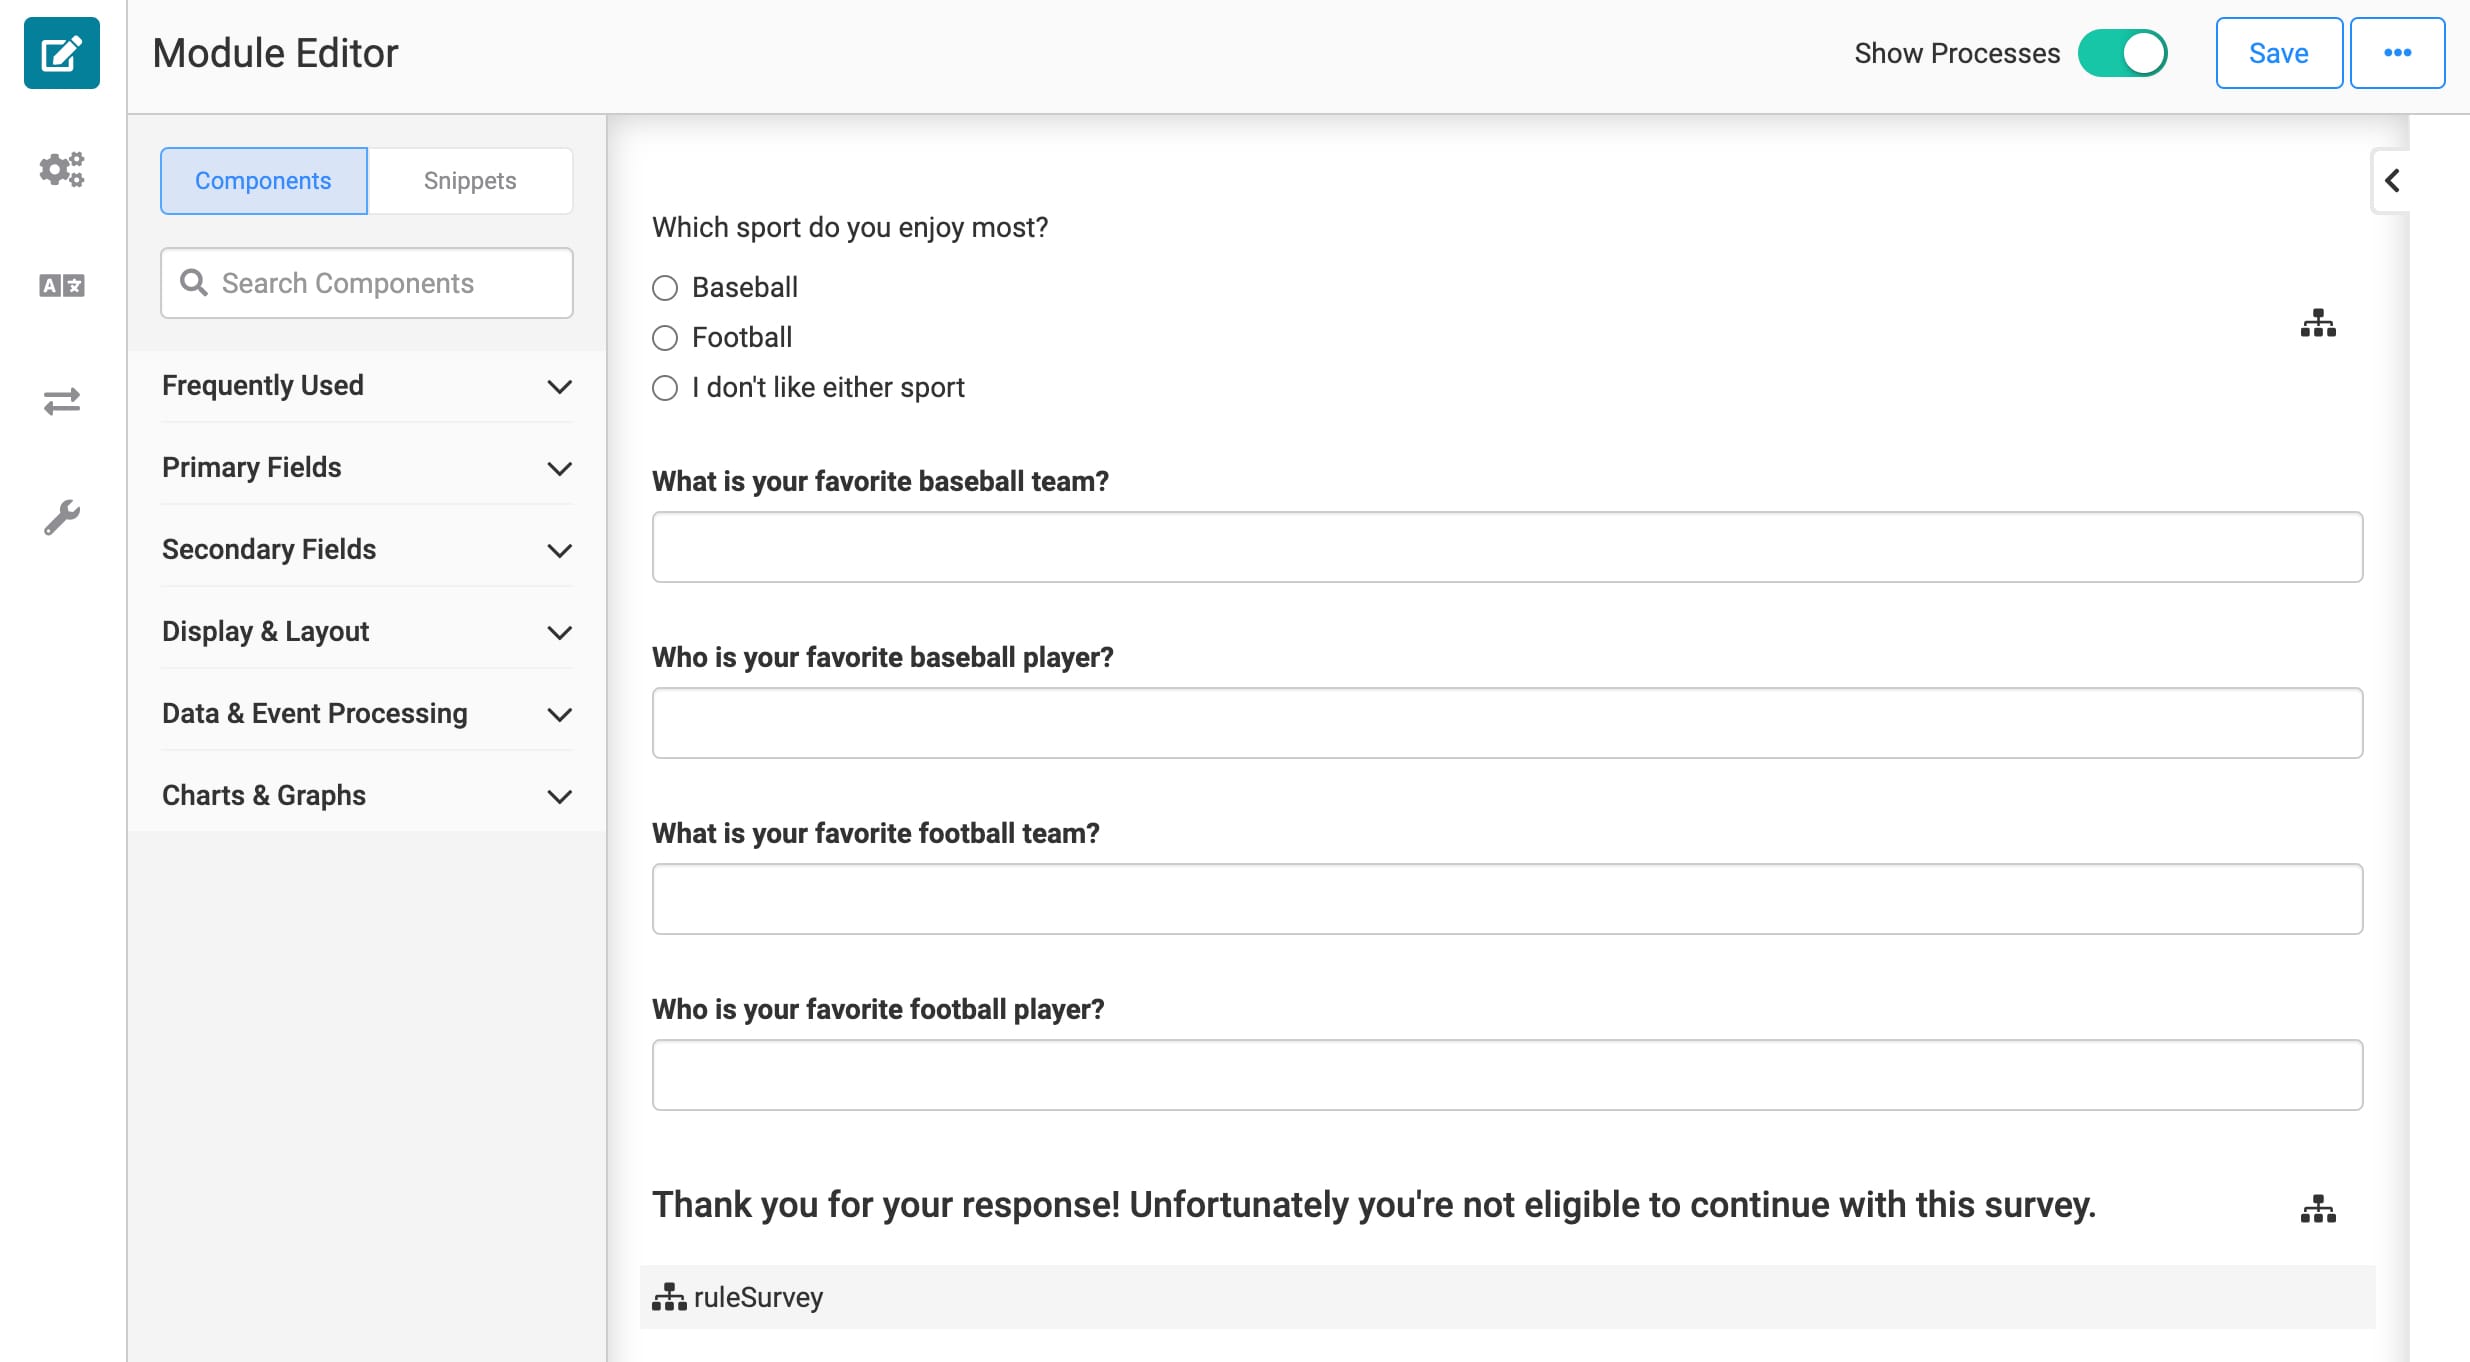
Here's how the completed configuration looks in the Module Builder:
And here's how the completed configuration works in Express View:
What You'll Learn
In this
-
Reference Field Tags in Decisions.
-
Conditionally show or hide fields based on their Field Tag.
What You'll Need
For this configuration, you'll need:
-
1 Radio Buttons component
-
4 Text Field components
-
1 HTML Element component
-
1 Decisions component
Configure the Radio Buttons Component
Imagine you work for an advertising firm and want to survey end-users about their favorite teams and players in baseball and football. You're only interested in responses from people who enjoy baseball or football. So, you'll start by asking which sport they enjoy most.
This Radio Buttons component is the input for your Decisions component. Based on the end-user's input, the Decisions component shows fields with a tagBaseball Field Tag, fields with a tagFootball Field Tag, or a thank you message.
| 1. | Drag and drop a Radio Buttons component onto your canvas. |
| 2. | Enter favSport in the Property ID. |
| 3. | Enter Which sport do you enjoy most? in the Label Text. |
| 4. | In the Values table, enter the following: |
| Option Label | Value to Store in Submission Data |
|---|---|
|
Baseball |
baseball |
|
Football |
football |
|
I don't like either sport |
neither |
| 5. | Click Save. |
Configure the Text Field Components
Next you'll add four Text Field components, where the end-user can answer follow-up questions. Two Text Fields get a Field Tag of tagBaseball and the other two get the Field Tag tagFootball. For example:

| 1. | Drag and drop 4 Text Field components onto your canvas, placing them below the Radio Buttons component. |
| 2. | Enter the Property IDs, Field Tags, and Label Text for each Text Field as follows: |
| Property ID | Field Tag | Label Text |
|---|---|---|
|
baseballTeam |
tagBaseball |
What is your favorite baseball team? |
|
baseballPlayer |
tagBaseball |
Who is your favorite baseball player? |
|
footballTeam |
tagFootball |
What is your favorite football team? |
|
footballPlayer |
tagFootball |
Who is your favorite football player? |
| 3. | Set the Hide Field toggle to ON for each Text Field component. |
| 4. | Save each Text Field as you add it. |
Configure the HTML Element Component
Now you'll create a short message to display to end-users who aren't eligible to answer the follow-up questions.
| 1. | Drag and drop an HTML Element component onto your canvas, placing it below the Text Fields. |
| 2. | Enter htmlThanks in the Property ID field. |
| 3. | Enter h4 in the HTML Tag field. |
| 4. | Enter in the Thank you for your response! Unfortunately you're not eligible to continue with this survey. in the Content field. |
| 5. | Set the Hide Element toggle to ON. |
| 6. | Click Save. |
Configure the Decisions Component
Now, set the show/hide logic in your Decisions component. The if/then scenarios are:
-
If the end-user enjoys baseball most, then show the fields with the tagBaseball Field Tag.
-
If the end-user enjoys football most, then show the fields with the tagFootball Field Tag.
-
If the end-user doesn't enjoy either sport, then show the HTML Element component's thank you message.
Remember, you configured the Text Field and HTML Element components to be hidden by default. So, you can use the Output Type of visible to conditionally show select fields.
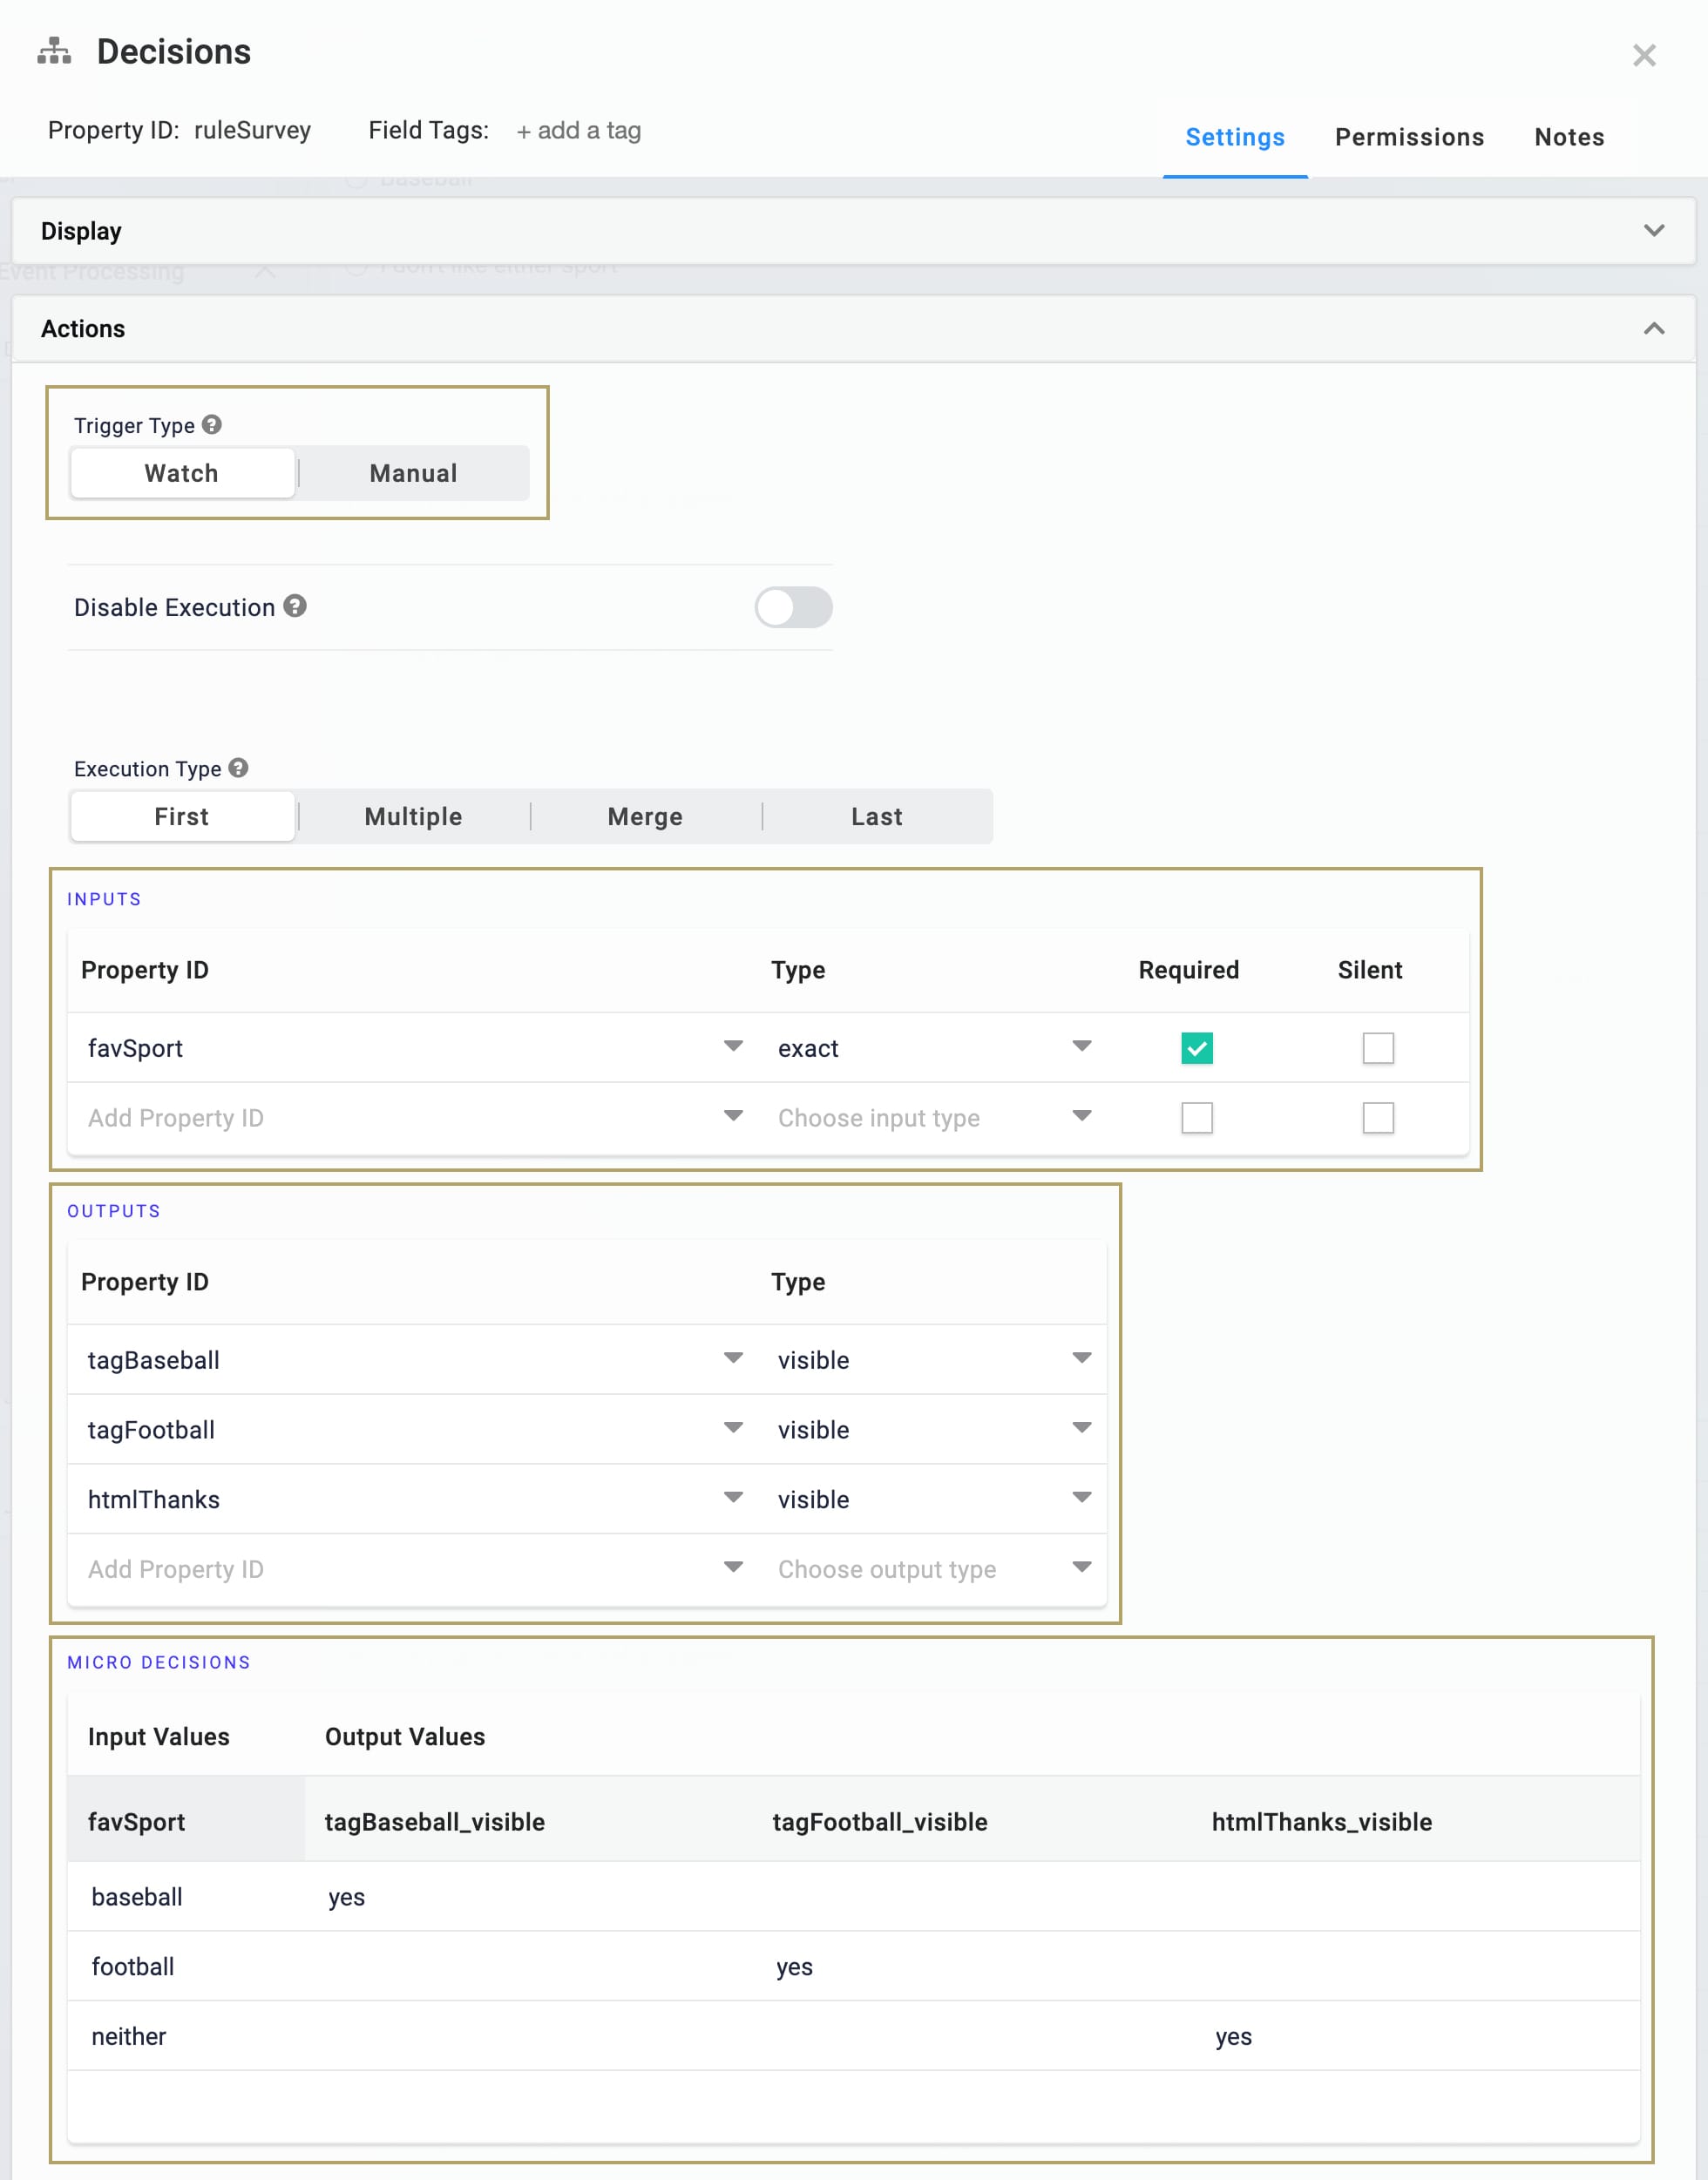
| 1. | Drag and drop a Decisions component onto your canvas, placing it below the HTML Element. |
| 2. | Enter ruleSurvey in the Property ID and Canvas Label Text fields. |
| 3. | Set the Trigger Type to Watch. |
| 4. | Complete the Inputs table as follows: |
| Property ID | Type | Required |
|---|---|---|
|
favSport |
exact |
Yes (selected) |
| 5. | Complete the Outputs table as follows: |
| Property ID | Type |
|---|---|
|
tagBaseball |
visible |
|
tagFootball |
visible |
|
htmlThanks |
visible |
| 6. | Complete the Micro Decisions table as follows: |
| favSport | tagBaseball_visible | tagFootball_visible | htmlThanks_visible |
|---|---|---|---|
|
baseball |
yes |
|
|
|
football |
|
yes |
|
|
neither |
|
|
yes |
| 7. | Click Save. |
| 8. | Save your module. |
Now you're ready to test out your module. Preview it in Express View and select an option from your Radio Buttons. Notice what fields are visible based on which answer you select. Your module works like this in Express View:
Lab
You can find the completed Referencing Field Tags in Decisions lab here: https://training.unqork.io/#/form/616451696920e732bb7e68f3/edit.
