Environment Administration: Adding Custom Script Using Google Tag Manager
Overview
Sometimes you might need to add custom JavaScript to your application. Using Google Tag Manager is a great solution. Here are some examples of when you might use Google Tag Manager to add custom script to your application:
-
Importing a JavaScript library or SDK (software development kit) so you can reference it in your application.
-
Embedding an analytics tracking tool, like Amplitude or Adobe Analytics.
Here's an overview of how to use Google Tag Manager to add custom scripts to your Unqork application.
|
1.
|
Create a Google Tag Manager tag that contains your custom script. |
|
2.
|
Select triggers for your tag, to ensure the tag runs where and when you need. |
|
3.
|
Link your Tag Container to your Unqork application. You'll do this in Unqork's Environment Administration. |
In this article, we'll guide you through each step.
What You'll Learn
In this article, you'll learn how to:
Creating a Google Tag Manager Tag
These instructions assume you already have a Google Tag Manager account with a Tag Container. To learn more about creating a Google Tag Manager account, see the following article on Setting Up and Installing Tag Manager: https://support.google.com/tagmanager/answer/6103696?hl=en&ref_topic=3441530#zippy=%2Cweb-pages
When you create a new Tag Container, Google Tag Manager prompts you to copy and paste the Tag Manager Snippet Script to every page of your website. Unqork performs this step for you. You only need to add the Container ID to your environment.
|
3.
|
Enter a title for your tag. |
|
4.
|
Click Tag Configuration. |
|
5.
|
Select a tag type from the Choose Tag Type options list. |
|
6.
|
Customize your Tag Configuration settings as needed. |
Before you click Save, you must set up Triggers for your tag. We'll look at how to select the right trigger type next.
Selecting Triggers for a Tag
You must add a Trigger to your tag. The Tag Triggers settings control when your tag runs. You can also control what pages of the application your tag runs on. In this section, we'll look at the Tag Trigger settings you can use to:
-
Set the tag to run on every page view.
-
Set the tag to run on every history change.
-
Set the tag to only run on specific pages.
Before we dive in, let's see why you would use different triggers, or even multiple triggers, for a single tag.
When navigating through an Unqork application, the URL might change in one of two ways:
- The part of the URL before the # symbol changes. For example going from https://trainingx.unqork.io/app/udlc-release#/ to https://trainingx.unqork.io/app/udlc-module-revisions#/. The browser views this as a true page change.
- The part of the URL after the # symbol changes. For example going from https://trainingx.unqork.io/app/udlc-release#/display/release-dashboard/ to https://trainingx.unqork.io/app/udlc-release#/display/release-view/. The browser doesn't view this as a true page change.
The default tag trigger type is Page View. But, the browser only sees the first type of URL change as a true page change/new page view. So, the default Page View tag trigger type won't count the second type of URL change as a triggering event. If you want the tag to run on every navigation event, you can use the History Change trigger type. The History Change trigger type recognizes every time the browser logs a change to the browsing history. It also recognizes every time the part of the URL after the # symbol changes.
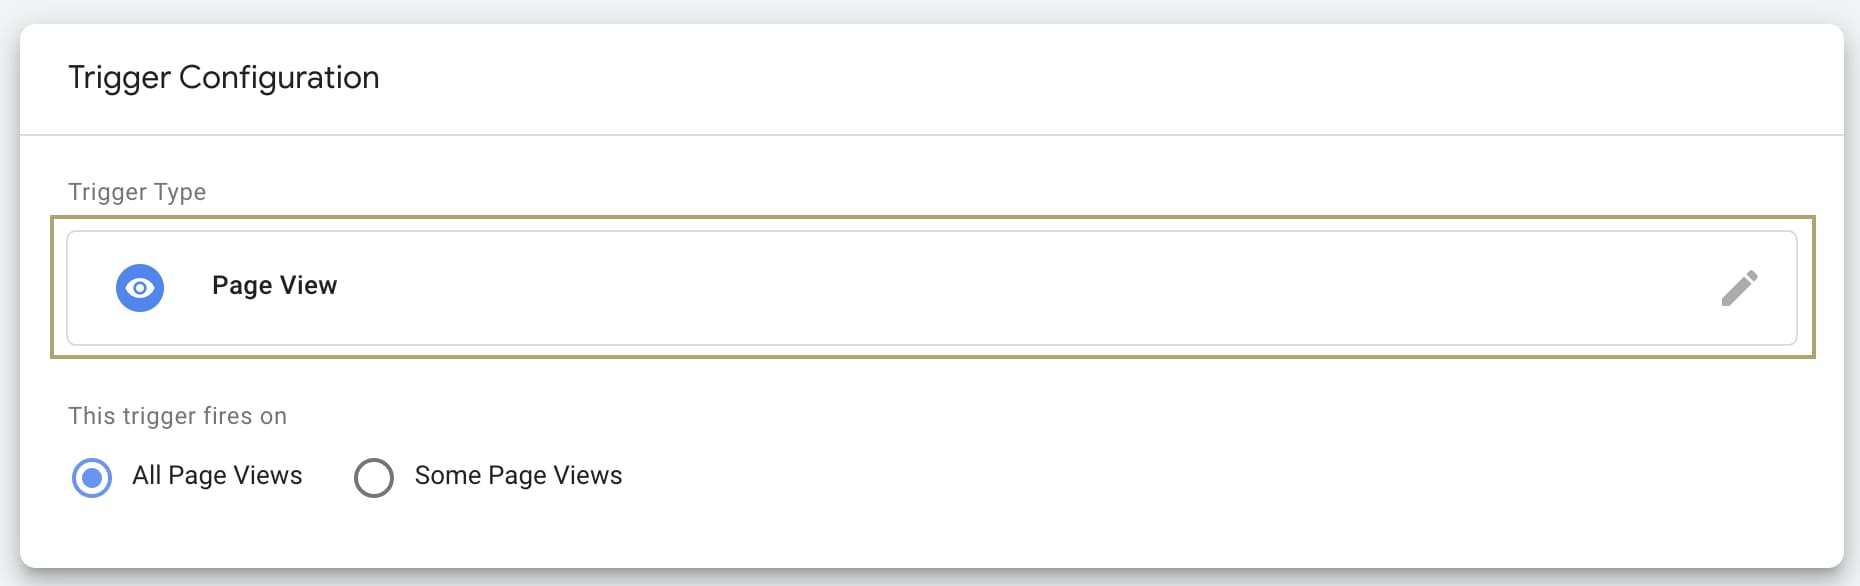
Setting the Tag to Run on Every Page View
The default Page View trigger type is a good option when it's not essential to run the tag on every navigation event. For example, loading an SDK.
To add a Page View trigger to your tag:
|
1.
|
In the New Tag modal, click Triggering. |
|
2.
|
Click the + (New Trigger) icon in the top-right corner of the Choose a Trigger panel. The Trigger Configuration panel opens. |
|
3.
|
Enter a title for your trigger. |
|
4.
|
Click Trigger Configuration. |
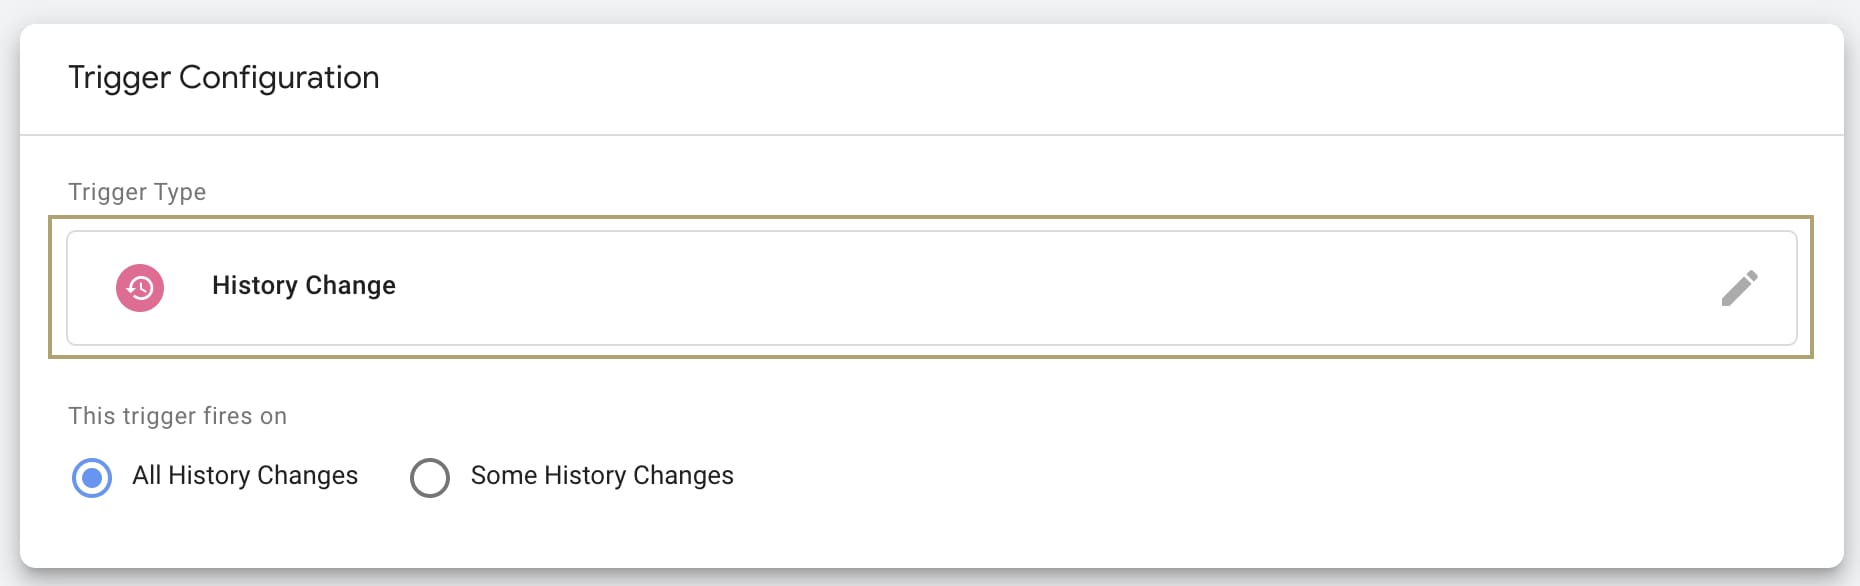
Setting the Tag to Run on Every History Change
The History Change trigger type is a good option if you must run the tag on every browsing event. For example, sections of your application where only the part of the URL after the # symbol changes on navigation.
To add a Page View trigger to your tag:
|
1.
|
In the New Tag modal, click Triggering. |
|
2.
|
Click the + (New Trigger) icon in the top-right corner of the Choose a Trigger panel. The Trigger Configuration panel opens. |
|
3.
|
Enter a title for your trigger. |
|
4.
|
Click Trigger Configuration. |
|
5.
|
Select History Change. |
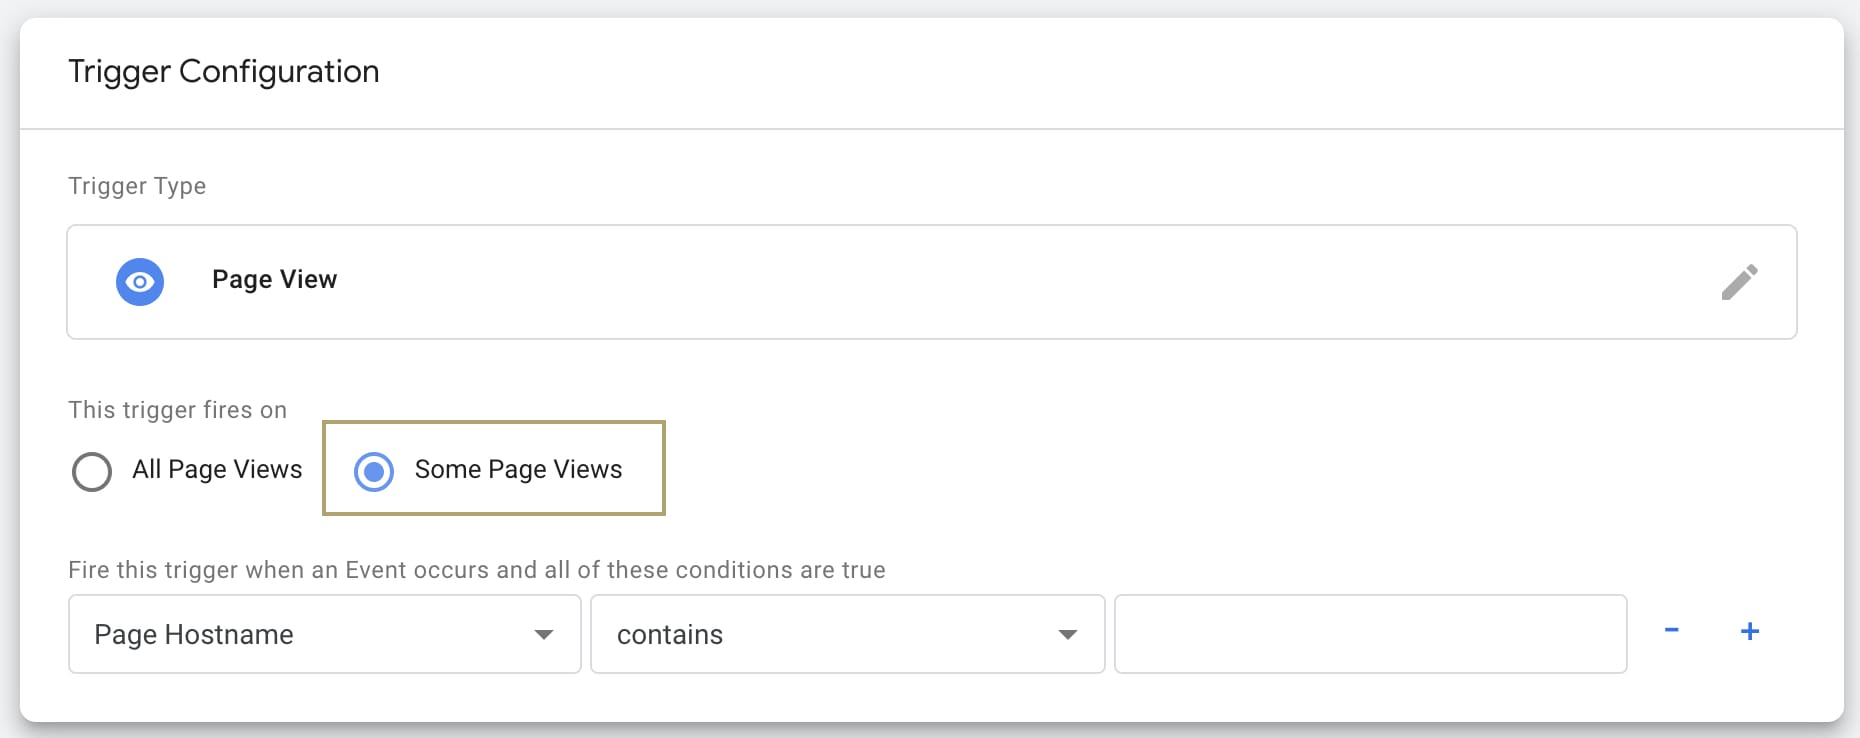
Setting the Tag to Run on Specific Pages
In some cases, you'll need to add several tags to the same Tag Container. But, you don't want all the tags to run on every page of your application. The Trigger Configuration window offers a simple solution for this problem. You can adjust the This Trigger Fires On setting so your tag only runs on some page views or history changes. Then you can create rules for what events and conditions will trigger the tag. For example, when the Page Hostname contains a specific word.
To set your tag to run on specific page views or history changes:
|
1.
|
In the New Tag modal, click Triggering. |
|
2.
|
Click the + (New Trigger) icon in the top-right corner of the Choose a Trigger panel. The Trigger Configuration panel opens. |
|
3.
|
Enter a title for your trigger. |
|
4.
|
Click Trigger Configuration. |
|
5.
|
Select a Trigger Type. In this example, Page View. |
|
6.
|
Select the Some Page Views radio button. |
|
7.
|
Define the conditions that must be met to run the trigger. |
Linking a Google Tag Manager Tag to your Unqork Application
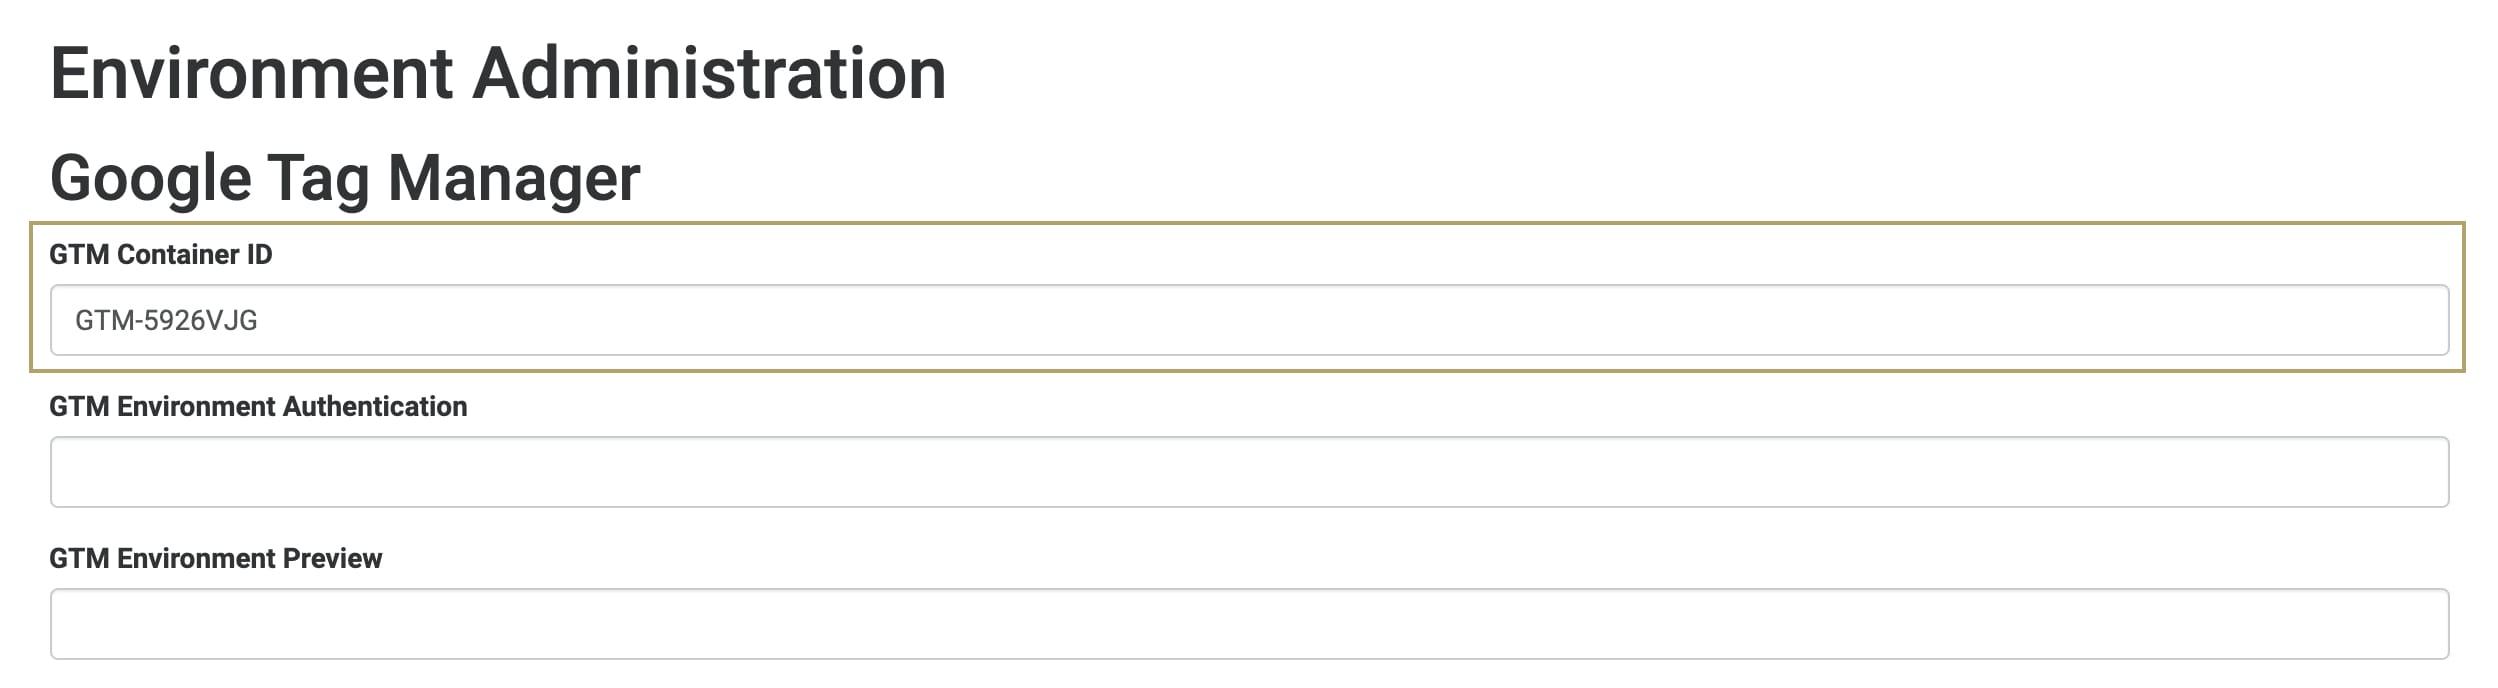
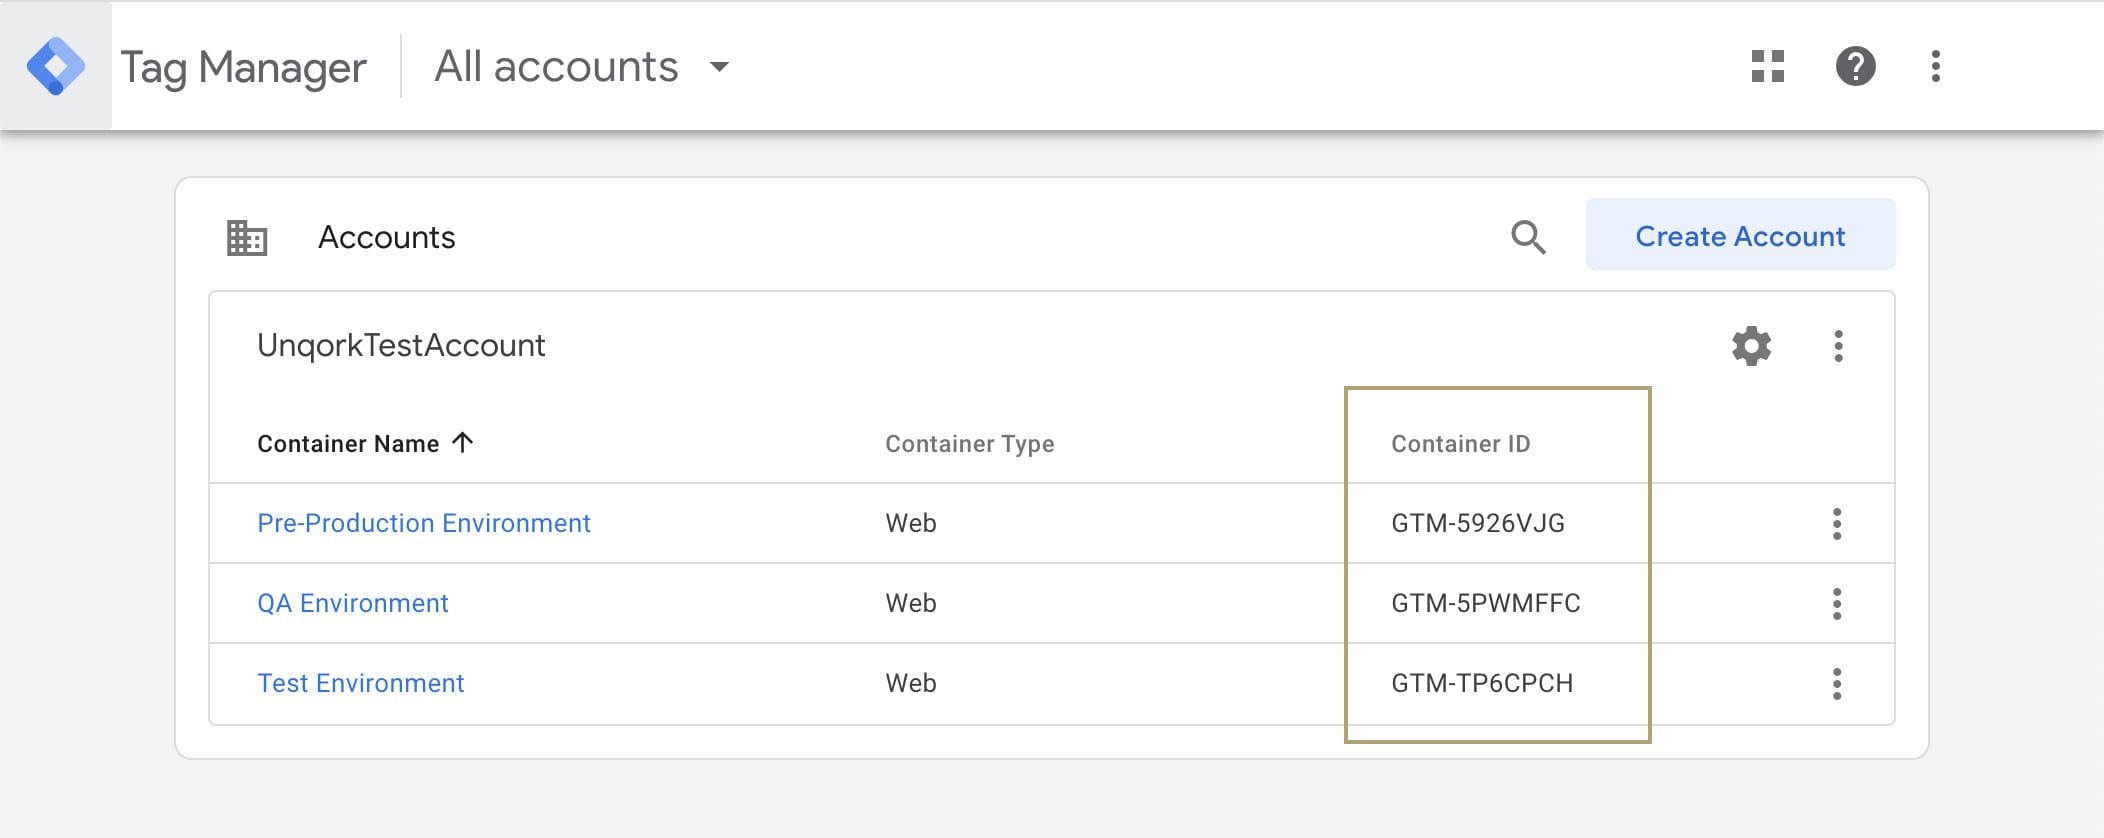
Now that you've created your tags in Google Tag Manager, you're ready to link them to your Unqork application. To do this, you'll enter your Google Tag Manager information on Unqork's Environment Administration page. You'll need to have your unique Container ID handy. You can find the Container ID on your Tag Manager homepage (https://tagmanager.google.com/#/home). For example:
To enter your Container ID on the Environment Administration page:
|
1.
|
Click the Settings drop-down at the top right of the Unqork Designer Platform. |
|
3.
|
Select Environment Administration, under Environment. |
|
4.
|
Navigate to the Google Tag Manager section of the Environment Administration page. |
|
5.
|
Enter your unique Container ID in the GTM Container ID field. |
Only use the GTM Environment Authentication and GTM Environment Preview settings if you have multiple environments set up in Google Tag Manager. To learn more about environments in Google Tag Manger, see Google Tag Manager's Environments article here: https://support.google.com/tagmanager/answer/6311518/environments?hl=en. Another solution for running different tags in different Unqork environments is to create one Tag Container per Unqork environment. Then, add the environment-specific Container ID to each Unqork environment's Environment Administration page.
|
6.
|
Click Save Changes, at the bottom of the page. |