The Schema Docs Dashboard tool displays a list of all schema modules in your environment. Schema modules act as a blueprint for the database, which is used to store submission data. The dashboard has a variety of filters to help you find a specific module. Once located, you can view the component information of that module. Finally, you can view information about that module's submission data in your browser. This lets you analyze submissions and generate a URL you can use to retrieve the data into your application.
The Schema Docs Dashboard offers a couple of filters to search for and locate your environment’s schema modules. Available filters include:
ID
Title
Once you’ve located a schema module, you can view its details. Along with the module's title, you can view the components that make up that module. The dashboard will display the following information:
Label
Property Name
Type
Required
Comments
If you have a long list of components in your schema module, you can also filter by any of the above options.
Schema Docs Dashboard Tool Access
This tool requires Creators to have specific role access in Environment Role RBAC (role-based access control) or WSRBAC (Workspaces Role-Based Access Control).
If using Environment Roles (not using WSRBAC):
Creator roles can view all data in this tool.
If using WSRBAC:
Creators can view data related to modules and workflows inside Workspaces where they have access.
If a user cannot access specific data, it likely means they do not have access to the Workspace containing the module.
Schema Module Specifications
When creating schema modules, it's best to configure them using Schema Module Specifications. The only extra step when creating a schema module is to add a schema tag. Then, configure all your components as you would, following Unqork best practices.
It's important to note that schema modules are storage vessels for your data, so only fields should exist in the modules. Do not include Decisions, Calculators, Initializers, or any other Data & Event Processing components.
Use the following steps to set up your schema modules.
These instructions assume you have a workspace open, saved, and with a title.
To create a module in your application:
From your Application page, click + Create New.
Select Module.
In the Module Name field, enter a unique name. The Module Path* field populates with a URL-friendly version of the name you enter.
From the Module Type* drop-down, select Other (data storage, rerouting, etc.).
In the Tags field, enter
schemaand press Enter (Return) on your keyboard.Click Create.
Save your module.
With this simple configuration in place, you can now configure the rest of your schema module.
Navigating the Schema Docs Dashboard
To view the details of a schema module, you'll use the Schema Docs Dashboard table. By default, the table displays 10 entries. You can click the pagination buttons below the table to display more entries.
To the right of each table entry, you’ll see a View button. Click this button and you'll find a list of all the components in your module.
Below is an example of how the dashboard looks:
Filtering the Schema Docs Dashboard
The dashboard has two filters to help you locate a schema module in your environment. You can use any or all of these filters, depending on how specific you want to be. As you enter text into the fields, the results display automatically. To clear all fields, just click the funnel icon to the far right. Let’s take a look at the filters:
Filter | Description |
|---|---|
ID | This is your module's module ID. |
Title | This is your module's title. |
Viewing Your Schema Module
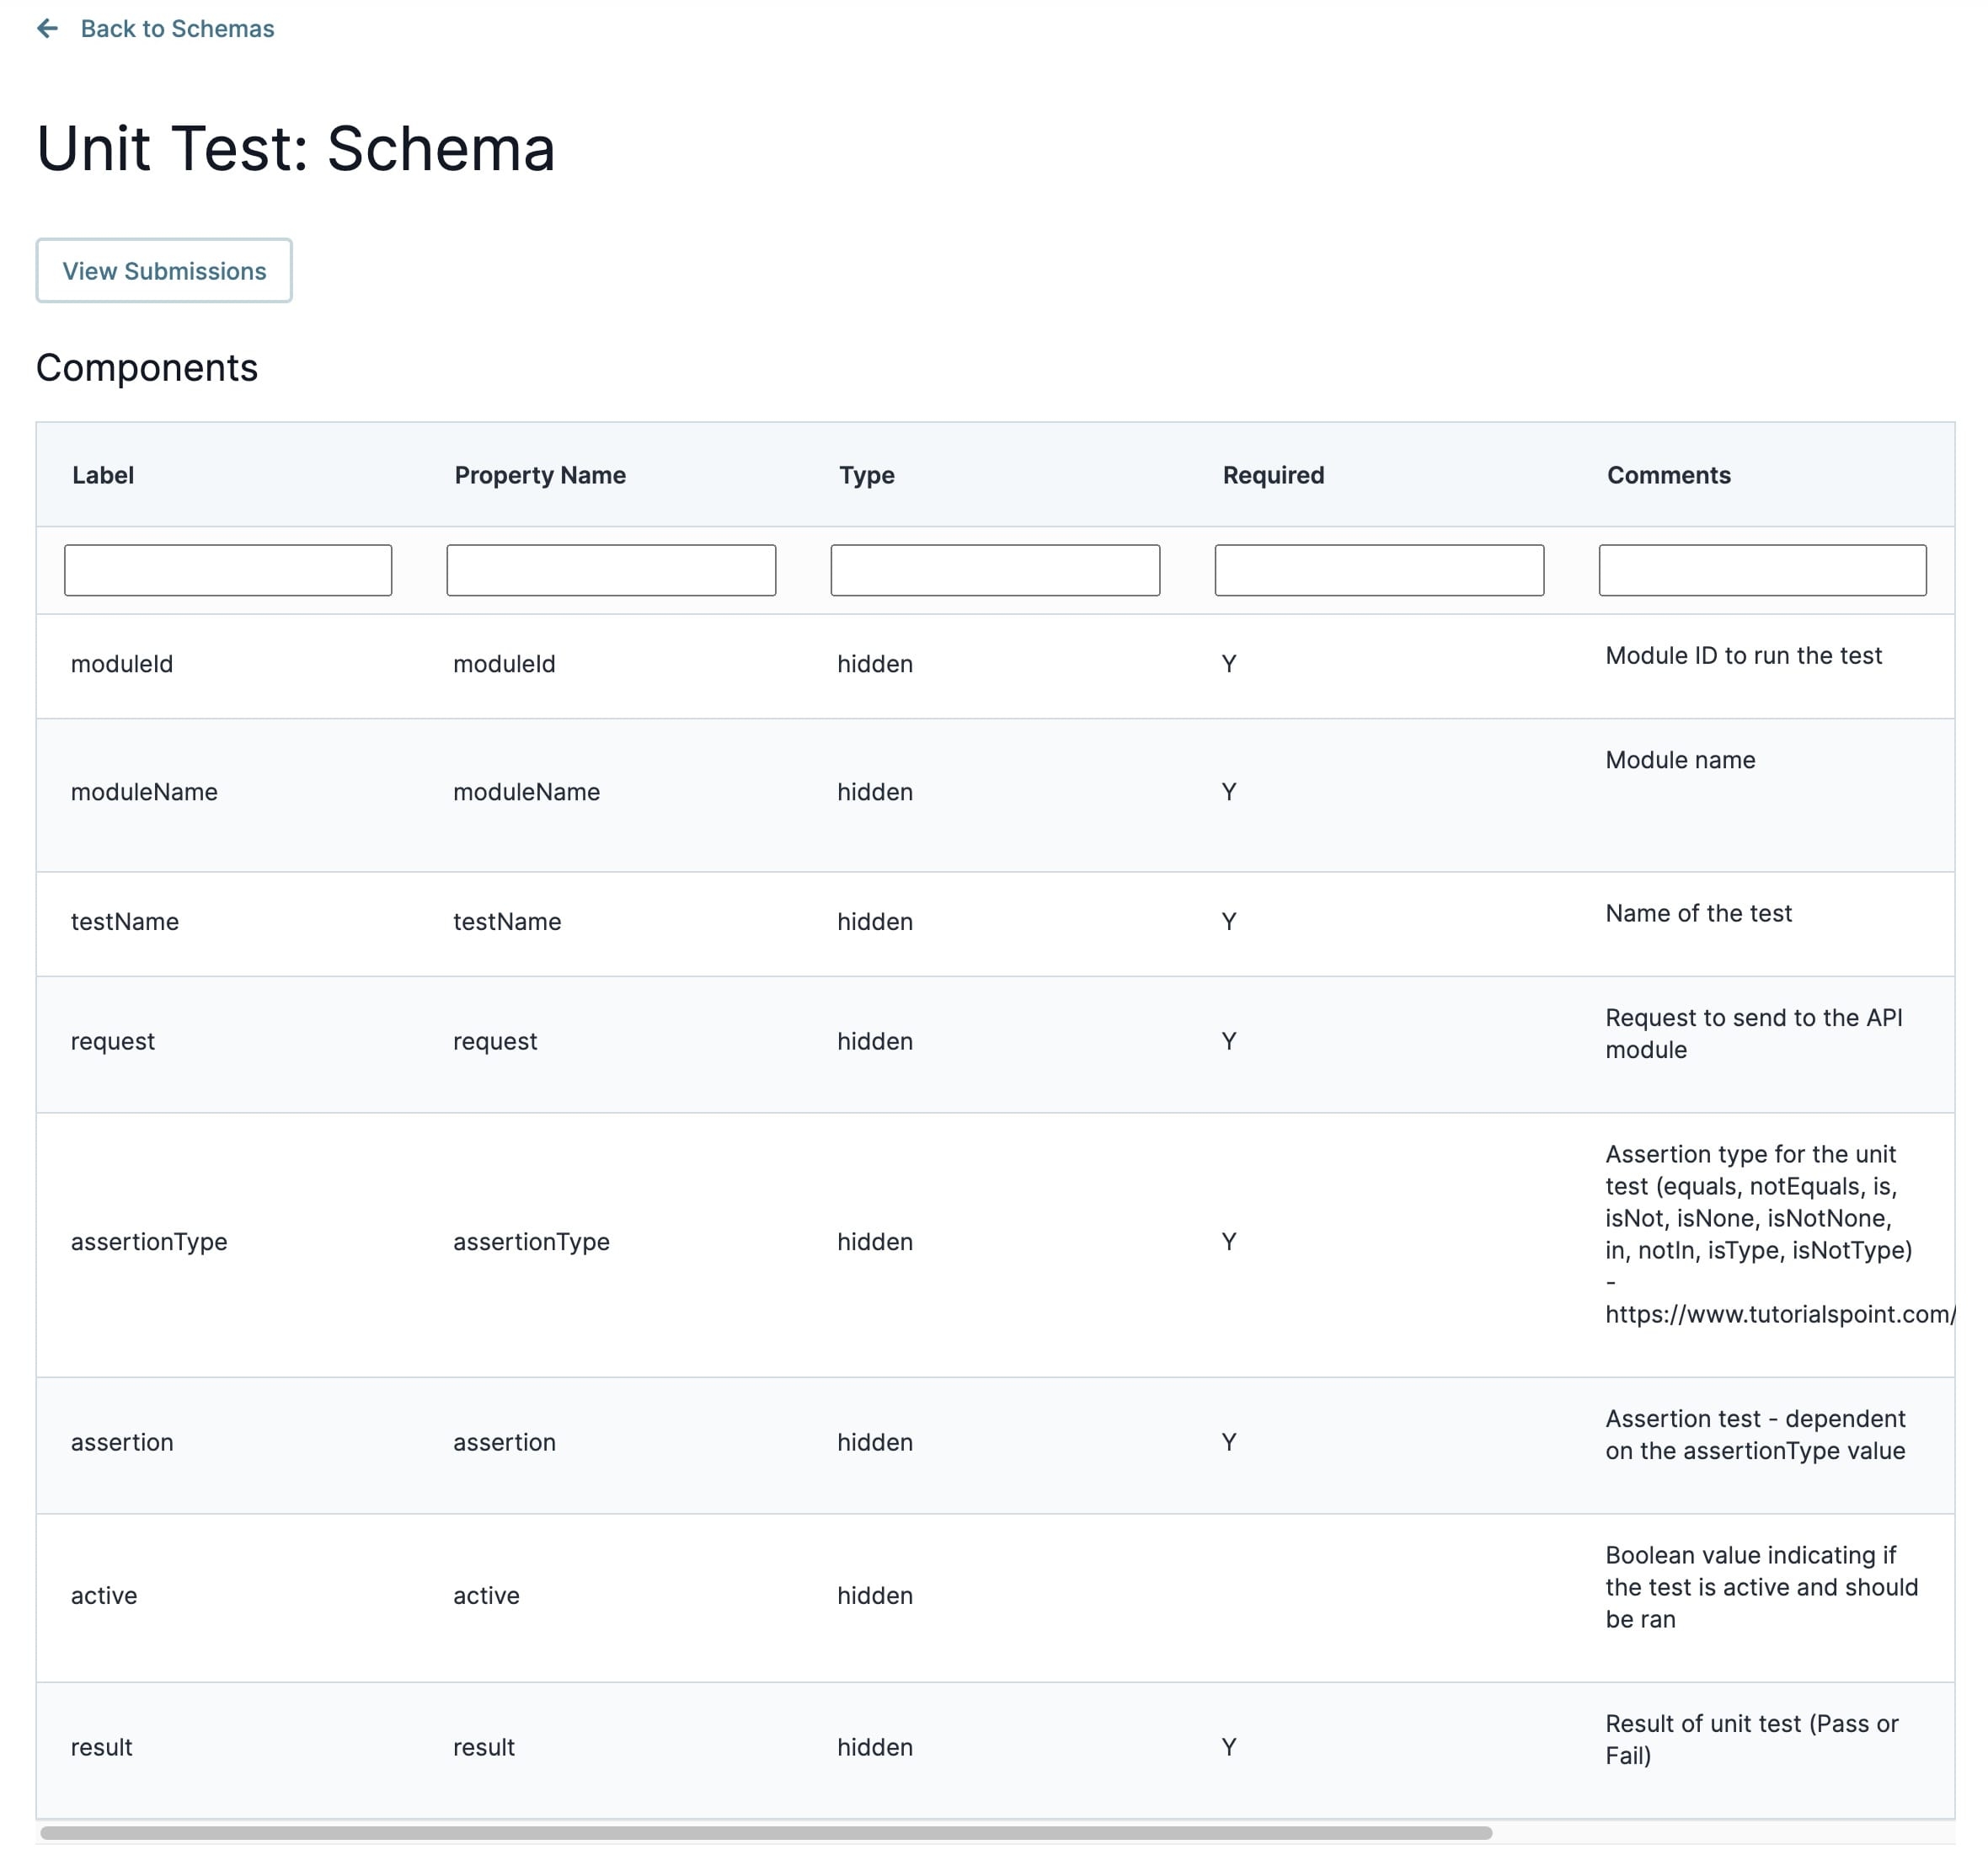
Once you’ve located your schema module, click on the module's View button to the far right. After clicking the button, you’re taken to a new page with a list of all the components inside the module. You'll also find the following information related to those components:
The component's Label or Label Text.
The component's Property Name or Property ID.
The component type.
If the component is required.
Any comments added to the component.
Here's an example of what you might see when you view your module's components:
Viewing the Module's Submissions
Below your schema module's title, you'll see a View Submissions button. When clicked, you'll see all your schema module's submissions as unformatted JSON. You'll notice from this new page's URL, this is an API call. You'll see that the URL's format is the same as a Get Module Submission API call: {your-environment}.unqork.io/fbu/uapi/modules/{moduleId}/submissions.
The advantage of generating this URL is for use in a Plug-In component's Source Data URL field. That way, you can populate a dashboard, drop-down, or any other component that uses schema data.
No matter how many submissions exist in your schema module, only 50 submissions display. You can only call these 50 submissions into your application.
The following extract is an example of what you might see after clicking View Submissions:
To format the JSON neatly in your browser, you can install a JSON Formatter Chrome extension.
.png)

