General component settings are configuration settings that are available across most Module Builder components. These settings typically help identify and group components, as well as control how the component is seen in Express View with RBAC. This article outlines the general settings you can use to configure your components.
For more information on component specific configuration settings, visit the Component Library landing page.
About the Configuration Window
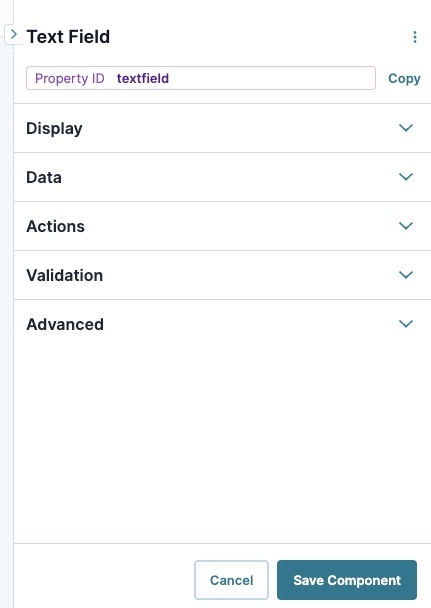
To access the general settings, you must first open the component configuration drawer. Once you add a component onto the Module Builder canvas, the configuration drawer displays automatically. To open an existing component's configuration drawer, hover over the component on the canvas and click the (Settings) button from the component toolbar.
Setting | Description |
|---|---|
> (Open) / < (Close) | Click > to close the component's configuration drawer. Click < to open the component configuration drawer. Use this button to temporarily expand the canvas view area.
|
| The ellipsis menu contains the following settings:
|
Property ID | A Property ID is the unique field ID used by Unqork to track and link components in your module. The Property ID is how the software identifies your component. Using Property IDs lets you link components, creating logic-based configurations and API calls. Property IDs must use camel case (stylized as camelCase) without spaces or punctuation. |
Copy | After saving the module, clicking this button creates an HTML link and copies it to your local clipboard. Opening this link in a browser opens the Module Builder and the component's configuration window. |
Display | Select this tab to manage your component's display settings. Display settings control the visual elements end-users see in Express View. For example, The Button component's Label Text setting controls the text that displays inside a button in Express View. |
Data | Select this tab to manage your component's data settings. Data settings can control how a component's values are stored and what certain components can do. For example, the Dropdown component's Data Values table controls what options end-users see in a drop-down, and what value is entered when they select an option. |
Actions | Select this tab to manage your component's Actions settings. The Actions settings control what a component does when certain criteria are met. For example, the Button component's Event action type can trigger another component when clicking the button. |
Validation | Select this tab to manage your component's validation settings. Validation settings control what values are accepted in input components and if the input component field is required. For example, the Text Field Component setting makes it so end-users must enter a value in order to progress past the current page. |
Advanced | Select this tab to manage your component's advanced settings. The Advanced tab provides Creators with additional settings to further customize the component. |
Cancel | Click this button to undo any unsaved configuration changes and return to the Module Builder canvas. |
Save Component | Click this button to save all setting configuration changes and return to the Module Builder canvas. |
General component settings are configuration settings that are available across most Module Builder components. These settings typically help identify and group components, as well as control how the component is seen in Express View with RBAC. This article outlines the general settings you can use to configure your components.
For more information on component specific configuration settings, visit the Component Library landing page.
About the Configuration Window
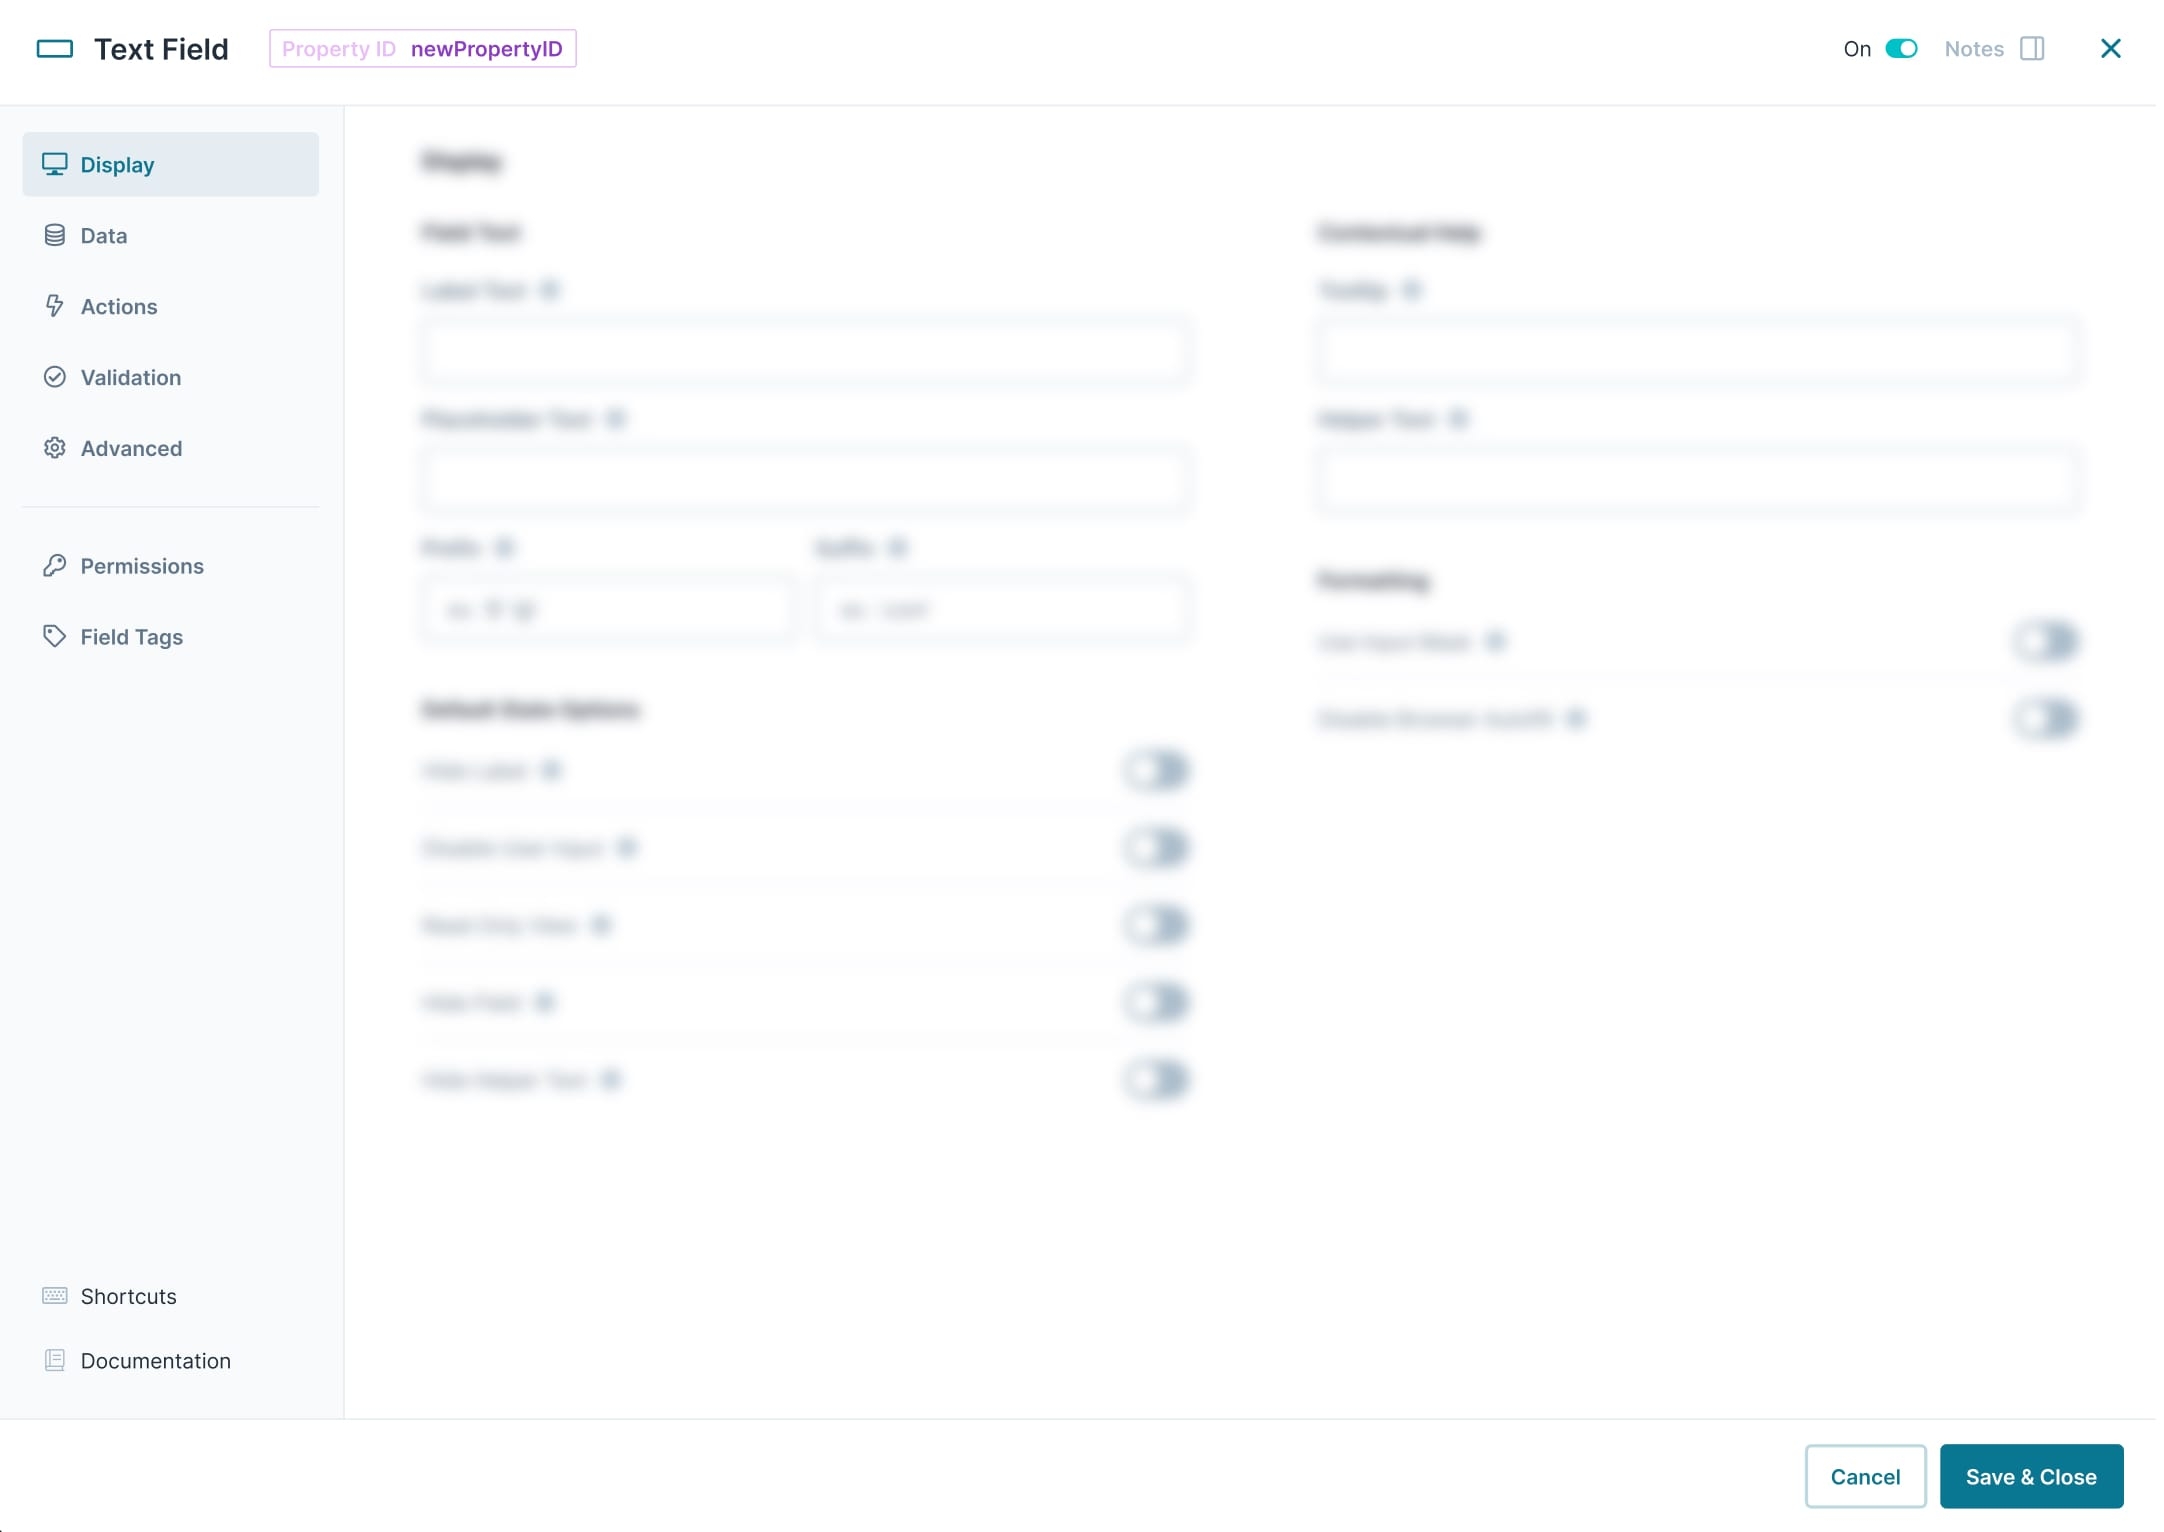
To access the general settings, you must first open the component configuration window. Once you add a component onto the Module Builder canvas, the configuration window displays automatically. You can also open the configuration window of an existing component in your Module Builder canvas by hovering over the component and clicking the .jpg) (Settings) button from the component toolbar.
(Settings) button from the component toolbar.
Setting | Description |
|---|---|
Property ID | A Property ID is the unique field ID used by Unqork to track and link components in your module. The Property ID is how the software identifies your component. Using Property IDs lets you link components, creating logic-based configurations and API calls. Property IDs must use camel case (stylized as camelCase) without spaces or punctuation. |
| The component is active and visible in Express View. While active, other components and processes can reference your component. Setting the toggle to By default, the Active toggle is set to |
Notes | Select this tab to display the component's Notes area. You can use notes to keep your teammates informed. The Notes editor offers a semi-WYSIWYG (What You See is What You Get) content editor. Built to look like a word processor, this editor lets you create, edit, and format your notes. Notes are saved when saving the component. |
| Select this tab to manage your component's display settings. |
| Select this tab to manage your component's data settings. |
| Select this tab to manage your component's actions settings. |
| Select this tab to manage your component's validation settings. |
| Select this tab to manage your component's advanced settings. |
| Select this tab to see the RBAC settings of the component. |
| Assign one-word labels to help organize, identify, and group the components in your application. Consider an example from the API Specification Snippet: Field Tags are applied to Hidden components in the panelRequest and panelResponse Panel components. The Field Tags identify the data type of parameters included in the API request and response. The API Docs Dashboard tool populates with information about each parameter’s data type, identified by the Field Tag. Field Tags act as a type of Property ID group and let you group components for configuration purposes. Field Tags let you target two or more components using a simple logic component. For example, add the Field Tag tagForDecision to multiple components in your module. Open the Inputs table of a Decisions component and reference the tagForDecision Field Tag as the input of the Decisions component. The output of the Decisions component then affects all components with the tagForDecision Field Tag. Save your Field Tags by pressing Enter (Return) or adding a comma after each entry. |
| Select this tab to open the list of supported keyboard shortcuts you can use in the component settings modal. Keyboard shortcuts include:
Additional keyboard shortcuts:
|
| Select this tab to access the component documentation in Unqork's In-Product Help. |
Cancel | Click this button to undo any unsaved configuration changes and return to the Module Builder canvas. |
Save & Close | Click this button to save all setting configuration changes and return to the Module Builder canvas. |
DATA MODEL
If your components are mapped to a Data Model, you can expect other settings and attributes to display at the top of the component's settings modal. When viewing the settings for a component associated with a Data Model, some fields are disabled because they are controlled by the schema associated with the Data Model.
Below are the available options for mapped components:
Setting | Description |
|---|---|
Component | Represents the component associated with the Data Model. If the Data Model property type associated with this component supports other component types, you can select a different component from the drop-down menu. The component settings will immediately display for that selected component. |
Field Name | The JSON Schema field associated with this component. |
Data Model | The Data Model associated with this component. |
Type | The data type of the Data Model field. |
Property ID | The component's Property ID. |

.png)


