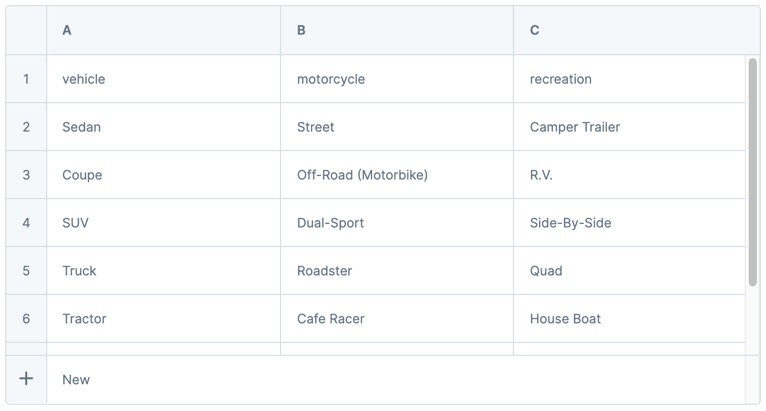
The Data Table component acts as a spreadsheet for referencing data, like an Unqork Data Collection. The Data Table component lets you manually enter or import submission data to store in columns and rows that are hidden from the end-user in Express View.
Depending on your needs, you might incorporate Data Table components with other components. Common components include the ViewGrid and Data Grid components, which display table data to the end-user as a dashboard. You can also execute formulas by combining the Data Table component with the Data Workflow or Calculator component. You can also create a binded table that uses the Data Table component's dynamic values to add or change data using a Data Workflow component.
For more information on binded tables, see our Input Operator Use Case: Binded Tables article.
You'll find the Data Table component in the Display & Event Processing group to the left of the Module Builder.
About the Configuration Window
To learn more about general component settings, view our General Component Settings article.
Data Table
The Data table stores data as an array. Each item in the list represents a row in the table. The table displays a collection of columns and rows. Row 1 in the Data Table defines the title header for each column. For example, if you have a column containing a list of vehicle types, then your first row header could be vehicles.
Right click on a cell to see the following options:
Setting | Description |
|---|---|
Insert Row Above | Adds a empty row above the selected cell. |
Insert Row Below | Adds an empty row below the selected cell. |
Remove Row | Removes the row containing the selected cell. You can select multiple rows to remove at the same time. |
Cut | Cuts the cell's data and stores it in your local machine's clipboard data. You can cut multiple cells or rows of data at the same time. |
Copy | Copies the cell's data and stores it in your local machine's clipboard data. You can copy multiple cells or rows of data at the same time. |
New Row | Adds a new row to the bottom of the Data Table. |
Display Settings
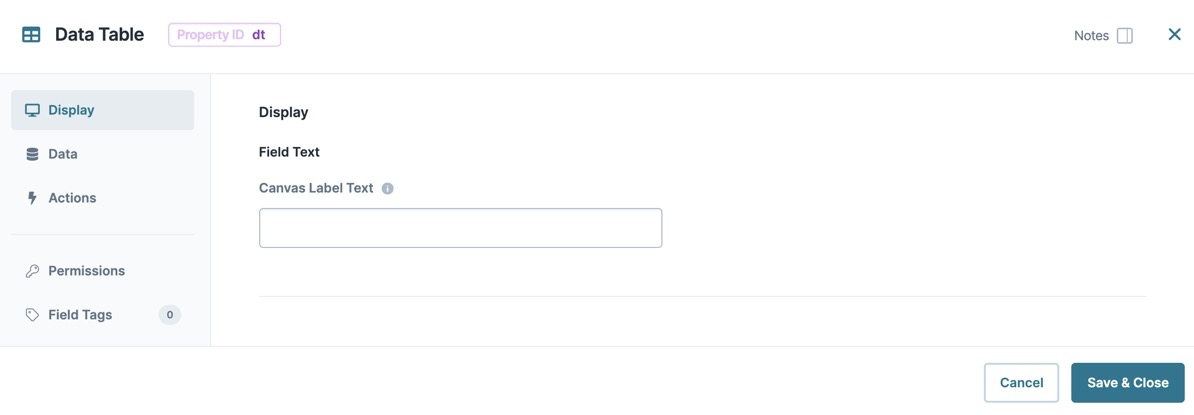
Field Text
Setting | Description |
|---|---|
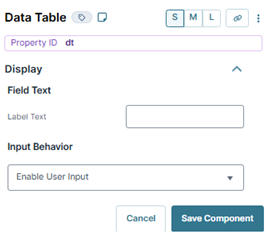
Label Text | A component’s Label Text indicates the purpose of the corresponding field or component. For non-input components, the Label Text isn't end-user facing, and only appears in the Module Builder. User-friendly labels make your module more accessible. Keep labels short and descriptive (a word or two) using title case. For longer entries, use sentence case. |
Input Behavior
Setting | Description |
|---|---|
Input Behavior | Controls how end-users interact with the component. Choose from the following options:
|
Data Settings
Data Storage
Setting | Description |
|---|---|
Store Data in Database | The Store Data in Database setting affects how data persists through your application. When set to
Set the toggle to
By default, Store Data in Database is set to |
Actions Settings
Set Execution
Setting | Description |
|---|---|
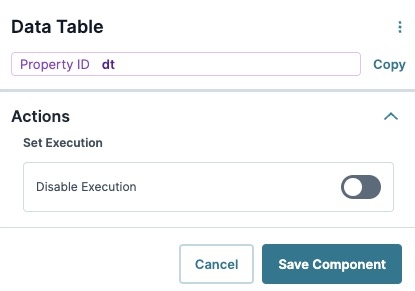
Disable Execution | The component is active in the Module Builder. While active, other components and processes can reference your component. Setting the toggle to By default, the Active toggle is set to |
Adding a Data Table Component
Configure a Multi-Select Dropdown component to reference a Data Table component. Then, set up the Multi-Select Dropdown component to ask your end-user which vehicles they own.
Configure the Data Table Component
This Data Table component supplies the vehicle labels and values for your end-user to select from a drop-down menu in Express View.
These instructions assume that you have an open module saved with a title.
In the Module Builder, drag and drop a
.png) Data Table component onto the canvas.
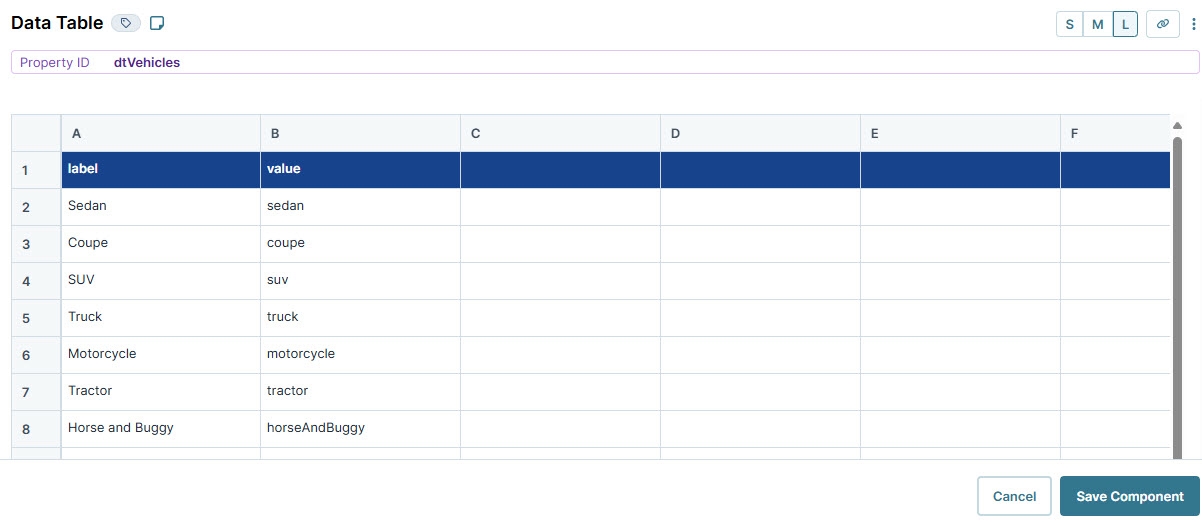
Data Table component onto the canvas.In the Property ID and Canvas Label Text fields, enter
dtVehicles.In the Data Table, enter the following:
A
B
1
label
value
2
Sedan
sedan
3
Coupe
coupe
4
SUV
suv
5
Truck
truck
6
Motorcycle
motorcycle
7
Tractor
tractor
8
Horse and Buggy
horseAndBuggy
As a best practice, enter column titles in lowercase, with no breaks or special characters.
Click Save Component.
Configure the Multi-Select Dropdown Component
Then, configure a Multi-Select Dropdown component to reference your Data Table component data so your end-user can select one or more options.
Drag and drop a
.png) Multi-Select Dropdown component onto your canvas, placing it below the dtVehicles
Multi-Select Dropdown component onto your canvas, placing it below the dtVehicles .png) Data Table component.
Data Table component.In the Property ID field, enter vehicles.
In the Label Text field, enter
Vehicles.Navigate to the component's Data settings.
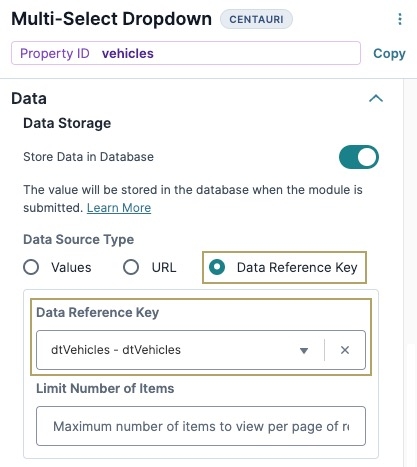
From the Data Source Type options, select Data Reference Key.
In the Data Reference Key field, enter
dtVehicles. This reference key refers to the Property ID of your dtVehicles.png) Data Table component.
Data Table component.Click Save Component.
Save your module.
Click Preview to explore the Multi-Select Dropdown component's functionality in Express View:
Structure of a Data Table Component's Data
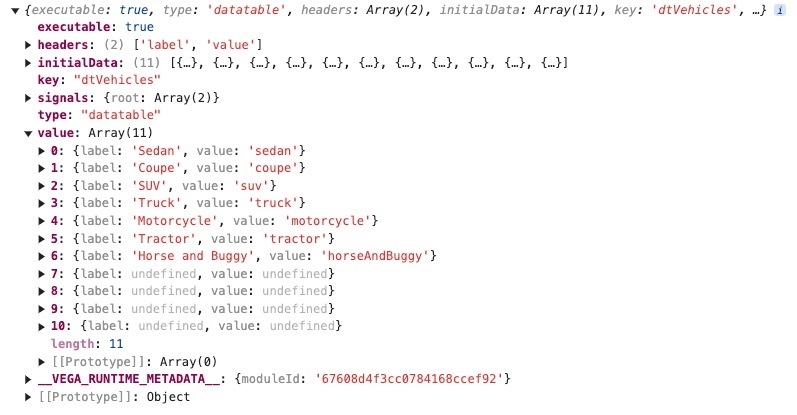
The Data Table component's data stores in submission data as an array of objects. In the example below, the dtVehicles .png) Data Table component displays the content of each Data Table row in an object. Opening an object in the array displays a set of key/value pairs, where the key is the header name (first row) of the column, and the value is the data stored in the row of the column.
Data Table component displays the content of each Data Table row in an object. Opening an object in the array displays a set of key/value pairs, where the key is the header name (first row) of the column, and the value is the data stored in the row of the column.
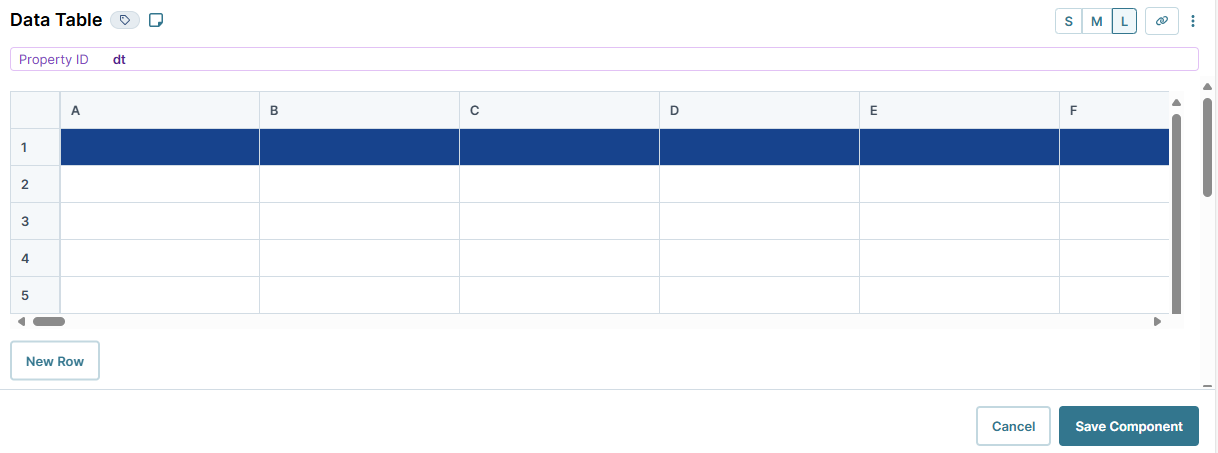
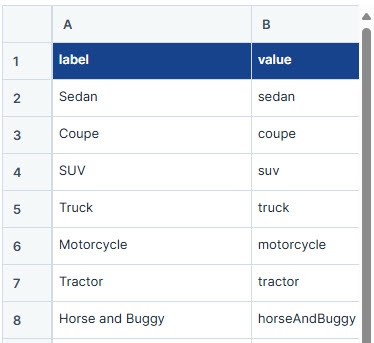
Here's how a Data Table looks in the component configuration view:
Here's how the same data table looks in the DevTools Console:
The Data Table component acts as a spreadsheet for referencing data, like an Unqork Data Collection. The Data Table component lets you manually enter or import submission data to store in columns and rows that are hidden from the end-user in Express View.
Depending on your needs, you might incorporate Data Table components with other components. Common components include the ViewGrid and Data Grid components, which display table data to the end-user as a dashboard. You can also execute formulas by combining the Data Table component with the Data Workflow or Calculator component. You can also create a binded table that uses the Data Table component's dynamic values to add or change data using a Data Workflow component.
For more information on binded tables, see our Input Operator Use Case: Binded Tables article.
You'll find the Data Table component in the Display & Event Processing group to the left of the Module Builder.
About the Configuration Window
To learn more about general component settings, view our General Component Settings article.
Display Panel
Field Text
Setting | Description |
|---|---|
Canvas Label Text | A component’s Label Text indicates the purpose of the corresponding field or component. For non-input components, the Label Text isn't end-user facing, and only appears in the Module Builder. User-friendly labels make your module more accessible. Keep labels short and descriptive (a word or two) using title case. For longer entries, use sentence case. |
Data Panel
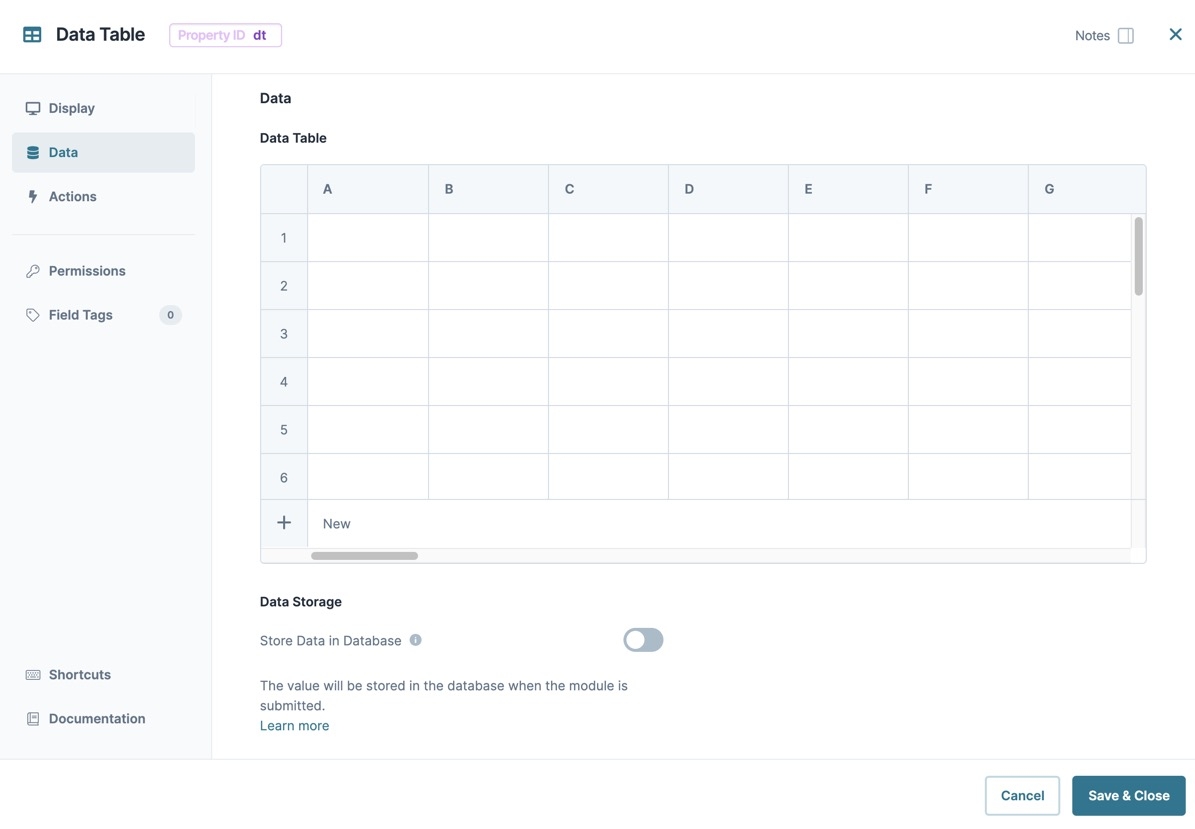
Data Table
The data table stores data as an array. Each item in the list represents a row in the table. The table displays a collection of columns and rows. Row 1 in the Data Table component defines the title header for each column. For example, if you have a column containing a list of vehicle types, then your first row header could be vehicles.
After saving the Data Table component, empty columns and rows are removed from the table.
Settings in the Data Table include:
Setting | Description |
|---|---|
|
For existing Data Tables, hovering over the rightmost column displays the ··· (column options) button. Clicking the button displays the following options:
|
+ New | Adds a new row to the bottom of the Data Table. |
Data Storage
Setting | Description |
|---|---|
Store Data in Database | The Store Data in Database setting affects how data persists through your application. When set to
Set the toggle to
By default, Store Data in Database is set to |
Actions Panel
Set Execution
Setting | Description |
|---|---|
Disable Execution | The component is active in the Module Builder. While active, other components and processes can reference your component. Setting the toggle to By default, the Active toggle is set to |
Adding a Data Table Component
Let's configure a Multi-Select Dropdown component to reference a Data Table component. Set up the Multi-Select Dropdown component to ask your end-user which vehicles they own.
Configure the Data Table Component
This Data Table component supplies the vehicle labels and values for your end-user to select from a drop-down menu in Express View.
These instructions assume that you have an open module saved with a title.
In the Module Builder, drag and drop a
.png) Data Table component onto your canvas.
Data Table component onto your canvas.In the Property ID and Canvas Label Text fields, enter
dtVehicles.In the data table, enter the following:
A
B
1
label
value
2
Sedan
sedan
3
Coupe
coupe
4
SUV
suv
5
Truck
truck
6
Motorcycle
motorcycle
7
Tractor
tractor
8
Horse and Buggy
horseAndBuggy
As a best practice, enter column titles in lowercase, with no breaks or special characters.
Click Save & Close.
Configure the Multi-Select Dropdown Component
Then, configure a Multi-Select Dropdown component to reference your Data Table component data so your end-user can select one or more options.
Drag and drop a
.png) Multi-Select Dropdown component onto your canvas, placing it below the dtVehicles
Multi-Select Dropdown component onto your canvas, placing it below the dtVehicles .png) Data Table component.
Data Table component.In the Property ID field, enter vehicles.
In the Label Text field, enter
Vehicles.From the Data Source Type options, select Data Reference Key.
In the Data Reference Key field, enter
dtVehicles. This refers to the Property ID of your dtVehicles.png) Data Table component.
Data Table component.Click Save & Close.
Save your module.
Click Preview to explore the Multi-Select Dropdown component's functionality in Express View:
Structure of a Data Table Component's Data
The Data Table component's data stores in submission data as an array of objects. In the example below, the dtVehicle .png) Data Table component displays the content of each Data Table row in an object. Opening an object in the array displays a set of key /value pairs, where the key is the header name (first row) of the column, and the value is the data stored in the row of the column.
Data Table component displays the content of each Data Table row in an object. Opening an object in the array displays a set of key /value pairs, where the key is the header name (first row) of the column, and the value is the data stored in the row of the column.
Here's how a Data Table looks in the component configuration view:
Here's how the same data table looks in the DevTools Console:


.jpg)
.png)
