Create Value Operator
Overview
To pass a value to another component, add a Create Value operator to your Data Workflow. You can use this operator to create the following:
-
Strings
-
Booleans
-
Numbers
Most often, you use this operator in tandem with a logic component. For example, to create a value of GO to trigger a Plug-In or Calculator component.
The Create Value operator always serves as the start of your Data Workflow, so it has no need for an input port. Like the Create Table operator, this operator has an argument port. You can use an argument with your Create Value operator to determine the value it creates. You connect another operator to the Create Value operator's argument port. Then, you enter _arg in the Expression/Value field of the operator's Info window to reference that value.
You can find the Create Value operator under the I/O group to the left of your canvas.
What You'll Learn
In this article, you'll learn:
About the Info Window
Here's what a Create Value operator looks like, along with its Info window:
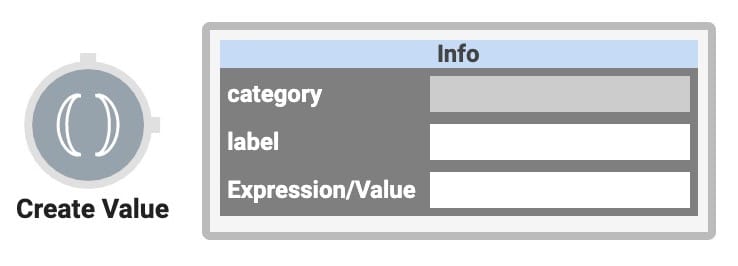
And here's a breakdown of each setting in the Info window:
|
Setting |
Description |
|---|---|
|
Label |
Sets the label for your operator. The label you enter here shows beneath your operator on your Data Workflow canvas. This field is optional, but set a label if you use more than one of the same operator type. A label helps you identify your operators without opening any Info windows. |
|
Expression/Value |
Sets the value to create and pass to another operator. You can create a number, a string, or a boolean value. To create a number, enter the number here. To create a string, enter the string here surrounded by single quotes. To create a boolean, enter either TRUE or FALSE. |
Adding a Create Value Operator
To demonstrate a Create Value operator, you'll create a simple value of 2.
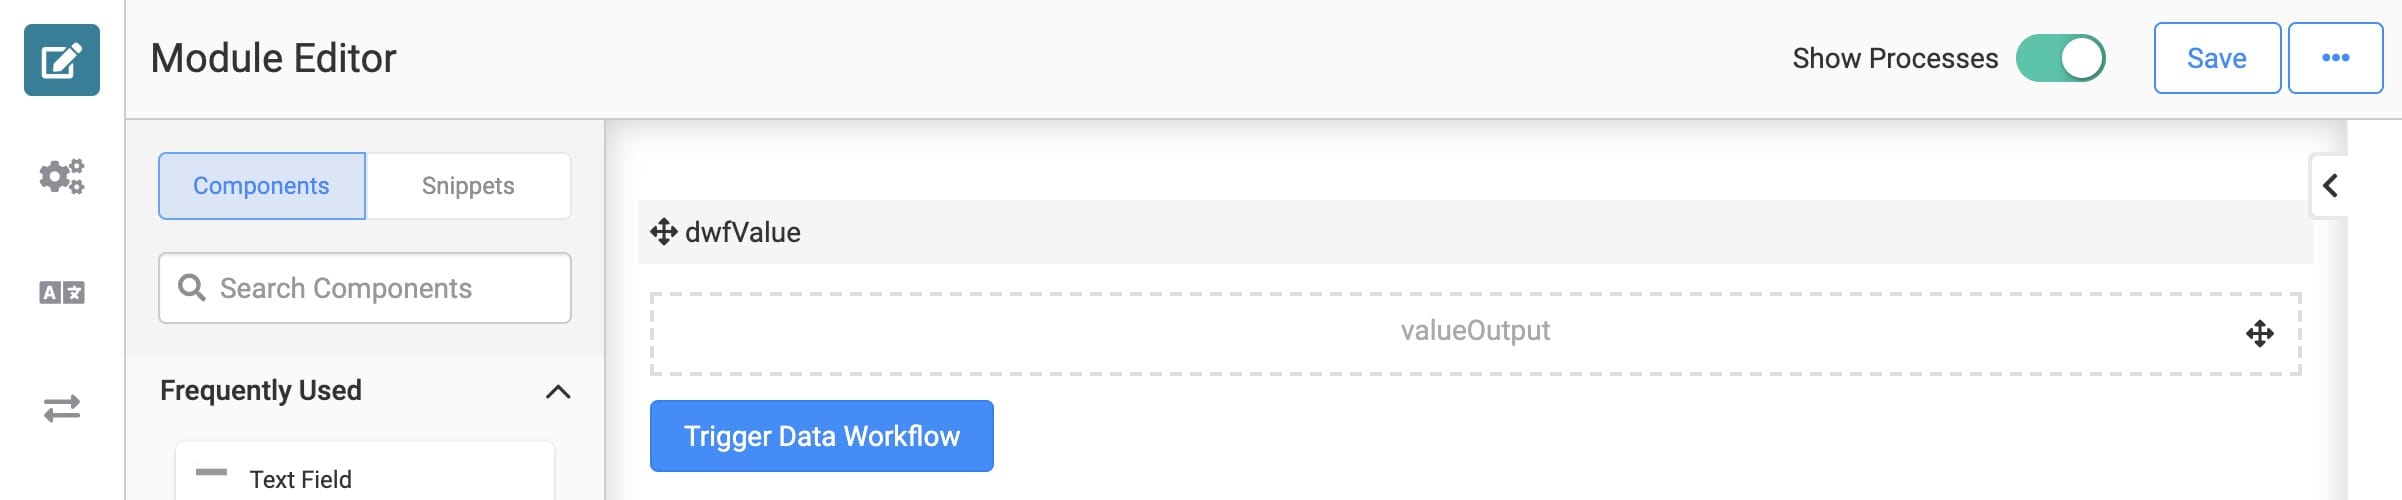
Here's how the completed use case looks in the Module Builder:
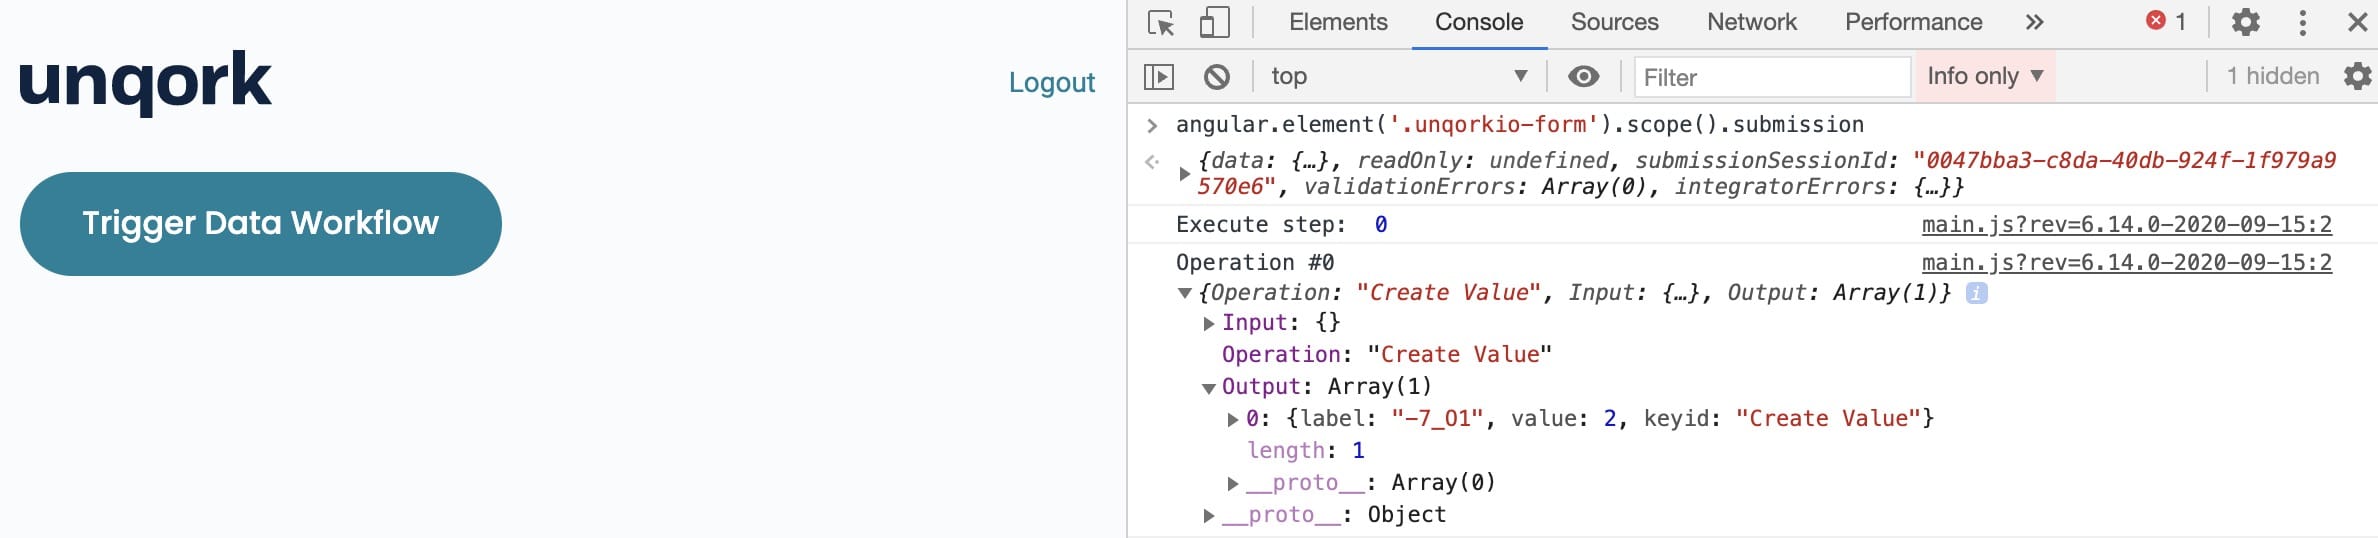
Here's how the completed use case works in Express View, including a peek at the DevTools Console:
What You Need
To set up this use case, you need:
-
1 Hidden component
-
1 Button component
-
1 Data Workflow component
To set up your Data Workflow, you need:
-
1 Create Value operator
-
1 Output operator
Configure the Hidden Component
Before you can add your Data Workflow, you need a place to store its output. For that, you use a Hidden component.
| 1. | Drag and drop a Hidden component onto your canvas. |
| 2. | Enter valueOutput in the Property ID and Label Text fields. |
| 3. | Click Save. |
Configure the Data Workflow Component
Next, you set up the Data Workflow itself.
| 1. | Drag and drop a Data Workflow component onto your canvas. Place your Data Workflow component above your Hidden component. |
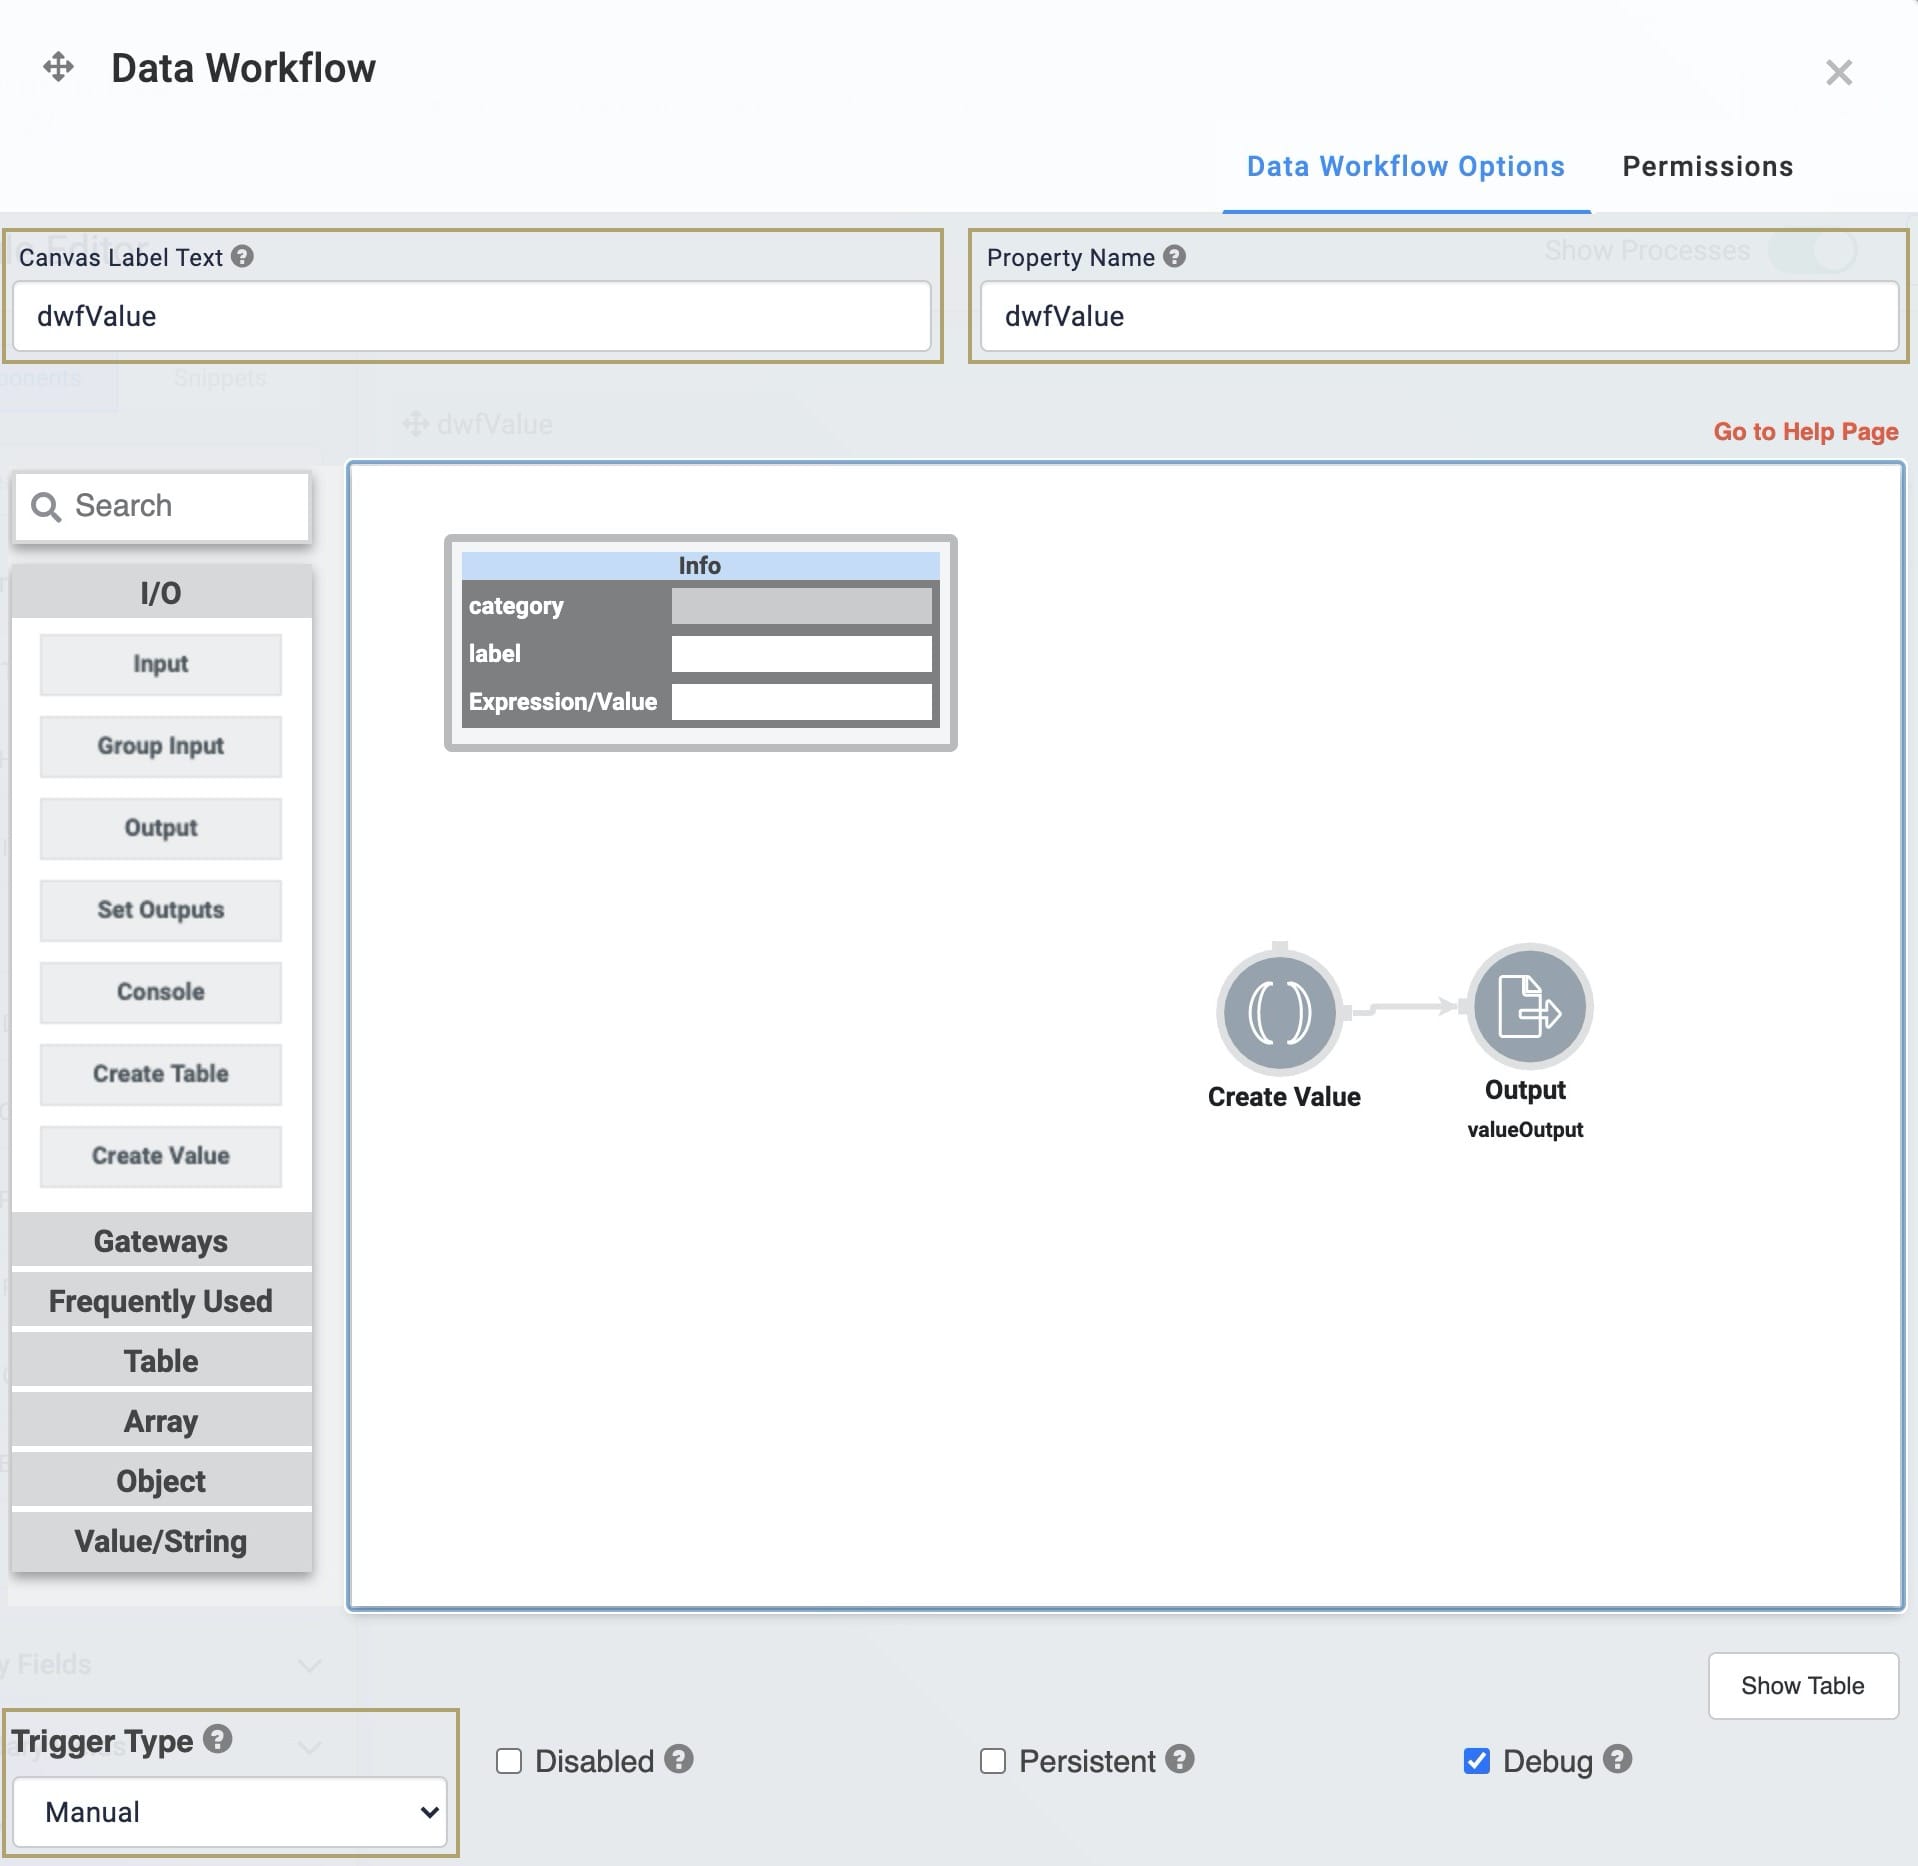
| 2. | Enter dwfValue in the Label and Property Name fields. |
| 3. | Select Manual from the Trigger Type drop-down. |
Configure the Create Value Operator
| 1. | Drag and drop a Create Value operator onto your Data Workflow canvas. |
| 2. | Configure the Create Value operator's Info window as follows: |
|
Setting |
Value |
|---|---|
|
Category |
Create Value |
|
Label |
|
|
Expression/Value |
2 |
Configure the Output Data Operator
| 1. | Drag and drop an Output operator onto your Data Workflow canvas. |
| 2. | Configure the Output operator's Info window as follows: |
|
Setting |
Value |
|---|---|
|
Category |
Output |
|
Component |
valueOutput |
|
Action |
Value |
| 3. | Connect the output port (right) of the Create Value operator to the input port (left) of the Output operator. |
| 4. | Click Save. |
Configure the Button Component
Finally, to trigger the Data Workflow, add a Button component.
| 1. | Drag and drop a Button component onto your canvas. Place your Button component above your Data Workflow component. |
| 2. | Enter btnTrigger in the Property ID field. |
| 3. | Enter Trigger Data Workflow in the Label Text field. |
| 4. | Enter dwfValue in the Trigger on Click field. |
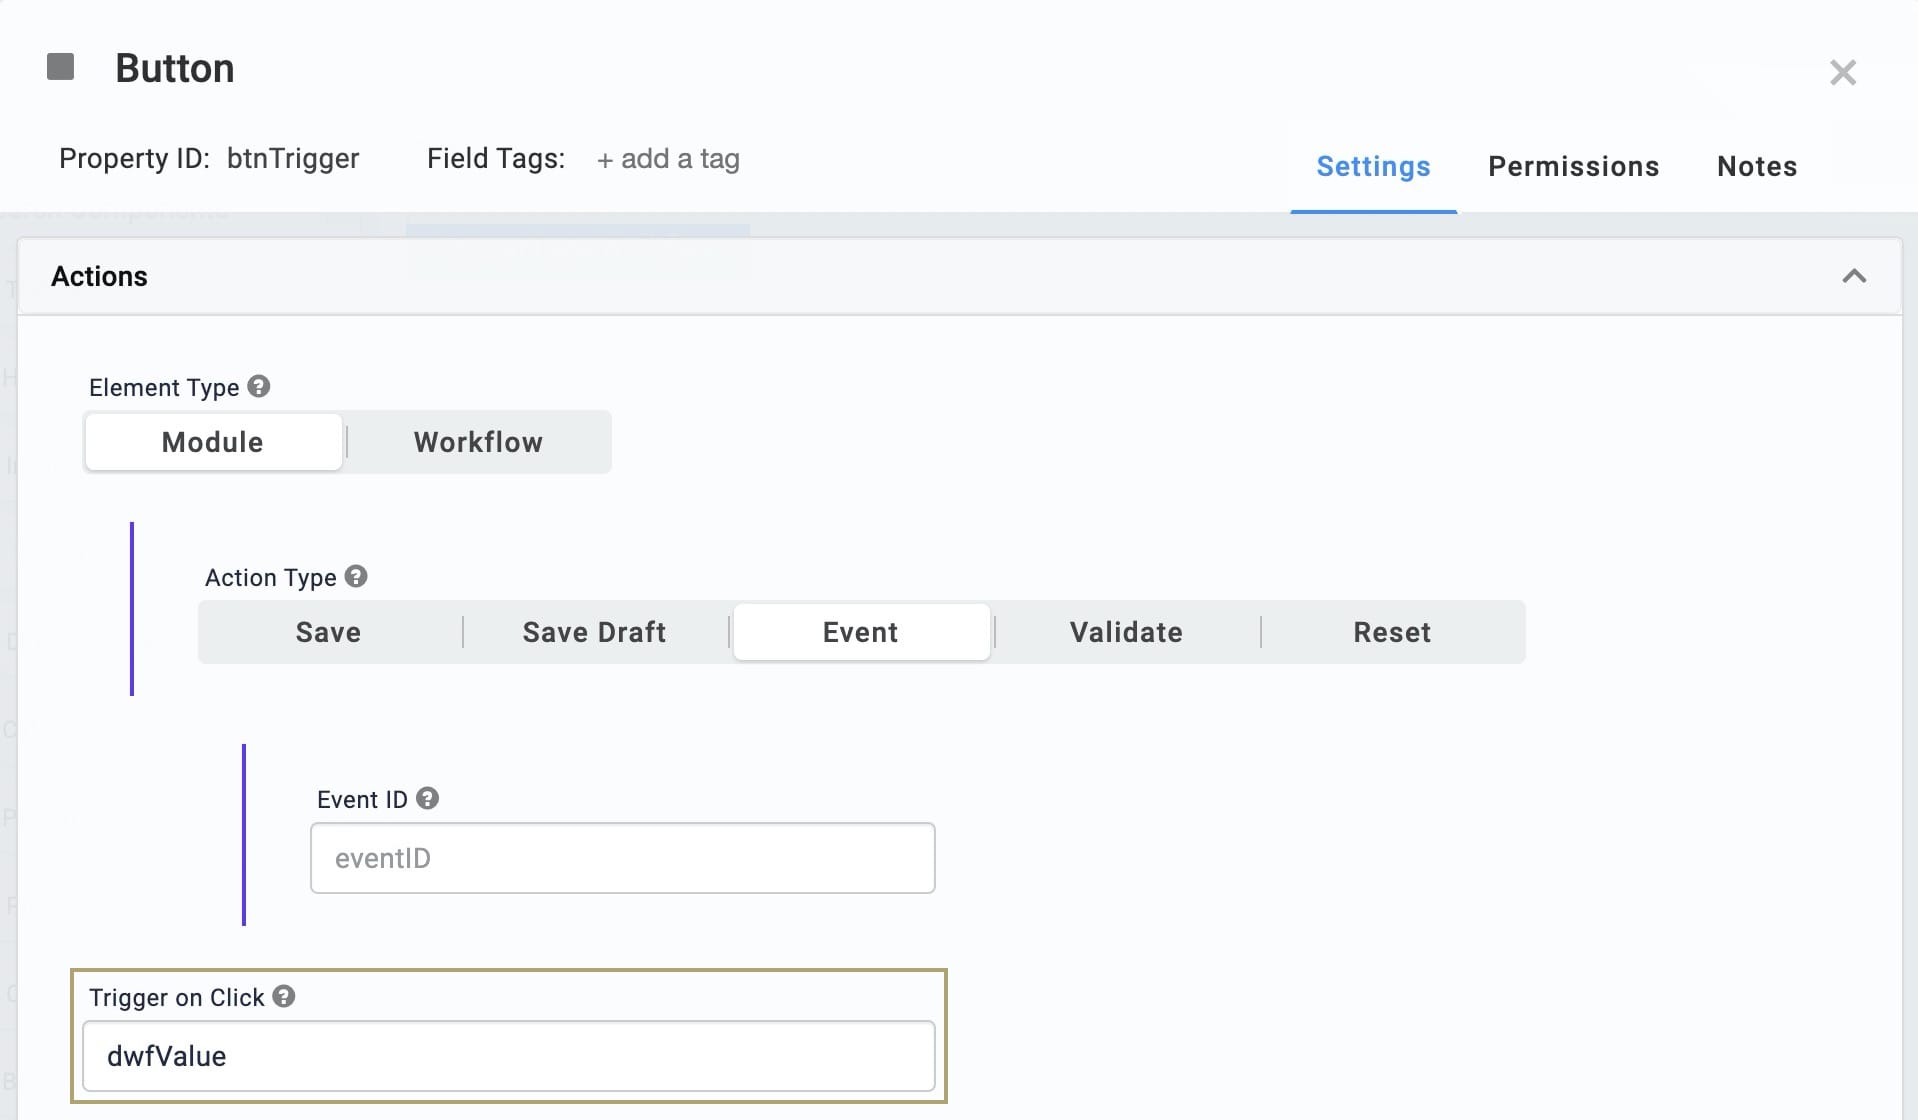
| 5. | Click Save. |
| 6. | Save your module. |
Now you can test out your Data Workflow. When you click your button, the Data Workflow triggers. The Data Workflow then creates a value of 2 and puts it in your Hidden component.
Changing a Create Value Operator's Settings
You can revisit and make changes to this operator.
| 1. | Click the Data Workflow component. |
A 5-button toolbar displays above the component on hover-over.
| 2. | Click the  (Settings) button to open the Data Workflow canvas. (Settings) button to open the Data Workflow canvas. |
| 3. | Click the operator to open its Info Window. |
| 4. | Make changes to the operator's settings as needed. |
| 5. | Click Save. |
| 6. | Save your module. |
Copying a Create Value Operator
You can make a copy of your operator using familiar keyboard settings. You can copy and paste an exact copy of your operator, matching all settings.
| 1. | Hover over the Data Workflow component. |
A 5-button toolbar displays above the component on hover-over.
| 2. | Click the (Settings) button to open the Data Workflow canvas. |
| 3. | Click the operator you want to duplicate. |
| 4. | On your keyboard, press Command + C (Mac OS) or Ctrl + C (Windows/Linux) to copy the operator. |
TIP You can copy more than one operator at a time. Hold Command or Ctrl on your keyboard and click all the operators you want to copy. Follow the rest of the steps as usual.
| 5. | On your keyboard, press Command + V (Mac OS) or Ctrl + V (Windows/Linux) to paste the copied operator(s) to the Data Workflow canvas. |
| 6. | Click Save. |
| 7. | Save your module. |
TIP Did you know you can copy an operator and paste it into a different Data Workflow? You'll use the same steps outlined above.
Removing a Create Value Operator
Lastly, you can delete this operator from your Data Workflow canvas. You can also use these same steps to delete a connection between two operators.
| 1. | Hover over the Data Workflow component. |
A 5-button toolbar displays above the component on hover-over.
| 2. | Click the (Settings) button to open the Data Workflow canvas. |
| 3. | Click the operator you want to delete. |
| 4. | On your keyboard, press Delete. |
NOTE Once you delete this operator, make sure to connect your remaining operators. If your Data Workflow path doesn't end with an Output or Console operator, your Data Workflow won't work. So, once you delete an operator, make sure to update any remaining paths to end at an Output or Console operator.
| 5. | Click Save. |
| 6. | Save your module. |
Lab
You can view this complete use case here: https://training.unqork.io/#/form/5f4d3bf0972685021f686556/edit.
